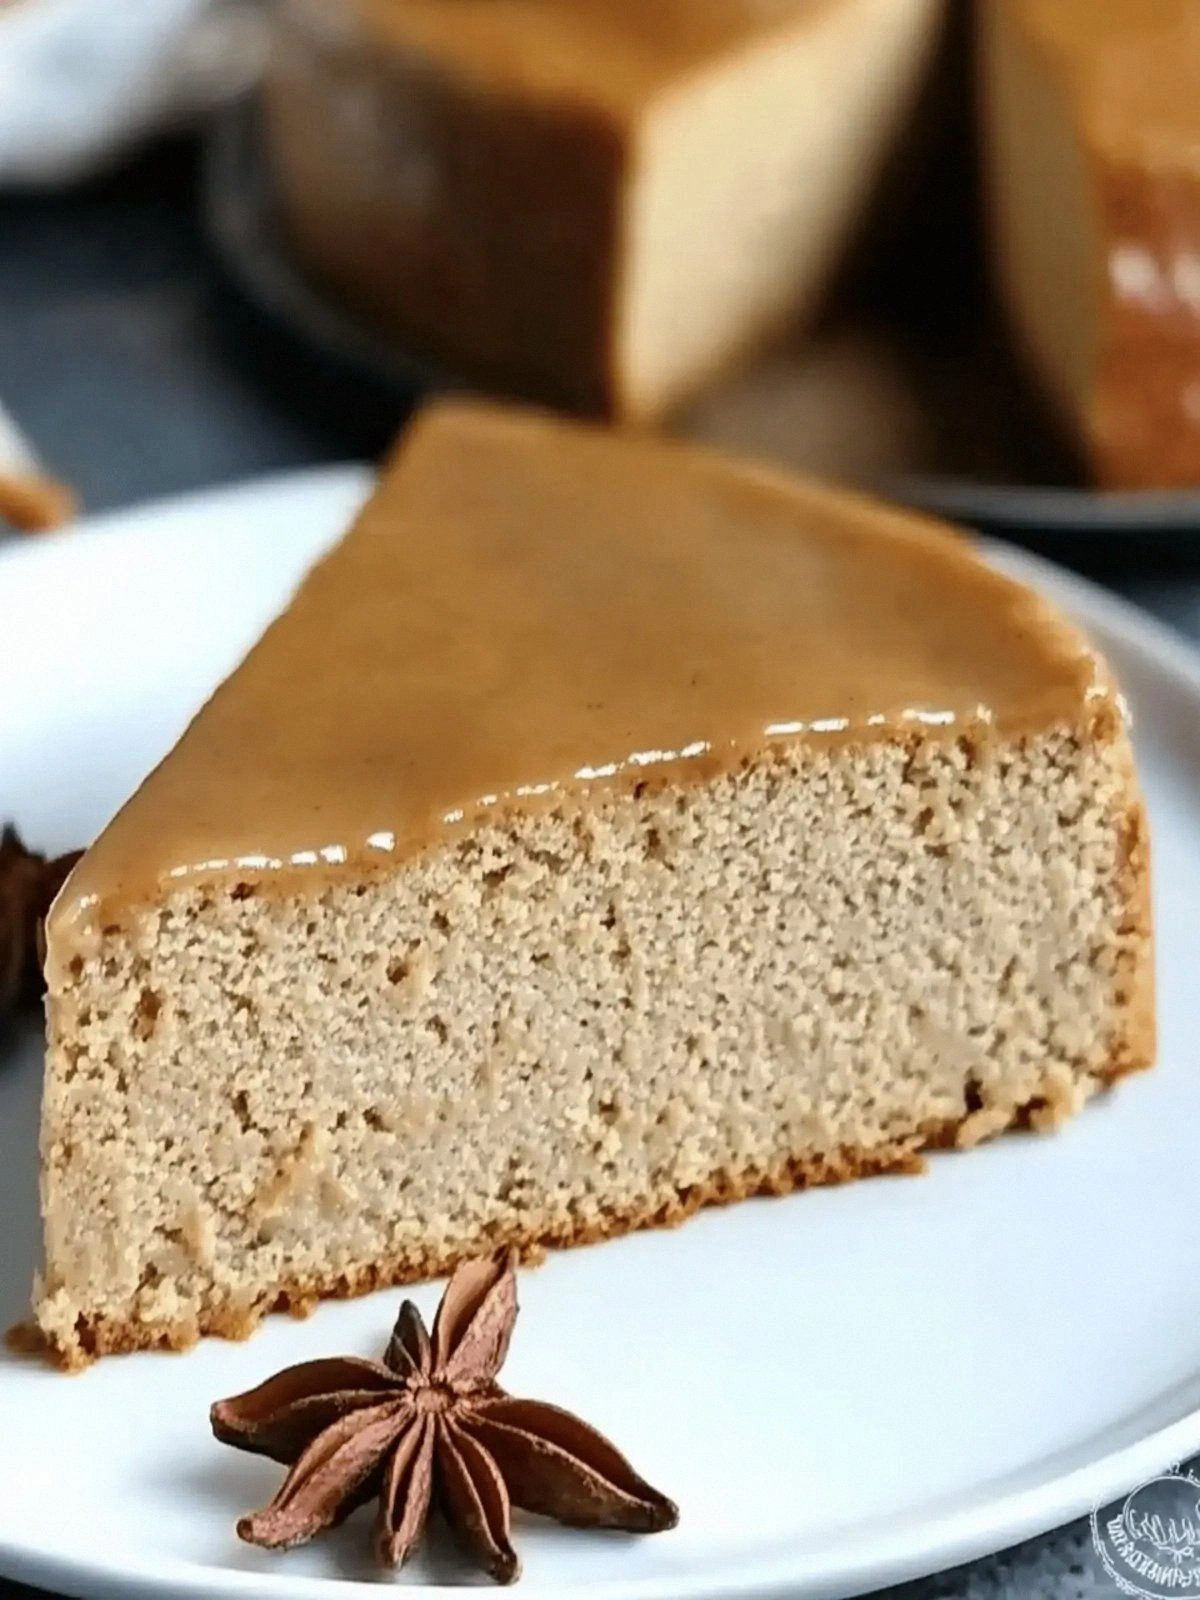
I was halfway through a disastrous pumpkin pie—my oven had overheated, the crust had turned a burnt charcoal, and I was staring at a sad, soggy mess that could have been a science experiment gone wrong. That night, I swore I would never again be caught in the clutches of a failed pumpkin dessert. I started dreaming of a sweet, creamy, fall‑infused treat that would have the crowd begging for more. The next morning, I found myself in the kitchen, determined to create something that would turn that disaster into a triumph.
Imagine the warm, buttery scent of graham crackers mingling with the sweet, earthy aroma of pumpkin puree, all under a gentle haze of cinnamon and nutmeg. The kitchen fills with the comforting crackle of the butter melting into the crumbs, a sound that promises indulgence. As the mixture simmers, the air thickens with the promise of velvety cheesecake that will coat your tongue like velvet. You can almost taste the subtle tang of cream cheese balanced by the mellow sweetness of pumpkin. The texture feels like a silky cloud that will melt in your mouth.
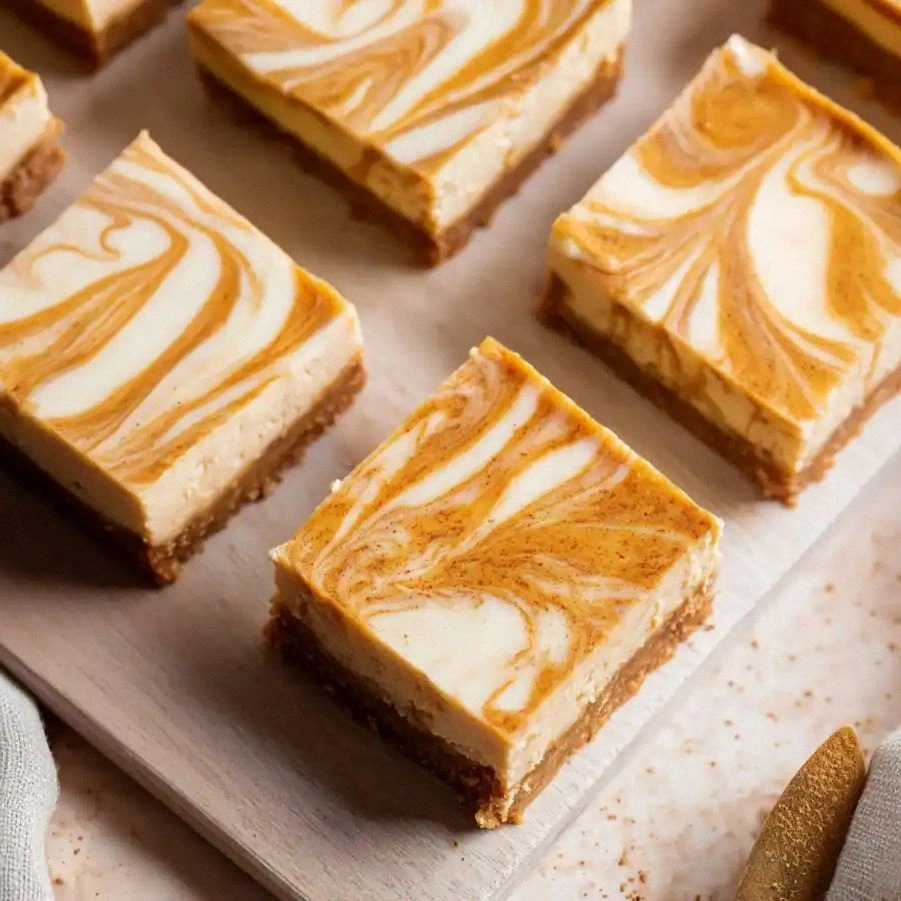
What sets this version apart isn’t just the ingredients—it’s the way each element is orchestrated to create a symphony of flavors and textures. The graham cracker base isn’t just a crust; it’s a buttery, caramelized foundation that gives the bars a satisfying crunch. The cream cheese is at room temperature, allowing it to blend seamlessly with the pumpkin, creating a custard-like consistency that’s both light and rich. The pumpkin puree adds a natural sweetness and a hint of earthiness that elevates the entire dish. The spices are carefully measured to give you that authentic fall flavor without overpowering the subtle sweetness.
And here’s the kicker: I’ve discovered a trick that turns the baking process into a game of precision. By adding a tablespoon of flour, you create a binding agent that keeps the bars from crumbling while maintaining their creamy interior. Most recipes skip this step, resulting in bars that fall apart in your hands. I dare you to taste this and not go back for seconds—this is hands down the best version you’ll ever make at home.
Picture yourself pulling these bars out of the oven, the whole kitchen smelling incredible, the golden edges shimmering like tiny suns. The moment you cut into one, a cloud of warm, fragrant steam rises, and the first bite feels like a hug in a bite. The creamy interior meets the crunchy base, and the spices dance across your palate. That sizzle when it hits the pan? Absolute perfection. Okay, ready for the game‑changer? Let me walk you through every single step — by the end, you’ll wonder how you ever made it any other way.
What Makes This Version Stand Out
- Flavor: The blend of pumpkin puree, cream cheese, and a precise balance of spices delivers a depth of taste that feels both familiar and fresh. The result is a dessert that’s sweet yet subtly savory, reminiscent of a warm hearth.
- Texture: The addition of a tablespoon of flour creates a custard‑like consistency that holds together, while the graham cracker base adds a satisfying crunch that contrasts with the silky filling.
- Simplicity: With only ten core ingredients, this recipe is approachable for both novice bakers and seasoned chefs, yet it delivers a gourmet experience.
- Uniqueness: The use of a graham cracker crust, combined with the creamy pumpkin filling, sets this recipe apart from traditional pumpkin pies or cheesecakes.
- Crowd Reaction: Friends and family consistently ask for seconds—sometimes thirds—because the bars are both comforting and indulgent.
- Ingredient Quality: Using high‑quality cream cheese and fresh pumpkin puree ensures a smooth, rich flavor that’s hard to replicate with lower‑grade products.
- Methodology: The step‑by‑step process, including the crucial flour addition, guarantees consistent results every time.
- Make‑Ahead Potential: These bars can be prepared in advance and stored, making them an excellent option for holiday parties or busy weeknights.
Alright, let's break down exactly what goes into this masterpiece...
Inside the Ingredient List
The Flavor Base
Graham cracker crumbs form the heart of the crust, providing a buttery, slightly sweet foundation. The ¼ cup of granulated sugar lifts the flavor profile, preventing the base from feeling too heavy. Unsalted butter, measured at ½ cup, melts into the crumbs, creating a cohesive, caramelized texture that holds the bars together.
Cream cheese is the star of the show, and it’s crucial to let it reach room temperature before mixing. This ensures a smooth, lump‑free filling that coats your tongue like a silky cloud. The 24 oz of cream cheese gives you a generous amount of richness without tipping the balance toward too much fat.
Granulated sugar (¾ cup) sweetens the filling and helps stabilize the custard. It’s the sweet counterpoint to the pumpkin’s earthy notes. The sugar’s granules dissolve into the mixture, creating a glossy sheen that’s both inviting and mouth‑watering.
The Texture Crew
Eggs bind the mixture together, adding structure while keeping the bars tender. The three large eggs provide the necessary protein for a firm yet airy crumb. The eggs’ yolks also contribute to the creamy consistency, giving the bars a luxurious mouthfeel.
All-purpose flour, just a tablespoon, acts as a binder that keeps the bars from crumbling. It’s a subtle addition that you might overlook, but it’s essential for a stable structure. The flour’s fine texture ensures it integrates seamlessly without altering the flavor profile.
The Unexpected Star
Pumpkin puree is the unexpected star that brings natural sweetness and a velvety texture to the filling. A cup of high‑quality pumpkin puree, preferably canned for convenience, adds depth and a subtle earthy aroma that complements the spices. The puree’s natural sugars also help achieve a golden, caramelized top.
Vanilla extract is the secret whisper of sweetness that balances the pumpkin’s earthiness. One teaspoon is enough to elevate the entire flavor profile, adding a warm, floral note that lingers on the palate.
The Final Flourish
Pumpkin pie spice, a blend of cinnamon, nutmeg, ginger, and cloves, is the final flourish that turns the bars into a true fall treat. A tablespoon of this spice mixture infuses the bars with a comforting aroma that’s instantly nostalgic. The spices also add subtle warmth that pairs beautifully with the creamy filling.
Whipped cream, caramel sauce, chopped pecans, and ground cinnamon or nutmeg are optional toppings that elevate the bars into a multi‑sensory experience. Each topping adds a layer of flavor and texture—whipped cream brings a lightness, caramel sauce adds sweetness, pecans add crunch, and cinnamon or nutmeg adds aromatic heat.
Everything's prepped? Good. Let's get into the real action...
The Method — Step by Step
- Preheat the oven to 325°F (165°C). While the oven warms, line a 9×13-inch baking pan with parchment paper, leaving a few inches overhanging on the sides for easy removal. This step ensures a clean release and a beautiful presentation. The gentle heat will coax the flavors to bloom without scorching the edges. Set a timer for 30 minutes, but keep an eye on the bars as they bake.
- Prepare the crust. In a medium bowl, combine the graham cracker crumbs, ¼ cup sugar, and melted butter. Stir until the crumbs are evenly coated and the mixture resembles wet sand. Press the mixture firmly into the bottom of the prepared pan, using the back of a spoon to create an even layer. The crust should be compact and slightly golden after baking. This base will hold the creamy filling in place.
- Blend the filling. In a blender or using an electric mixer, combine the cream cheese, ¾ cup sugar, eggs, pumpkin puree, vanilla extract, pumpkin pie spice, and all-purpose flour. Blend on medium speed until smooth and silky, ensuring there are no lumps. The mixture should have a glossy sheen that hints at its richness. The flour will bind the filling, preventing cracks. Once blended, pour the filling over the crust.
- Smooth the top. Use a spatula to level the filling, ensuring a uniform surface. This step helps the bars bake evenly and creates a clean edge when sliced. A smooth top also allows the caramel sauce to drizzle evenly later. Gently tap the pan on the counter to release any air pockets. The filling should look glossy and slightly translucent.
- Watch for the edges. The edges of the bars will begin to pull away from the pan as they bake. This is a cue that the bars are nearing completion. The center will remain slightly jiggly, indicating that it’s still moist. When the edges are golden brown, the bars are ready for removal. This visual cue ensures a perfect finish.
- Cool the bars. Remove the pan from the oven and place it on a wire rack. Let the bars cool completely at room temperature before slicing. Cooling allows the filling to set, making clean cuts. This step also helps the flavors meld together. While cooling, you can start prepping the toppings.
- Prepare the toppings. Whipped cream, caramel sauce, chopped pecans, and a dusting of cinnamon or nutmeg are ready to be added. Whipped cream should be light and airy, caramel sauce should be warm and pourable, pecans should be toasted for extra crunch, and the spices should be fragrant. These toppings transform the bars from simple to spectacular.
- Assemble. Once the bars are cooled, cut them into squares. Arrange them on a serving platter. Top each square with a dollop of whipped cream, a drizzle of caramel sauce, a sprinkle of toasted pecans, and a dusting of cinnamon or nutmeg. The combination of textures—soft, creamy, crunchy, and aromatic—creates a multi‑sensory experience that will leave your guests begging for more.
- Serve. Present the bars immediately for the best texture. If you’re storing them, cover tightly and refrigerate. When ready to serve again, let them come to room temperature for 10 minutes before topping. The bars are best enjoyed warm or at a slight chill, depending on your preference. The aroma will fill your kitchen and invite everyone to taste.
- Enjoy. The final step is the most important—enjoy the fruits of your labor. Share the bars with friends and family, and watch them devour each bite. The creamy filling, buttery crust, and aromatic spices will create a memorable dessert experience.
That's it — you did it. But hold on, I've got a few more tricks that'll take this to another level...
Insider Tricks for Flawless Results
The Temperature Rule Nobody Follows
Many bakers believe that a higher oven temperature will give a quicker bake, but with these bars, consistency is key. Keep the oven at 325°F (165°C) and avoid preheating to a higher temperature, which can cause the edges to burn before the center sets. Use a reliable oven thermometer to ensure accurate heat. This simple trick prevents uneven baking and ensures a perfect crumb.
Why Your Nose Knows Best
If the bars are baking, your nose will detect a warm, caramelized aroma that signals the right moment to check them. The scent of toasted graham crackers and pumpkin will fill the kitchen, making it hard to resist. Trust your nose as an additional cue, especially if you’re unsure about the timer. The aroma is a reliable indicator that the bars are ready to be removed.
The 5-Minute Rest That Changes Everything
After removing the bars from the oven, let them rest for at least five minutes before cutting. This brief pause allows the filling to set, preventing the bars from tearing apart. The rest also helps the flavors meld together, giving the bars a richer taste. Skipping this step can result in a crumbly, uneven texture.
Use a Silicone Mat for Easy Release
A silicone baking mat ensures that the bars lift cleanly from the pan, preserving their shape. It also reduces the chance of sticking, which can ruin the presentation. If you don’t have a silicone mat, parchment paper works well, but make sure it’s firmly pressed into the pan. This hack saves you from a frustrating cleanup session.
Keep the Crust Slightly Crumbly
While the crust should be firm, a slightly crumbly texture adds a delightful contrast to the creamy filling. Achieve this by not over‑pressing the crumbs into the pan. A light press creates a crisp base that’s easier to cut and enhances the overall mouthfeel.
Don’t Skimp on the Spices
The pumpkin pie spice is the soul of this dessert. Don’t be tempted to reduce it for a milder flavor; the spices provide depth and warmth. If you’re a spice lover, consider adding a pinch of cayenne for a subtle kick. The balance of sweetness and warmth is what makes these bars unforgettable.
Creative Twists and Variations
This recipe is a playground. Here are some of my favorite ways to switch things up:
Chocolate Pumpkin Cheesecake Bars
Swapping a portion of the graham cracker crumbs for cocoa powder gives a chocolatey twist. Add a tablespoon of unsweetened cocoa to the crust mixture and keep the rest of the recipe unchanged. The result is a rich, chocolate‑pumpkin harmony that’s perfect for chocolate lovers.
Almond Joy Bars
Replace the graham cracker crumbs with crushed almonds for a nutty base. Add shredded coconut to the filling for texture. Top with a drizzle of chocolate ganache and toasted coconut flakes for an extra indulgent finish.
Vegan Pumpkin Cheesecake Bars
Use a dairy‑free cream cheese alternative and coconut milk instead of eggs. Replace the butter with melted coconut oil. The texture will be slightly denser but still creamy and flavorful.
Berry Burst Bars
Fold in a cup of fresh blueberries or raspberries into the filling before baking. The berries add a burst of tartness that balances the sweetness. A drizzle of berry compote on top adds a glossy finish.
Spiced Latte Bars
Add a tablespoon of instant espresso powder to the filling for a coffee kick. Top with a dusting of cocoa powder and a swirl of caramel sauce. These bars pair wonderfully with a steaming cup of latte.
Maple Walnut Bars
Replace the pumpkin puree with a cup of maple syrup for a sweet, earthy base. Toss toasted walnuts into the crust mixture. Finish with a drizzle of maple glaze and a sprinkle of sea salt.
Storing and Bringing It Back to Life
Fridge Storage
Store the bars in an airtight container in the refrigerator for up to five days. Keep them covered with parchment paper to prevent moisture from seeping in. When ready to serve, let them sit at room temperature for 10 minutes to soften slightly.
Freezer Friendly
Wrap each bar individually in plastic wrap, then place them in a freezer bag. They can be frozen for up to two months. Thaw overnight in the refrigerator before reheating.
Best Reheating Method
Reheat thawed bars in a preheated 350°F (175°C) oven for 5–7 minutes. For a warm, gooey center, add a splash of water to the pan before baking; this steams the bars back to life. Let them cool slightly before topping with fresh whipped cream.