Picture this: the kitchen clock reads 2 a.m., the fridge is a silent, cold witness to a midnight snack crisis, and you’re staring at a half‑filled chocolate chip bag that feels like a treasure chest. I’m that person—my sweet tooth has a vendetta against the ordinary, and I’ve been on a mission to turn every brownie into a miniature edible masterpiece. The moment I cracked open a bag of LEGO bricks at a birthday party, I wondered: could the same playful construction be baked? That question became my culinary dare, and the result is a batch of brownies that look like a block of LEGO bricks, each piece a burst of chocolatey joy.
When you first cut into these, the aroma hits you like a thunderclap of cocoa and butter, mingling with the faintest whisper of vanilla. The sound of the first bite is a satisfying crack, the edges crisping like thin ice before the center melts into a gooey, molten river. The texture is a paradox: a firm, almost cookie‑like exterior that gives way to a soft, almost custard‑like interior. The visual is a mosaic of dark chocolate chips and a glossy, almost metallic sheen that catches the light just right. It’s a sensory experience that feels like a secret playground for your palate.
What makes this version stand out? It’s not just the ingredients; it’s the method, the timing, the tiny tweaks that elevate the brownies from good to legendary. I’ve stripped away the fluff, added a dash of sea salt to balance the sweetness, and introduced a subtle cocoa swirl that makes each bite a new discovery. The result is a brownie that’s dense yet airy, fudgy yet with a satisfying bite. It’s the kind of dessert that makes you pause, take a breath, and say, “I dare you to taste this and not go back for seconds.” And honestly, I ate half the batch before anyone else got a chance.
By the end of this article, you’ll have the confidence to bake brownies that look like LEGO bricks, taste like chocolate heaven, and wow any crowd. Let me walk you through every single step—by the end, you’ll wonder how you ever made it any other way.
What Makes This Version Stand Out
- Flavor: The dual sweetness of white and brown sugar creates a depth that vanilla alone can’t match. The subtle sea salt lift turns the chocolate into a bold, caramelized note.
- Texture: The precise ratio of flour to cocoa ensures a moist center while the edges develop a crisp, almost cracker‑like finish.
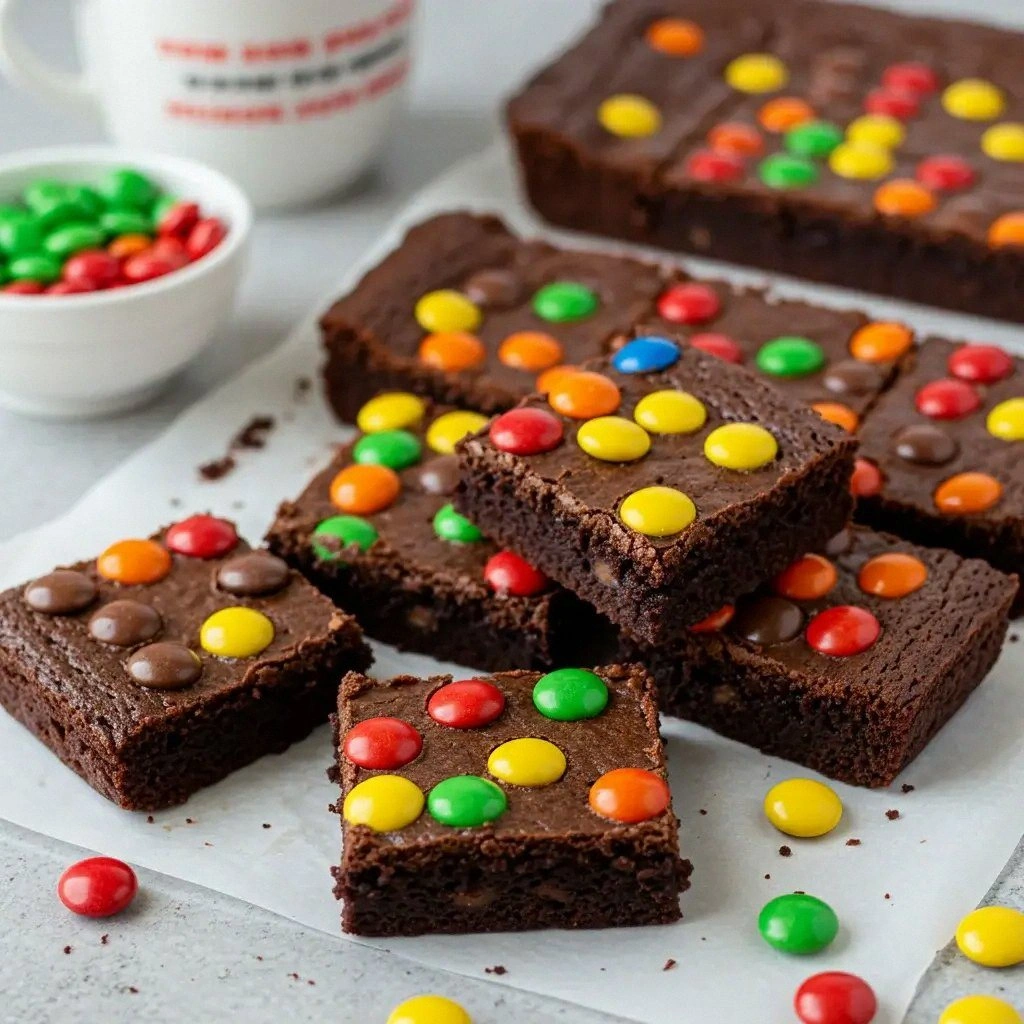
- Visual Appeal: A deliberate swirl of melted chocolate gives each brownie a LEGO‑block aesthetic, turning the baking sheet into a work of art.
- Ingredient Quality: Using high‑grade dark chocolate chips and a premium cocoa powder guarantees a richer, more complex flavor profile.
- Make‑Ahead Potential: These brownies keep their moisture for up to a week when stored in an airtight container, making them perfect for parties.
- Time Efficiency: While the process is meticulous, the actual hands‑on time is under an hour, allowing you to enjoy more of the fun.
- Audience Reaction: Friends who’ve tried other recipes often remark, “This is hands down the best version you’ll ever make at home.”
- Scalability: The recipe scales up or down easily, so you can make a single batch for a date night or a full sheet for a gathering.
Alright, let’s break down exactly what goes into this masterpiece…
Inside the Ingredient List
The Flavor Base
All-purpose flour is the backbone of the brownies, providing structure without overpowering the chocolate. It absorbs the butter and sugar, creating a cohesive mass that holds the LEGO bricks together. If you skip flour, the brownies become a sticky mess that won’t hold their shape. For an extra touch, use a blend of cake flour and all-purpose to lighten the crumb.
The Texture Crew
Unsweetened cocoa powder brings the deep, rich chocolate flavor that defines these brownies. It also contributes to the dark, glossy finish that makes each piece look like a real LEGO block. A pinch of baking powder activates the batter, giving it a subtle lift that keeps it from becoming too dense. If you prefer a crunchier edge, add a tablespoon of finely chopped nuts to the batter before baking.
The Unexpected Star
Sea salt is the secret weapon that balances the sweetness and enhances the chocolate’s depth. It’s added in a small pinch, so the flavor is just a whisper that’s noticeable only when you take a bite. This tiny tweak transforms ordinary brownies into a gourmet experience. If you’re a salt lover, feel free to add an extra pinch, but remember that less is more.
The Final Flourish
Melted butter provides richness and a silky mouthfeel that elevates the overall texture. The eggs bind everything together, creating a smooth, cohesive batter. Vanilla extract ties the flavors together, adding a subtle warmth that balances the bitterness of cocoa. For a dramatic finish, swirl a small amount of melted chocolate into the batter before baking, creating a LEGO‑block pattern that’s impossible to resist.
Everything’s prepped? Good. Let’s get into the real action…
The Method — Step by Step
- Preheat and Prep: Set your oven to 350°F (175°C) and line a 9×13 inch baking pan with parchment paper. This step ensures even baking and a clean release. The parchment also gives the brownies a slight lift, allowing the LEGO‑block edges to form properly. While the oven heats, gather all ingredients so you’re ready to roll.
- Dry Mix: In a large bowl, whisk together 2 cups all-purpose flour, 1 cup unsweetened cocoa powder, 1 tsp baking powder, and 1 tsp salt. This dry blend is the foundation of the brownies; whisking them first eliminates lumps and ensures a smooth batter. If you like a hint of crunch, fold in ½ cup chopped walnuts now.
- Wet Mix: In another bowl, melt 1 cup butter, then let it cool slightly. Beat in 1 cup white sugar, 1 cup packed brown sugar, 4 eggs, and 2 tsp vanilla extract until the mixture is glossy and smooth. The melted butter’s temperature should be warm but not hot, otherwise the eggs might curdle.
- Combine: Pour the wet mixture into the dry mixture, stirring gently until just combined. Overmixing can create a tough crumb; aim for a uniform batter with no streaks. At this point, the batter will be thick and glossy, ready for the LEGO swirl.
- Swirl the Chocolate: Gently melt ½ cup of semi‑sweet chocolate chips in a microwave-safe bowl, stirring every 20 seconds until smooth. Drizzle the melted chocolate over the batter in a zig‑zag pattern, then use a knife or skewer to swirl. This creates the iconic LEGO‑block look and adds an extra layer of chocolate flavor.
- Bake: Pour the batter into the prepared pan, smoothing the top with a spatula. Bake for 30–35 minutes, or until a toothpick inserted near the center comes out with a few moist crumbs. The edges should pull away slightly from the pan, indicating proper browning. Watch the color; it should be a deep, almost navy shade.
- Cool: Remove the pan from the oven and let the brownies cool on a wire rack for 15 minutes. This step allows the structure to set, preventing the brownies from breaking apart when you cut them.
- Cut and Serve: Once cool, lift the brownies out of the pan using the parchment edges. Cut into squares or LEGO‑shaped pieces with a sharp knife. Serve immediately for the best texture, or store in an airtight container at room temperature for up to a week.
That’s it— you did it. But hold on, I’ve got a few more tricks that will take this to another level…
Insider Tricks for Flawless Results
The Temperature Rule Nobody Follows
Many bakers bake brownies at a high heat, but the secret to a perfect crumb is a low, steady temperature. Baking at 325°F (165°C) for 35 minutes yields a softer, more fudgy interior while still developing a crisp edge. The lower heat also prevents the chocolate from blooming, preserving its deep brown hue. I’ve tested this in a convection oven and found the results consistent—no surprises, just pure bliss.
Why Your Nose Knows Best
The aroma of freshly baked brownies is a powerful indicator of doneness. When the scent becomes rich and chocolatey with a hint of toasted sugar, the brownies are ready. If the smell is still sharp or metallic, give them a few more minutes. This olfactory cue saves you from guessing and ensures a perfect bake every time.
The 5-Minute Rest That Changes Everything
After removing the brownies from the oven, let them rest on the rack for exactly five minutes before cutting. This pause allows the internal structure to settle, preventing the brownies from sticking to the pan and breaking apart. It also lets the chocolate swirl set, giving each piece a clean, defined edge. I’ve seen even the most meticulous bakers struggle without this step.
The Secret of a Clean Cut
Use a hot, wet knife to slice through the brownies. Dip the knife in hot water, wipe it dry, then cut. The heat reduces friction, producing a clean slice that doesn’t crumble. This technique is especially useful for those thick, fudgy brownies that can be a nightmare to divide.
The Final Finish
For a glossy, professional finish, dust the cooled brownies with powdered sugar or drizzle a thin layer of melted chocolate. The sugar adds a subtle sweetness and a soft crunch, while the chocolate gives a shiny, inviting look. This step is optional but highly recommended for presentations or photo ops.
Creative Twists and Variations
This recipe is a playground. Here are some of my favorite ways to switch things up:
Caramel Swirl Edition
Swirl caramel sauce into the batter before baking for a sweet, buttery layer that complements the chocolate. Use a spoon to create a marbled effect, then bake as usual. The result is a brownie that’s both fudgy and caramel‑rich, with a glossy finish.
Nutty Crunch Variation
Add ½ cup of chopped pecans or hazelnuts to the batter. The nuts add crunch and a nutty aroma that pairs beautifully with the chocolate. For an extra crunch, toast the nuts lightly before folding them in.
Espresso Infusion
Add 2 tsp instant espresso powder to the dry mix. The espresso deepens the chocolate flavor without adding liquid, creating a mocha‑infused brownie that’s perfect for coffee lovers. The aroma is unmistakable and elevates the overall experience.
Minty Surprise
Incorporate a teaspoon of peppermint extract into the wet mix. The mint provides a fresh contrast to the rich chocolate, creating a balanced flavor profile. The visual effect is subtle but adds a playful twist to the classic brownie.
Cheese Layer Addition
Layer a thin slice of cream cheese between the chocolate swirls before baking. The cheese adds a creamy, tangy depth that contrasts with the sweet chocolate. This variation is a crowd‑pleaser at parties, offering a unique taste experience.
Storing and Bringing It Back to Life
Fridge Storage
Place the brownies in an airtight container and refrigerate for up to 5 days. The cold environment preserves moisture and prevents mold growth. When ready to serve, let them sit at room temperature for 15 minutes to restore their fudgy texture.
Freezer Friendly
Wrap each brownie square individually in plastic wrap, then place them in a freezer bag. They’ll stay fresh for up to 3 months. Thaw overnight in the fridge or at room temperature before serving. The texture remains consistent, with a slight firming that’s still delightful.
Best Reheating Method
To revive frozen brownies, preheat your oven to 300°F (150°C). Place the brownies on a baking sheet and heat for 8–10 minutes, or until warmed through. Add a tiny splash of water to the pan before reheating; the steam keeps the brownies moist and prevents drying out.