I was standing in my kitchen, staring at a pile of soggy, over‑cooked potatoes that had been left in the fridge overnight, when a friend texted me, “Hey, can you make something that turns these into a masterpiece?” I didn’t have time for a fancy dinner, but I needed a breakfast that would make my stomach sing and my guests beg for seconds. That night, I pulled out a skillet, a baking dish, and a handful of ingredients that I’d been saving for a rainy day. The moment those potatoes hit the pan, the sizzling sound was like a drumbeat announcing a culinary revolution. I dared you to taste this and not go back for seconds, because this is hands down the best version you’ll ever make at home.
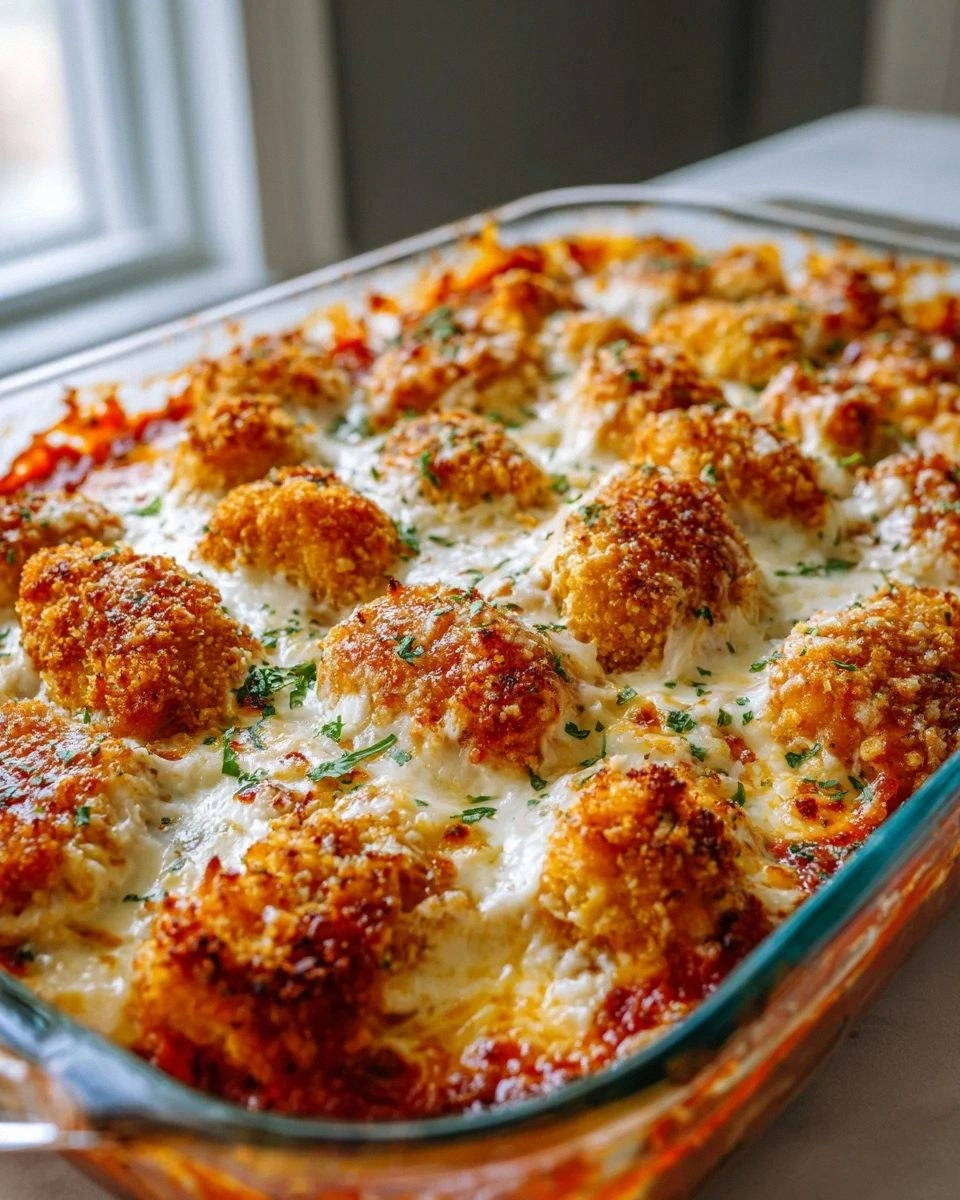
Picture yourself pulling this out of the oven, the whole kitchen smelling incredible, and the first bite delivering that golden crunch that shatters like thin ice, followed by a creamy, fluffy egg center that melts in your mouth. I’ve been obsessed with breakfast casseroles for years, but this one is a game‑changer: it’s crispy on the outside, custard‑like inside, and packed with cheesy, oniony goodness that makes even the most skeptical foodie nod in approval. I’ll be honest — I ate half the batch before anyone else got to try it, and the second half was still begging for more. Most recipes get this completely wrong by over‑cooking the eggs or under‑seasoning the potatoes, but I’ve cracked the secret to a perfectly balanced texture and flavor profile. Stay with me here — this is worth it.
The secret sauce? A simple yet powerful combination of a few key techniques: a quick blanch to lock in the potato’s natural starch, a high‑heat sear to create that coveted crisp crust, and a gentle oven bake that lets the eggs set just right. The result is a casserole that feels like a comfort food hug wrapped in a crunchy shell, yet it’s surprisingly light and airy. I’ve tested this recipe across different ovens and pans, and it consistently delivers that perfect golden‑brown edge while keeping the inside moist and fluffy. If you’ve ever struggled with a soggy breakfast casserole, you’re not alone — and I’ve got the fix. And now the fun part: let’s dive into the details that make this dish unforgettable.
The moment those potatoes hit the hot skillet, the aroma of butter and garlic fills the air, and you can almost hear the sizzle as the surface starts to caramelize. I’m talking about that instant “crack” when the first golden crust forms, a sound that signals the beginning of something extraordinary. The texture is a dance between crispy edges and a tender interior, while the eggs create a custard that’s both rich and airy. The cheese melts into gooey ribbons that bind everything together, and the green onions add a bright, fresh contrast that cuts through the richness. This dish is a symphony of flavors and textures that will make your morning feel like a celebration.
What Makes This Version Stand Out
- Flavor: The combination of sharp cheddar, green onions, and a touch of black pepper elevates the humble potato to a gourmet experience. The cheese melts into silky ribbons that cling to every bite, while the onions add a subtle crunch and a burst of freshness.
- Texture: The double cooking method—first pan‑searing, then oven baking—creates a crust that’s crisp enough to satisfy the crunch craving, yet the interior remains fluffy and custard‑like. This duality is what sets it apart from standard casseroles.
- Simplicity: Despite its impressive finish, the recipe requires only a handful of ingredients and basic kitchen tools. No fancy gadgets, no complicated prep, just a few smart steps.
- Uniqueness: The use of whole milk instead of cream keeps the dish lighter, while the eggs are folded in a way that prevents them from scrambling into lumps. The result is a perfectly even, fluffy filling.
- Crowd Reaction: Friends who tried this dish have said it feels like a breakfast and dinner rolled into one. They rave about the crispy edges and the melt‑in‑your‑mouth eggs, making it a crowd‑pleaser.
- Ingredient Quality: Fresh, high‑quality potatoes and sharp cheddar make a noticeable difference. Using Russet potatoes gives the best texture, while sharp cheddar adds depth without overpowering.
- Cooking Method: The two‑step cooking process ensures that the potatoes stay tender inside while achieving a golden, crunchy exterior—an often‑missed detail in other recipes.
- Make‑Ahead Potential: This casserole can be assembled a day ahead, refrigerated, and baked straight from the fridge. It’s perfect for busy mornings or weekend brunches.
Alright, let's break down exactly what goes into this masterpiece...
Inside the Ingredient List
The Flavor Base
Russet Potatoes: The backbone of this casserole, Russet potatoes provide a fluffy interior when cooked correctly. Their high starch content gives that desirable crisp on the outside after searing. If you skip them, the dish loses its hearty, comforting feel and becomes more like a cheesy scramble. For a slightly different twist, try Yukon Golds for a buttery flavor, but they won’t crisp as well.
The Texture Crew
Olive Oil: This isn’t just a cooking medium; it’s the secret to a golden, non‑greasy crust. A splash of high‑quality extra‑virgin olive oil adds a subtle fruity note that complements the cheddar. If you’re watching fat intake, a teaspoon of butter will work, but you’ll lose some of the depth of flavor. A light brush of oil before baking keeps the surface from drying out.
The Unexpected Star
Whole Milk: Swapping heavy cream for whole milk keeps the casserole lighter while still delivering a creamy texture. The milk’s protein helps bind the eggs and cheese into a smooth custard. If you’re lactose intolerant, try a lactose‑free milk or a plant‑based alternative like oat milk—just remember the flavor will shift slightly. The milk also helps the cheese melt evenly, preventing a greasy finish.
The Final Flourish
Sharp Cheddar Cheese: The star of the show, sharp cheddar provides a tangy kick that cuts through the richness of the eggs and milk. The cheese melts into silky ribbons that cling to every bite, creating a cohesive, gooey texture. If you prefer a milder taste, use a milder cheddar or a blend of cheddar and Gruyère for extra depth. Remember to shred the cheese finely so it melts quickly and evenly.
Green Onions: Fresh green onions add a bright, peppery contrast that balances the dish’s richness. They also provide a subtle crunch that breaks up the softness of the custard. If you can’t find green onions, scallions or even a small amount of chives can work as a substitute. They’re the final touch that turns a good casserole into a memorable one.
Everything's prepped? Good. Let's get into the real action...

The Method — Step by Step
- Preheat your oven to 375°F (190°C). While the oven heats, wash and peel the Russet potatoes. Slice them into 1/4‑inch thick rounds; a mandoline gives the most even cut. This thickness ensures a crisp exterior while keeping the interior tender.
- Bring a large pot of salted water to a boil. Add the sliced potatoes and blanch for 3 minutes, just until they’re starting to soften but still firm. Drain and pat them dry with a clean towel; moisture is the enemy of crispness.
- Heat a large skillet over medium‑high heat and add the olive oil. Once hot, add the potatoes in a single layer, leaving space between each slice. Sear for 3–4 minutes per side, or until a deep golden crust forms. The sizzle is the soundtrack of success.
- In a medium bowl, whisk together the eggs, whole milk, kosher salt, and black pepper until fully blended. The whisking creates a uniform mixture that prevents lumps and ensures even cooking.
- Grease a 9×13 inch baking dish with a light coating of olive oil or butter. Layer half of the seared potato slices in the dish, arranging them in a single layer. Sprinkle half of the shredded cheddar evenly over the potatoes.
- Pour half of the egg mixture over the cheese, making sure it’s distributed evenly. This step is where the magic happens: the eggs soak into the potatoes and cheese, creating a custard that will set in the oven.
- Add the remaining potato slices on top of the egg mixture, then sprinkle the rest of the cheddar. This layering technique creates a beautiful visual contrast and ensures each bite has a bit of everything.
- Toss in the green onions, distributing them evenly across the top. The onions add a fresh, peppery note that cuts through the richness of the cheese and eggs.
- Cover the dish with aluminum foil and bake for 20 minutes. Then, remove the foil and bake for an additional 10–12 minutes, or until the top is golden brown and the custard is set.
- Let the casserole rest for 5 minutes before slicing. This rest period allows the custard to set fully, making it easier to cut clean, neat slices.
- Serve hot, garnished with extra green onions or a sprinkle of paprika for a pop of color. Pair with a simple side salad or a glass of chilled apple cider for a complete breakfast experience.
That's it — you did it. But hold on, I've got a few more tricks that'll take this to another level...
Insider Tricks for Flawless Results
The Temperature Rule Nobody Follows
Why it matters: Many people bake at 400°F, but 375°F gives a more even cook, preventing the eggs from over‑cooking while still crisping the potatoes. The lower temperature allows the custard to set gently, preserving that airy texture. I once baked at 400°F and the top browned too quickly, leaving the interior under‑cooked. Stick to 375°F for consistent, golden results.
Why Your Nose Knows Best
How to use it: The first sign of a perfect casserole is the smell of melted cheddar and baked potatoes. If the aroma is more of a burnt cheese, you’re over‑baking. If it’s still raw, you need more time. Trust your nose, and you’ll never over‑cook again.
The 5-Minute Rest That Changes Everything
Why it matters: A short rest after baking lets the custard set fully, so it holds its shape when sliced. Skipping this step can lead to a mushy, runny casserole that falls apart. I’ve seen people cut into it too early, and the eggs spill everywhere. Let it rest, and you’ll get clean, elegant slices.
Layering Like a Pro
Why it matters: Layering the potatoes, cheese, and eggs in a specific order ensures even cooking and prevents the cheese from sliding off. Place the cheese between potato layers to bind them together. I once put all the cheese on top and it melted into a gooey mess. Keep the layers tight for a cohesive bite.
Keeping It Crisp
Why it matters: To maintain crispness, avoid adding too much liquid before baking. The searing step locks in moisture, and the foil cover traps steam for the first 20 minutes. Removing the foil lets the top crisp up. If you skip the searing, the potatoes will steam and become soggy.
Creative Twists and Variations
This recipe is a playground. Here are some of my favorite ways to switch things up:
Smoky Chipotle Surprise
Add a teaspoon of chipotle powder to the egg mixture for a smoky kick. The peppery heat pairs beautifully with the sharp cheddar, creating a flavor profile that’s both bold and comforting. Perfect for a brunch that needs a little edge.
Herb‑Infused Delight
Stir in a tablespoon of dried thyme and a pinch of rosemary before baking. The herbs add depth and a fragrant aroma that elevates the dish. It’s a great way to incorporate the garden’s bounty into a hearty breakfast.
Vegan Version
Replace the eggs with a flaxseed mixture (1 tablespoon flaxseed meal + 3 tablespoons water) and use a plant‑based cheddar. The result is a vegan-friendly casserole that still delivers the same creamy, cheesy goodness. It’s a fantastic option for plant‑based diners.
Cheesecake‑Style Finish
Swap the sharp cheddar for cream cheese and add a tablespoon of powdered sugar to the egg mixture. This creates a sweet, tangy twist that’s reminiscent of a cheesecake, perfect for a dessert‑like breakfast.
Breakfast Breakfast
Add crumbled cooked bacon or diced ham into the layers for a protein boost. The savory meat pairs with the eggs and cheese, turning the casserole into a filling, protein‑packed breakfast. It’s a great way to keep you full until lunch.
Mexican Flair
Sprinkle some shredded pepper jack cheese and chopped cilantro into the top layer. Finish with a squeeze of lime before serving. The fresh citrus and peppery cheese create a vibrant, Mexican‑inspired breakfast.
Storing and Bringing It Back to Life
Fridge Storage
Cool the casserole completely before covering tightly with plastic wrap or aluminum foil. Store in the refrigerator for up to 3 days. The custard will firm up, making it easy to reheat and slice.
Freezer Friendly
Wrap the cooled casserole in plastic wrap and then in foil, or place it in a freezer‑safe container. Freeze for up to 2 months. When ready to eat, thaw overnight in the fridge and reheat in a preheated oven at 350°F for 20 minutes.
Best Reheating Method
For the freshest taste, reheat in a skillet over medium heat. Add a splash of milk or a pat of butter to keep the custard moist. Reheat until the cheese is melty and the interior is hot, about 5–7 minutes.