I was standing in my kitchen, mid‑December, with a half‑empty fridge, a busted oven, and a craving that felt like a snowstorm in my mouth. I’d just tried to make a classic baked cheesecake, but the oven decided to throw a tantrum and the whole thing turned into a rubbery nightmare. I swear, the only thing that could have saved that disaster was a miracle, and that miracle turned out to be a simple, no‑bake peppermint cheesecake that literally stopped time. The moment I tasted the first spoonful, I felt a rush of minty coolness that danced with the creamy richness like a winter waltz, and I knew I had stumbled onto something legendary.
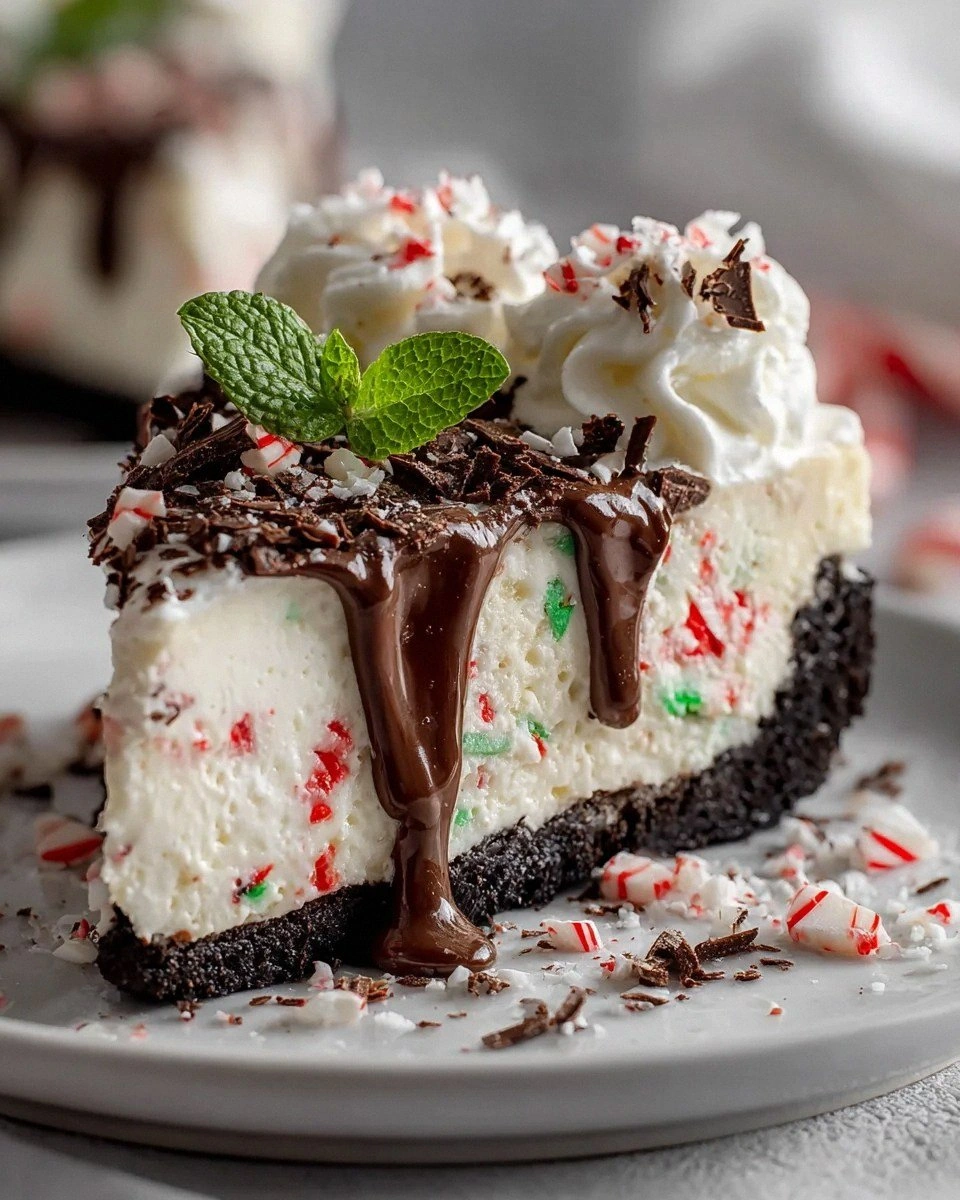
Imagine the scene: a glossy, ivory‑white filling that shimmers under the kitchen light, a crust that snaps with the satisfying crunch of a fresh snow‑drift, and a whisper of peppermint that tingles your nose before it even reaches your tongue. The aroma is a heady mix of sweet vanilla and crisp peppermint, the kind that makes you think of candy‑cane stalls at a holiday market. The texture? Silky, airy, and just firm enough to hold its shape when you cut a slice, yet soft enough to melt on your palate like a cloud on a summer day. When you bite, the crushed peppermint candy adds a surprise crunch that crackles like tiny fireworks.
Why does this version stand out from the sea of no‑bake cheesecakes out there? Most recipes either skimp on flavor, end up too dense, or rely on gelatin that makes the whole thing feel like Jell‑O. This one skips the gelatin entirely, using the natural thickening power of heavy cream and the perfect ratio of cream cheese to butter, resulting in a mousse‑like consistency that holds up beautifully. The secret? A dash of peppermint extract paired with crushed candy canes, which delivers a punch of fresh mint without any artificial aftertaste. Plus, the crust is a buttery graham‑cracker base that you can customize with crushed cookies if you’re feeling adventurous.
I dare you to taste this and not go back for seconds. I’ll be honest — I ate half the batch before anyone else got to try it, and that’s saying something because the whole family was waiting. Most recipes get the balance of sweet and mint completely wrong, either overwhelming you with sugar or leaving the mint flavor limp. Here’s what actually works: a precise ½ tsp of peppermint extract, a generous ½ cup of crushed peppermint candy for texture, and a light dusting of powdered sugar that never overpowers. Okay, ready for the game‑changer? Let me walk you through every single step — by the end, you’ll wonder how you ever made it any other way.
What Makes This Version Stand Out
- Taste: The peppermint isn’t just a garnish; it’s woven into the cream cheese filling, delivering a cool burst that’s balanced by the sweet, buttery crust.
- Texture: A light, airy mousse that holds its shape without the heaviness of a traditional baked cheesecake.
- Simplicity: No oven, no gelatin, no fancy equipment—just a few pantry staples and a whisk.
- Uniqueness: Crushed peppermint candy adds a surprising crunch that most no‑bake cheesecakes lack.
- Crowd Reaction: Guests swear they’ve never tasted a dessert that feels both festive and comforting at the same time.
- Ingredient Quality: Using full‑fat cream cheese and cold heavy cream creates a richer mouthfeel.
- Method: The no‑bake approach locks in flavor and texture while keeping the kitchen cool.
- Make‑Ahead Potential: This cheesecake can chill overnight, making it perfect for parties, potlucks, or a lazy Sunday treat.
Inside the Ingredient List
The Flavor Base
The cream cheese is the heart of this dessert. It provides that rich, tangy foundation that makes every cheesecake feel luxurious. If you skimp on it or use a low‑fat version, the filling will turn grainy and lose its signature silkiness. I always buy the full‑fat block, let it sit at room temperature for 30 minutes, and give it a quick whisk before adding any other ingredients. A quick tip: if you can, choose a cream cheese that’s been aged a little longer—its flavor deepens, making the final product taste more complex.
The Texture Crew
Heavy whipping cream is the secret weapon that turns this from a dense cheesecake into a light, airy cloud. When you whip it to stiff peaks, you’re essentially creating a network of air bubbles that hold the filling together without the need for gelatin. The key is to keep the cream ice‑cold; any warmth will cause it to deflate, leaving you with a runny mess. If you don’t have a stand mixer, a hand whisk works fine—just give yourself a few extra minutes and keep that bowl chilled.
The Unexpected Star
Peppermint extract is the game‑changer here. A little goes a long way, and if you overdo it, the flavor can become medicinal. I recommend starting with ½ tsp for four servings; you can always taste and add a few drops more if you crave an extra punch. The extract should be pure, not the cheap imitation that smells like a candy‑cane factory. Pair it with crushed peppermint candy for texture, and you get a dessert that sings both in aroma and crunch.
The Final Flourish
The graham cracker crumbs and unsalted butter form the crust that anchors the entire masterpiece. The crumbs provide a sweet, slightly caramelized flavor, while the butter binds everything together. If you’re allergic to wheat, you can swap the crumbs for gluten‑free oat cookies—just make sure they’re finely crushed. Melt the butter slowly and let it cool just a tad before mixing; hot butter will make the crumbs soggy, ruining the crispness. Finally, a pinch of powdered sugar sweetens the crust without making it gritty.
Everything's prepped? Good. Let's get into the real action...
The Method — Step by Step
First, crush the graham crackers into fine crumbs. I love using a food processor for speed, but a zip‑top bag and a rolling pin work just as well. Toss the crumbs into a medium bowl, then drizzle the melted unsalted butter over them. Stir until every crumb is glossy, like a tiny river of gold. Press this mixture firmly into the bottom of a 9‑inch springform pan, using the back of a measuring cup to create an even layer. Chill the crust in the freezer for 10 minutes while you prep the filling; this step ensures the crust sets and won’t crumble later.
While the crust chills, soften the cream cheese. Cut it into cubes and let it sit on the counter for about 30 minutes. If you’re in a rush, microwave it in 10‑second bursts, checking frequently to avoid melting. Once soft, whisk it with the powdered sugar until the mixture is smooth and free of lumps. The sugar should dissolve completely, giving the mixture a glossy sheen that hints at the velvety texture to come.
Now, whip the heavy cream. Use a chilled bowl and whisk—cold metal helps the cream reach stiff peaks faster. Start on low speed, then crank up to high once it begins to thicken. When soft peaks form, add the pure vanilla extract and the peppermint extract. Be careful: a little peppermint goes a long way. Whisk until you see firm, glossy peaks that stand up straight when you lift the whisk. This airy cream is the key to the cheesecake’s cloud‑like texture.
Fold the whipped cream into the cream cheese mixture. Use a rubber spatula and a gentle folding motion—think of coaxing two reluctant lovers together. Start by adding a third of the whipped cream, stirring just enough to lighten the mixture. Then, gently fold in the remaining cream in two more additions, being careful not to deflate the air bubbles. The filling should look light, fluffy, and slightly glossy—like a freshly fallen snowbank.
Pour the filling over the chilled crust, smoothing the top with an offset spatula. As you spread, notice how the filling settles like a soft blanket over the crust. Tap the pan lightly on the counter three times; this releases any trapped air pockets and ensures a uniform surface. Sprinkle the crushed peppermint candy evenly across the top, pressing it lightly so it adheres to the creamy layer.
Refrigerate the assembled cheesecake for at least 4 hours, preferably overnight. This chilling period allows the butter in the crust to firm up and the filling to set, creating clean slices. If you’re impatient, a quick 2‑hour chill works, but the texture will be slightly softer. When you’re ready to serve, run a thin knife around the edge of the pan to loosen the cheesecake, then release the springform.
Slice with a warm knife—dip the blade in hot water, wipe it dry, and glide through the cheesecake. The first slice should glide cleanly, revealing a smooth, mint‑green swirl (if you used a touch of green food coloring for extra visual flair). Serve chilled, and watch your guests' faces light up as the peppermint aroma hits their noses before they even take a bite.
That's it — you did it. But hold on, I've got a few more tricks that'll take this to another level. From mastering the perfect crust to adding a finishing glaze, these insider tips will make your next batch even more unforgettable.
Insider Tricks for Flawless Results
The Temperature Rule Nobody Follows
Never, ever let your cream cheese sit in a warm kitchen for too long. The ideal temperature is just barely above room temperature—about 68‑70°F. When the cheese is too warm, it becomes oily and separates when mixed with the sugar, leaving you with a grainy texture. Keep it in a cool spot, or pop it in the fridge for 5 minutes if it starts to feel too soft. I once left it out for an hour and the whole batch turned into a curdled mess—lesson learned.
Why Your Nose Knows Best
When you add the peppermint extract, pause and take a sniff. The aroma should be bright, clean, and slightly sweet—if it smells medicinal, you’ve added too much. Trust your nose more than the measuring spoon; a little extra vanilla can balance an overly sharp peppermint note. I always give the mixture a quick whiff before folding in the whipped cream, adjusting the extract by drops if needed.
The 5‑Minute Rest That Changes Everything
After folding the whipped cream into the cream cheese, let the mixture sit for five minutes before spreading it over the crust. This short rest allows any remaining air bubbles to rise to the surface, giving you a smoother, more even filling. Skipping this step can lead to tiny pockets that feel like unexpected “pop‑corn” when you bite. I once rushed this part and the cheesecake had a weird “bubbly” texture—don’t be that person.
Crush, Don’t Pulverize
When you crush the peppermint candy, aim for a coarse texture, not a fine powder. The larger shards provide a delightful crunch that contrasts with the creamy filling, while a fine powder would just blend into the frosting and lose its visual appeal. Place the candy in a zip‑top bag and smash with a rolling pin—stop when you see a mix of tiny shards and larger chunks. This step adds a surprise element that makes each bite interesting.
The Chill‑Before‑Serve Secret
Even after the recommended 4‑hour chill, I recommend a final 30‑minute blast in the freezer right before serving. This gives the crust a firmer bite and the filling a slightly firmer set, making slicing cleaner. Just be sure not to leave it in the freezer for more than an hour, or the edges will become icy. A quick chill is the difference between a “nice” cheesecake and a “wow, that’s professional” cheesecake.
Creative Twists and Variations
This recipe is a playground. Here are some of my favorite ways to switch things up:
Chocolate‑Mint Fusion
Swap half of the graham cracker crumbs for chocolate wafer crumbs and add a tablespoon of cocoa powder to the crust mixture. The result is a deep, chocolatey base that pairs beautifully with the peppermint‑infused filling. Top with extra chocolate shavings for a double‑hit of decadence.
Berry‑Peppermint Delight
Fold in a cup of fresh raspberries or a swirl of raspberry coulis into the filling before chilling. The tartness of the berries cuts through the sweetness and adds a pop of color that makes the dessert look as festive as it tastes.
Nutty Crunch Variation
Add ¼ cup of toasted, finely chopped pecans or almonds to the crust for an extra layer of texture. The nutty flavor complements the peppermint, creating a sophisticated flavor profile that’s perfect for adult gatherings.
Vegan Friendly
Replace the cream cheese with a high‑fat vegan cream cheese, use coconut cream instead of heavy whipping cream, and swap the butter for coconut oil. The texture remains luxuriously creamy, and the peppermint still shines. Just be sure to chill the coconut cream well before whipping.
Holiday Spice Twist
Add a pinch of ground cinnamon and a dash of nutmeg to the filling for a warm, spiced version that still retains the refreshing peppermint. This variation is perfect for Thanksgiving or early winter gatherings when you want a hint of spice without losing the minty freshness.
Storing and Bringing It Back to Life
Fridge Storage
Cover the cheesecake tightly with plastic wrap or store it in an airtight container. It will stay fresh for up to 5 days in the refrigerator. For best texture, let it sit at room temperature for 10 minutes before serving; this softens the crust just enough for a perfect bite.
Freezer Friendly
This cheesecake freezes beautifully. Wrap the entire springform pan in a double layer of foil, then place it in a freezer bag. It will keep for up to 2 months. When you’re ready to enjoy it, transfer it to the fridge to thaw overnight. The peppermint flavor actually intensifies after freezing, giving you an even more pronounced minty punch.
Best Reheating Method
If you prefer a slightly softer texture after refrigeration, place a small dish of water in the microwave and heat for 10‑15 seconds. The gentle steam will revive the creaminess without melting the crust. Avoid direct microwave heating of the cheesecake itself, as it can cause the filling to separate.