There’s a certain thrill in the kitchen when a disaster turns into an accidental masterpiece. I was in a rush to satisfy a midnight craving for something sweet, and the blender I had was the only appliance that wouldn’t quit. I dumped flour, sugar, butter, milk, eggs, vanilla, baking powder, and a pinch of salt into the bowl, then hit “smooth” without a second thought. The resulting batter was silky, not lumpy, and it smelled like a vanilla dream—my kitchen felt like a bakery on a sunny afternoon.
I dared myself to taste a cupcake straight from the tin, and the first bite was a cloud of light, airy sweetness that made me wonder if I’d just stumbled on the best version of vanilla cupcakes ever made at home. The batter was so smooth that the vanilla seemed to sing, the sugar dissolved like sugar crystals in a warm bath, and the butter added a buttery hug that never felt heavy. I could almost hear the batter whispering, “I’m going to rise like a cloud.” And, honestly, I almost didn’t want to share it—my mouth was full of cupcake‑filled joy.
What sets this version apart isn’t just the blender’s magic; it’s the way each ingredient is chosen to work in harmony. The butter is melted to give the batter a silky texture that’s easier to blend, the milk keeps it moist, and the eggs bind everything together with a gentle lift. The baking powder is calibrated to give a gentle rise without over‑browning, and that pinch of salt amplifies every flavor without overpowering the vanilla. It’s a recipe that feels like a secret handshake between the ingredients, a dance where each step is choreographed for perfection.
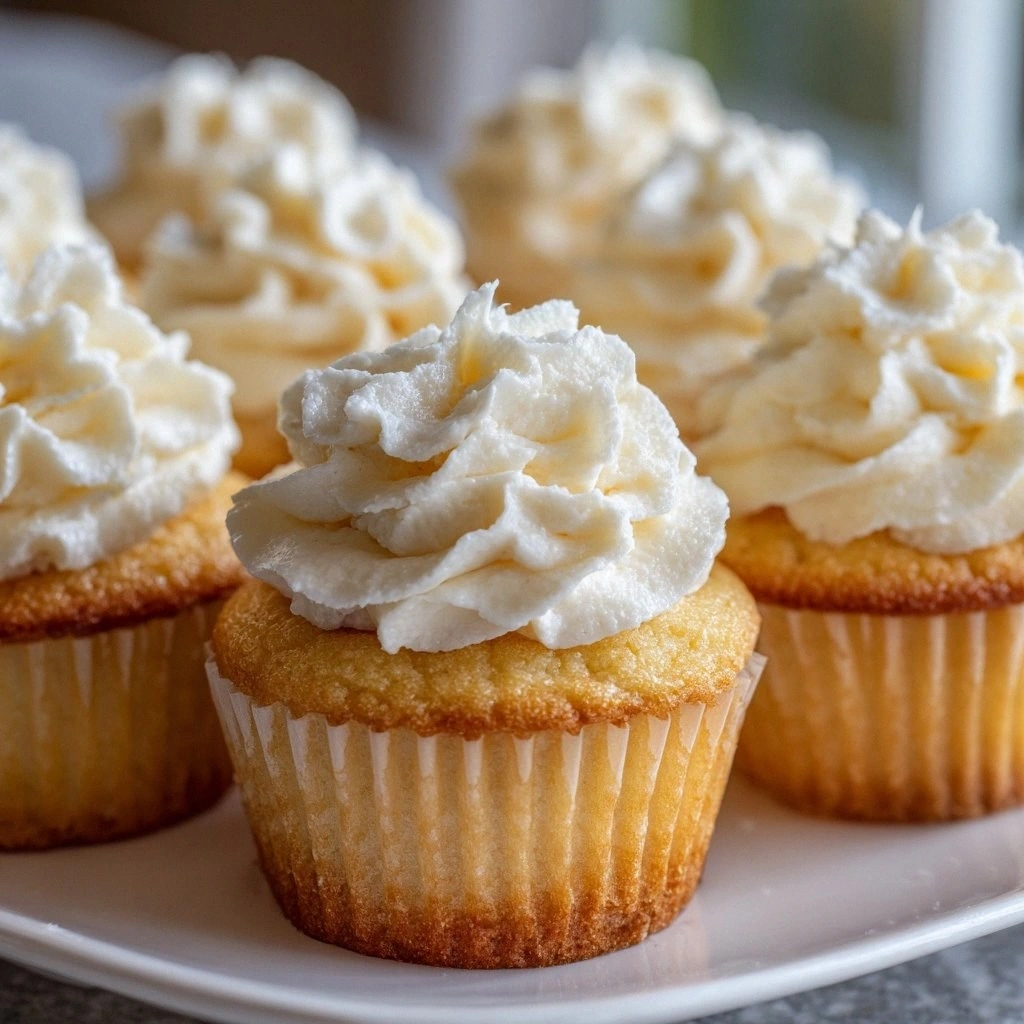
I’ll be honest—after the first batch, I ate half the cupcakes before anyone else got a chance to taste them. That’s the kind of confidence you get when you know your recipe is reliable. If you’ve ever struggled with cupcakes that come out dense or uneven, you’re not alone. This recipe fixes that with a simple, foolproof technique that turns your blender into a baking wizard. Picture yourself pulling a tray of golden, airy cupcakes from the oven, the whole kitchen smelling incredible, and everyone begging for a second bite. That’s the moment I wanted to share, and I’m going to walk you through every single step—by the end, you’ll wonder how you ever made it any other way.
What Makes This Version Stand Out
- Texture: The blender creates a uniformly silky batter that eliminates the dreaded lumps you often see in traditional mixing methods. This results in cupcakes that are light, fluffy, and tender to the bite.
- Flavor: Using melted butter and a generous splash of vanilla extract gives the cupcakes a rich, buttery depth that’s hard to replicate with dry ingredients alone.
- Speed: From prep to oven, you’re looking at under 30 minutes—perfect for a late‑night treat or a last‑minute dessert for guests.
- Versatility: The basic batter can be dressed up with add‑ins like chocolate chips, fruit, or spices, making it a blank canvas for creative twists.
- Make‑ahead: The batter stores in the fridge for up to 48 hours, and the cupcakes can be frozen for weeks without losing quality.
- Ingredient Quality: Every component is chosen to work in harmony, from the all‑purpose flour’s fine texture to the baking powder’s precise lift.
Inside the Ingredient List
The Flavor Base
All‑purpose flour is the backbone of our cupcakes, providing structure and a soft crumb. It’s essential to sift the flour before adding it to the blender to avoid clumps and to ensure an even rise. If you’re looking for a gluten‑free option, you can swap the all‑purpose flour for a 1:1 blend of gluten‑free flour and a binder like xanthan gum. Skipping the flour will leave you with a sticky, cake‑like batter that won’t hold its shape.
The Texture Crew
Granulated sugar does more than sweeten; it creates a tender texture by preventing the batter from becoming too dense. The sugar crystals also help to aerate the batter during blending, giving the cupcakes their signature lightness. If you prefer a lower‑sugar version, you can use a sugar substitute that measures like sugar, but be aware that the cupcakes may not rise as well.
The Unexpected Star
Unsalted butter, melted, is the secret to a buttery, moist crumb that doesn’t feel heavy. Melted butter blends seamlessly with the other liquids, preventing separation and ensuring a smooth batter. If you’re allergic to dairy, a high‑quality plant‑based butter will work just as well, though the flavor profile will shift slightly toward the plant‑based option.
The Final Flourish
Milk keeps the batter moist and contributes to a light, fluffy texture. Whole milk adds richness, while 2% milk offers a lighter alternative. If you’re lactose intolerant, a dairy‑free milk such as oat or almond milk will maintain the moisture without compromising taste. The final ingredient, a pinch of salt, enhances all the flavors, making each bite more satisfying.
Everything's prepped? Good. Let's get into the real action, where the blender takes center stage and turns simple pantry staples into a cloud of edible delight.
The Method — Step by Step
- Preheat your oven to 350°F (175°C) and line a muffin tin with six paper liners. This ensures the cupcakes bake evenly and makes clean‑up a breeze. The paper liners also prevent the cupcakes from sticking, giving you that perfect rise.
- In a large bowl, combine 2 cups of sifted all‑purpose flour, 1 cup of granulated sugar, 2 teaspoons of baking powder, and ½ teaspoon of salt. Mix these dry ingredients together to distribute the leavening agent evenly. This step is crucial because uneven distribution can lead to pockets of under‑baked batter.
- Add the melted butter, 1 cup of milk, 3 large eggs, and 2 teaspoons of vanilla extract to the dry mix. Place the bowl in your blender and blend on low speed until the mixture is smooth and free of lumps. The blender’s blades should glide through the batter like a gentle tide.
- Taste the batter; it should have a sweet, buttery flavor with a hint of vanilla. If it feels too thick, add a tablespoon of milk to thin it out. This is the moment of truth—if the batter is too thick, the cupcakes will be dense.
- Fill each paper liner about two‑thirds full with the batter. This allows room for the cupcakes to rise without overflowing. The batter should look glossy and smooth, like a calm lake.
- Place the tin in the preheated oven and bake for 18–20 minutes, or until a toothpick inserted into the center comes out clean. The cupcakes should have a golden top and a slightly firm edge that pulls away from the paper.
- Remove the cupcakes from the oven and let them cool in the tin for 5 minutes before transferring them to a wire rack. Cooling them in the tin helps them set without cracking. The aroma will fill the kitchen, making the wait feel worth it.
- Once completely cooled, you can frost them with your favorite icing or simply dust them with powdered sugar. For an extra touch, drizzle a thin line of chocolate ganache over the top. The cupcakes are now ready to serve or store.
That’s it—you did it. But hold on, I’ve got a few more tricks that will take this to another level. These insider tips will help you tweak the cupcakes to your exact taste and ensure every batch is flawless.
Insider Tricks for Flawless Results
The Temperature Rule Nobody Follows
Many bakers overlook the importance of room‑temperature ingredients. Let the eggs and butter sit at room temperature for 30 minutes before blending. This ensures the batter emulsifies properly, creating a lighter crumb. When everything is at the same temperature, the batter will rise more evenly and the cupcakes will look uniform.
Why Your Nose Knows Best
If the batter smells slightly burnt or metallic, stop immediately. A burnt aroma indicates the batter’s sugar is caramelizing too quickly, which can happen if the blender is too hot. Let the batter cool for a few minutes before continuing to blend or bake. Your nose is the best judge of when the batter is ready.
The 5‑Minute Rest That Changes Everything
After blending, let the batter rest in the refrigerator for 5 minutes before baking. This short chill allows the flour to hydrate fully, which improves the rise and texture. It also gives the butter time to set slightly, preventing the cupcakes from spreading too much during baking.
The Secret to a Crisp Edge
If you prefer a slightly crisp edge, bake the cupcakes for an additional 2 minutes after the toothpick test. Keep a close eye on them; the edges should pull away from the paper, but the center must remain soft. A crisp edge adds a delightful contrast to the moist interior.
The Perfect Frosting Match
Pair the cupcakes with a buttercream that has a 1:1 ratio of butter to powdered sugar. This creates a smooth, glossy finish that complements the vanilla flavor without overpowering it. For an extra twist, add a splash of espresso to the frosting; it deepens the vanilla notes and adds a subtle bitterness.
Creative Twists and Variations
This recipe is a playground. Here are some of my favorite ways to switch things up:
Chocolate‑Infused Dream
Add ½ cup of melted dark chocolate to the batter for a rich, mocha flavor. The chocolate will deepen the vanilla notes and give the cupcakes a silky finish. Finish with a drizzle of chocolate ganache for an extra indulgent touch.
Citrus Burst
Replace the vanilla extract with 2 teaspoons of orange zest and 1 teaspoon of lemon zest. The citrus will add a bright, refreshing contrast to the buttery base. A dusting of powdered sugar will keep the cupcakes sweet while highlighting the citrus notes.
Spiced Autumn
Stir in 1 teaspoon of ground cinnamon, ½ teaspoon of ground nutmeg, and a pinch of ground cloves. The warm spices will evoke cozy fall evenings. Pair with a caramel buttercream for a classic autumn dessert.
Berry Surprise
Fold in 1 cup of fresh blueberries or raspberries just before filling the tins. The berries will burst in the oven, adding a juicy pop of flavor. A simple lemon glaze will balance the sweetness.
Nutty Delight
Add ½ cup of chopped walnuts or pecans to the batter. The nuts will add crunch and a buttery undertone that complements the vanilla. Toast the nuts beforehand to bring out their flavor.
Coffee Kick
Dissolve 1 tablespoon of instant coffee in the milk before blending. The coffee will mellow the sweetness and add depth. Finish with a dusting of cocoa powder for a mocha finish.
Storing and Bringing It Back to Life
Fridge Storage
Store cupcakes in an airtight container in the refrigerator for up to 3 days. The moist crumb will stay fresh, and the buttercream will keep its texture. When ready to serve, let them sit at room temperature for 20 minutes to soften.
Freezer Friendly
Wrap each cupcake individually in plastic wrap, then place them in a freezer bag. They’ll keep for up to 2 months. To thaw, leave them in the fridge overnight or at room temperature for a quick bite.
Best Reheating Method
Reheat frozen cupcakes in a preheated oven at 350°F (175°C) for 8–10 minutes, or until warmed through. Add a tiny splash of water to the bottom of the tin to create steam, which keeps the cupcakes from drying out. Let them cool for a minute before frosting.