Picture this: I’m in the middle of a late‑night snack frenzy, the fridge is a sad, empty void, and the only thing that’s left is a jar of dill pickles that’ve been sitting there since last Christmas. I’m staring at them, thinking, “I can’t just toss these into a salad, can I?” The answer is a resounding yes—and a little more. I grabbed my trusty skillet, a handful of shredded cheddar, and the world’s most underrated kitchen hack: turning pickles into bite‑size, crispy, cheesy delights. The moment the first bite hits your tongue, the tangy crunch of the pickle collides with the molten cheddar, and the whole kitchen is suddenly filled with the aroma of a perfectly fried snack. I knew then that this would be the go‑to appetizer for every gathering, from casual potlucks to fancy dinner parties.
I dare you to taste this and not go back for seconds. The first bite is a paradox—crisp on the outside, gooey cheddar on the inside, and a burst of brine that lingers like a secret whisper. It’s the kind of snack that makes you forget you ever had a craving for anything else. I’ve tried countless “pickle‑cheese” combinations, but none of them matched the crunch-to-melt ratio that I discovered in this version. If you’ve ever struggled to make pickles truly exciting, you’re not alone—and I’ve got the fix. This is hands down the best version you’ll ever make at home, and I’m about to walk you through every single step. By the end, you’ll wonder how you ever made it any other way.
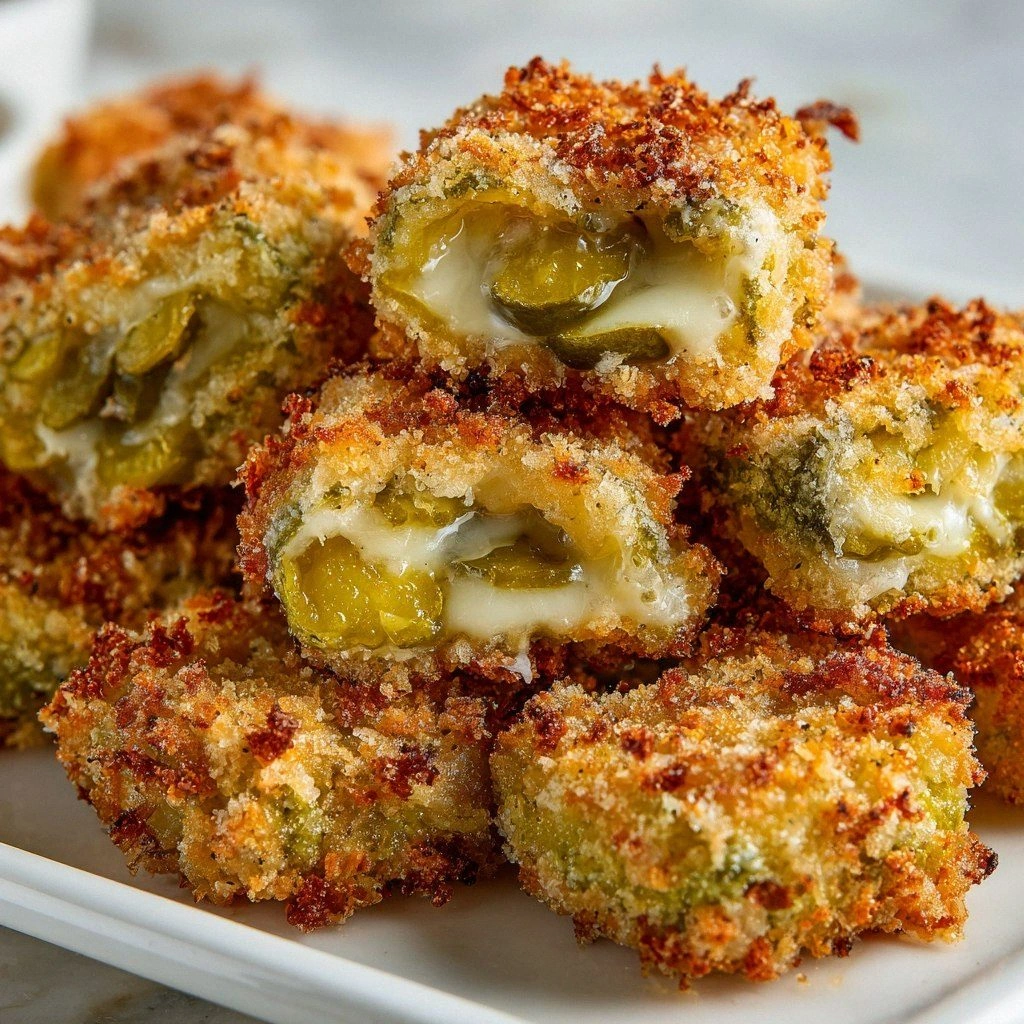
The first time I tried this recipe, the kitchen smelled like a cross between a deli and a summer picnic. The sizzling sound when the mixture hit the hot skillet was pure music, a promise of the crispy edges that shatter like thin ice. The texture is a delicate balance—each bite offers a satisfying crunch that gives way to a molten, cheesy center that oozes out with a gentle, savory sigh. The flavor is unapologetically bold, with a tang that cuts through the richness of the cheese and a hint of paprika that adds a subtle smokiness. The best part? It’s so easy to make and so satisfying that you’ll find yourself reaching for the jar of pickles again and again.
Okay, ready for the game‑changer? This recipe doesn’t just elevate pickles; it transforms them into a party‑starter that will have everyone begging for the recipe. The secret lies in the layering of textures and the precise timing of the baking process. You’ll learn how to make the perfect coating that’s light, airy, and irresistibly golden. I’ve spent hours tweaking the proportions, and the result is a bite that’s both crispy and creamy, a true culinary paradox. Let’s dive into the details that make this version stand out from every other recipe out there.
What Makes This Version Stand Out
- Crunch: The panko breadcrumbs give an unparalleled lightness that feels like a cloud when you bite into it, unlike the dense crumbs of traditional recipes.
- Flavor: The combination of dill pickles and cheddar creates a tangy, savory harmony that’s more complex than any standard cheese snack.
- Texture: The cheese melts into a gooey center while the outer shell remains crisp, providing a dual sensation that satisfies both cravings.
- Speed: Prep time is under 15 minutes, and the entire process is completed in 30 minutes, making it a perfect quick fix for any gathering.
- Visual Appeal: The golden crust with a hint of green from the pickles makes for a vibrant plate that’s Instagram‑ready.
- Versatility: This recipe can be served as a snack, appetizer, or even a side dish, making it adaptable to any meal.
- Make‑Ahead Friendly: The assembled bites can be stored in the fridge for up to 48 hours, then baked fresh—ideal for busy hosts.
Inside the Ingredient List
The Flavor Base
Dill pickles are the star ingredient, providing that satisfying crunch and tangy flavor that makes these bites irresistible. Their acidity cuts through the richness of the cheese, creating a delightful contrast that keeps you coming back for more. If you can’t find dill pickles, a sweet pickle can offer a different sweet‑sour dynamic, but it will change the overall flavor profile.
The Texture Crew
All‑purpose flour forms the first layer of the breading, ensuring the egg wash adheres properly and the breadcrumbs stick. This layer also creates a subtle barrier that keeps the cheese from leaking out during baking. If you skip the flour, the breadcrumbs will fall off, resulting in a messy, uneven coating.
The Unexpected Star
Panko breadcrumbs are the secret to that light, crispy texture. Their airy structure allows them to bake to a golden finish without absorbing too much oil. Swapping panko for regular breadcrumbs will give you a denser, heavier bite, which some people prefer, but the crispness will be noticeably reduced.
The Final Flourish
Seasonings—garlic powder, paprika, salt, and pepper—enhance the overall profile. Garlic powder adds depth, while paprika brings a hint of smokiness. Salt and pepper round out the flavors, ensuring every bite is balanced. If you’re adventurous, try a pinch of cayenne for a subtle heat that complements the tang.
Everything's prepped? Good. Let's get into the real action and turn these humble ingredients into a culinary masterpiece.
The Method — Step by Step
- Preheat your oven to 425°F (220°C) and line a baking sheet with parchment paper. The high temperature is essential for achieving that crisp, golden crust. While the oven heats, set up your breading station: a shallow dish of flour, a bowl of beaten eggs, and a bowl of panko breadcrumbs seasoned with garlic powder, paprika, salt, and pepper. The flour will help the egg wash stick, and the seasoned breadcrumbs will add a burst of flavor.
- Take each pickle slice and sprinkle a small amount of shredded cheddar on top, then fold the slice over to encase the cheese. The cheese should be tucked neatly inside so it doesn’t spill out during baking. If you prefer a thicker cheese layer, add a second sprinkle before folding. The key is to keep the cheese centered.
- Dip the folded pickle in the flour, ensuring an even coat. Shake off any excess. Then, dip it into the beaten eggs, allowing any excess to drip back into the bowl. Finally, roll the pickle in the seasoned panko mixture, pressing gently to adhere. This three‑step coating process creates a sturdy shell that holds the cheese together.
- Place the coated pickles on the prepared baking sheet, spacing them about an inch apart. Bake for 12-14 minutes, or until the breadcrumbs are golden brown and the cheese is bubbling. Watch for the edges pulling away from the parchment; that’s the signal that the crust is crisping up. Keep an eye on the cheese—it should be just starting to melt, not fully liquefied.
- Remove the bites from the oven and let them cool on a wire rack for 3-4 minutes. The cooling period allows the cheese to set slightly, making them easier to handle. While cooling, you can sprinkle a touch of fresh dill or a drizzle of honey for an extra pop of flavor. If you’re serving immediately, this is the moment to plate them beautifully.
- Serve immediately with a side of ranch or a spicy aioli. The creamy dip complements the tang of the pickle and the richness of the cheese. If you’re hosting a crowd, set up a dip station so guests can customize their bites. Remember, the best experience comes from eating them hot and fresh.
- If you have leftovers, store them in an airtight container in the refrigerator for up to 48 hours. When you’re ready to enjoy them again, reheat in a preheated oven at 350°F (175°C) for 5-7 minutes until the cheese is melted and the crust is crisp. Avoid microwaving; it will make the crust soggy.
- Enjoy the moment of triumph as you bite into that perfectly balanced crunch and melt. The sensory experience—sizzle, aroma, texture—will leave you craving more. I’ve got a few more tricks that’ll elevate this dish even further, so stay with me for the next section.
Insider Tricks for Flawless Results
The Temperature Rule Nobody Follows
Many home cooks bake at 375°F, assuming it’s a safe middle ground. In reality, that temperature is too low for a truly crisp crust. By pushing the oven to 425°F, you ensure that the panko browns quickly while the cheese remains molten. I once baked at 375°F and the crust was soggy; the next time I raised the heat, the result was a golden, airy bite.
Why Your Nose Knows Best
The aroma of the cheese melting in the oven is a reliable indicator that your bites are ready. If you can smell the cheddar turning buttery, the crunch is almost at its peak. Don’t rely solely on the timer—taste a small piece to confirm the texture. This sensory check saves you from overbaking or underbaking.
The 5-Minute Rest That Changes Everything
Letting the bites rest on a wire rack for a few minutes after baking allows the cheese to set, preventing it from oozing onto your plate. It also lets the outer shell firm up a bit, making each bite more stable. I’ve seen people pick them up immediately and end up with a cheese drizzle; a short rest saves the day.
The Double‑Coat Secret
For an ultra‑crispy experience, double‑coat the pickles. After the first breading, bake for 6 minutes, remove, then repeat the coating process before returning to the oven. The result is a crunchy shell that still feels light. I’ve used this trick when serving at parties where guests keep reaching for the next bite.
The Fresh Herb Finish
A sprinkle of fresh dill or a splash of lemon juice just before serving adds a bright counterpoint to the rich cheese. The herb’s aroma lifts the overall flavor profile, making each bite feel fresh. I always keep a small bowl of chopped dill on hand for that final flourish.
Creative Twists and Variations
This recipe is a playground. Here are some of my favorite ways to switch things up:
Cheddar & Jalapeño Fusion
Add thin slices of jalapeño inside the pickle before folding. The heat from the jalapeño adds a subtle kick that balances the tang. It’s a crowd‑pleaser for those who love a bit of spice. The jalapeño also adds a pop of color, making the bites even more visually appealing.
Mediterranean Medley
Swap cheddar for feta and sprinkle oregano on the breadcrumbs. The salty, tangy feta pairs beautifully with the brine of the pickles. Finish with a drizzle of olive oil and a squeeze of lemon for a Mediterranean twist. It’s a fresh, bright version that’s perfect for summer gatherings.
Smoky BBQ Bliss
Mix a tablespoon of your favorite BBQ sauce into the egg wash before coating. The smoky sweetness of the sauce infuses the crust, giving it a deep, caramelized flavor. Add a pinch of smoked paprika to the breadcrumbs for an extra layer of smokiness. This version is great for backyard barbecues.
Vegan Version
Replace cheddar with vegan cheese and use a plant‑based milk egg substitute. The coating process remains the same, but the texture will be slightly different—still delicious. This variation allows you to keep the same flavor profile while staying plant‑based.
Breakfast Boost
Serve the bites with a side of scrambled eggs and a drizzle of maple syrup for a sweet‑savory breakfast. The crunch and cheese complement the softness of the eggs, and the maple adds a subtle sweetness. This twist turns an appetizer into a hearty morning meal.
Storing and Bringing It Back to Life
Fridge Storage
Place the baked bites in an airtight container and refrigerate for up to 48 hours. The crispness may soften slightly, but the cheese will stay fresh. When you’re ready to enjoy them again, reheat in a preheated oven at 350°F (175°C) for 5-7 minutes. This restores the crunch while keeping the cheese molten.
Freezer Friendly
Freeze the baked bites on a parchment‑lined tray for 1-2 hours before transferring to a freezer bag. They can be stored for up to 2 months. When you’re ready to serve, bake at 350°F (175°C) for 10-12 minutes until heated through. This method preserves the texture and flavor for future gatherings.
Best Reheating Method
The best way to revive the crunch is by baking, not microwaving. If you must microwave, place a paper towel on the dish to absorb moisture. Add a tiny splash of water before reheating to steam back to perfection. This trick keeps the cheese from drying out and the crust from becoming chewy.