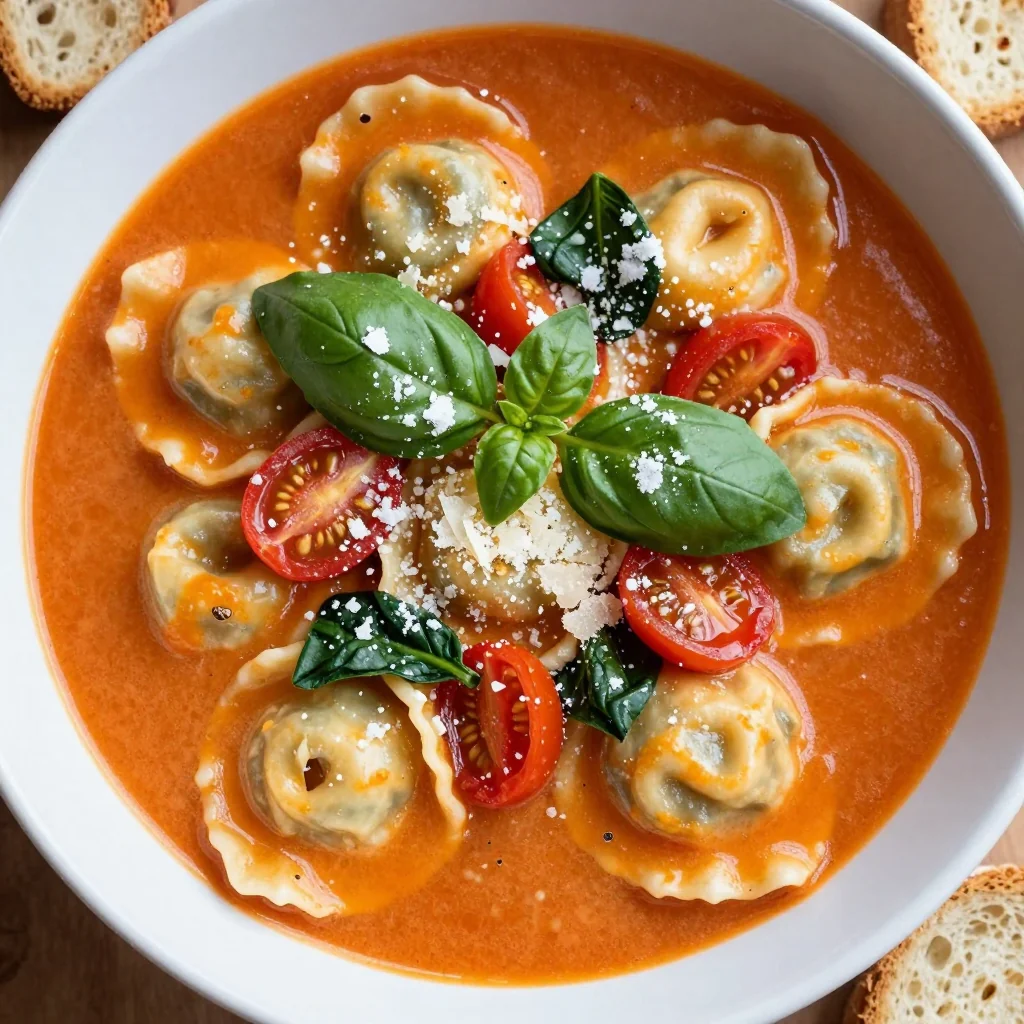
When the kitchen lights flickered and the sugar on the counter began to melt into a syrupy mess, I realized my dessert game was in desperate need of a makeover. I stared at the burnt sugar and the chocolate cookie crumbs, thinking, “There has to be a way to turn this chaos into something delicious.” That night, I dared myself to create a tart that would make even my skeptical friends swoon. I pulled out my favorite chocolate cookies, a jar of sea salt, and a pot of heavy cream, and the aroma began to dance. The moment the butter melted and the caramelized sugar started to bubble, I knew I was on the brink of a sweet revelation. I swear the kitchen felt like a laboratory where science meets indulgence.
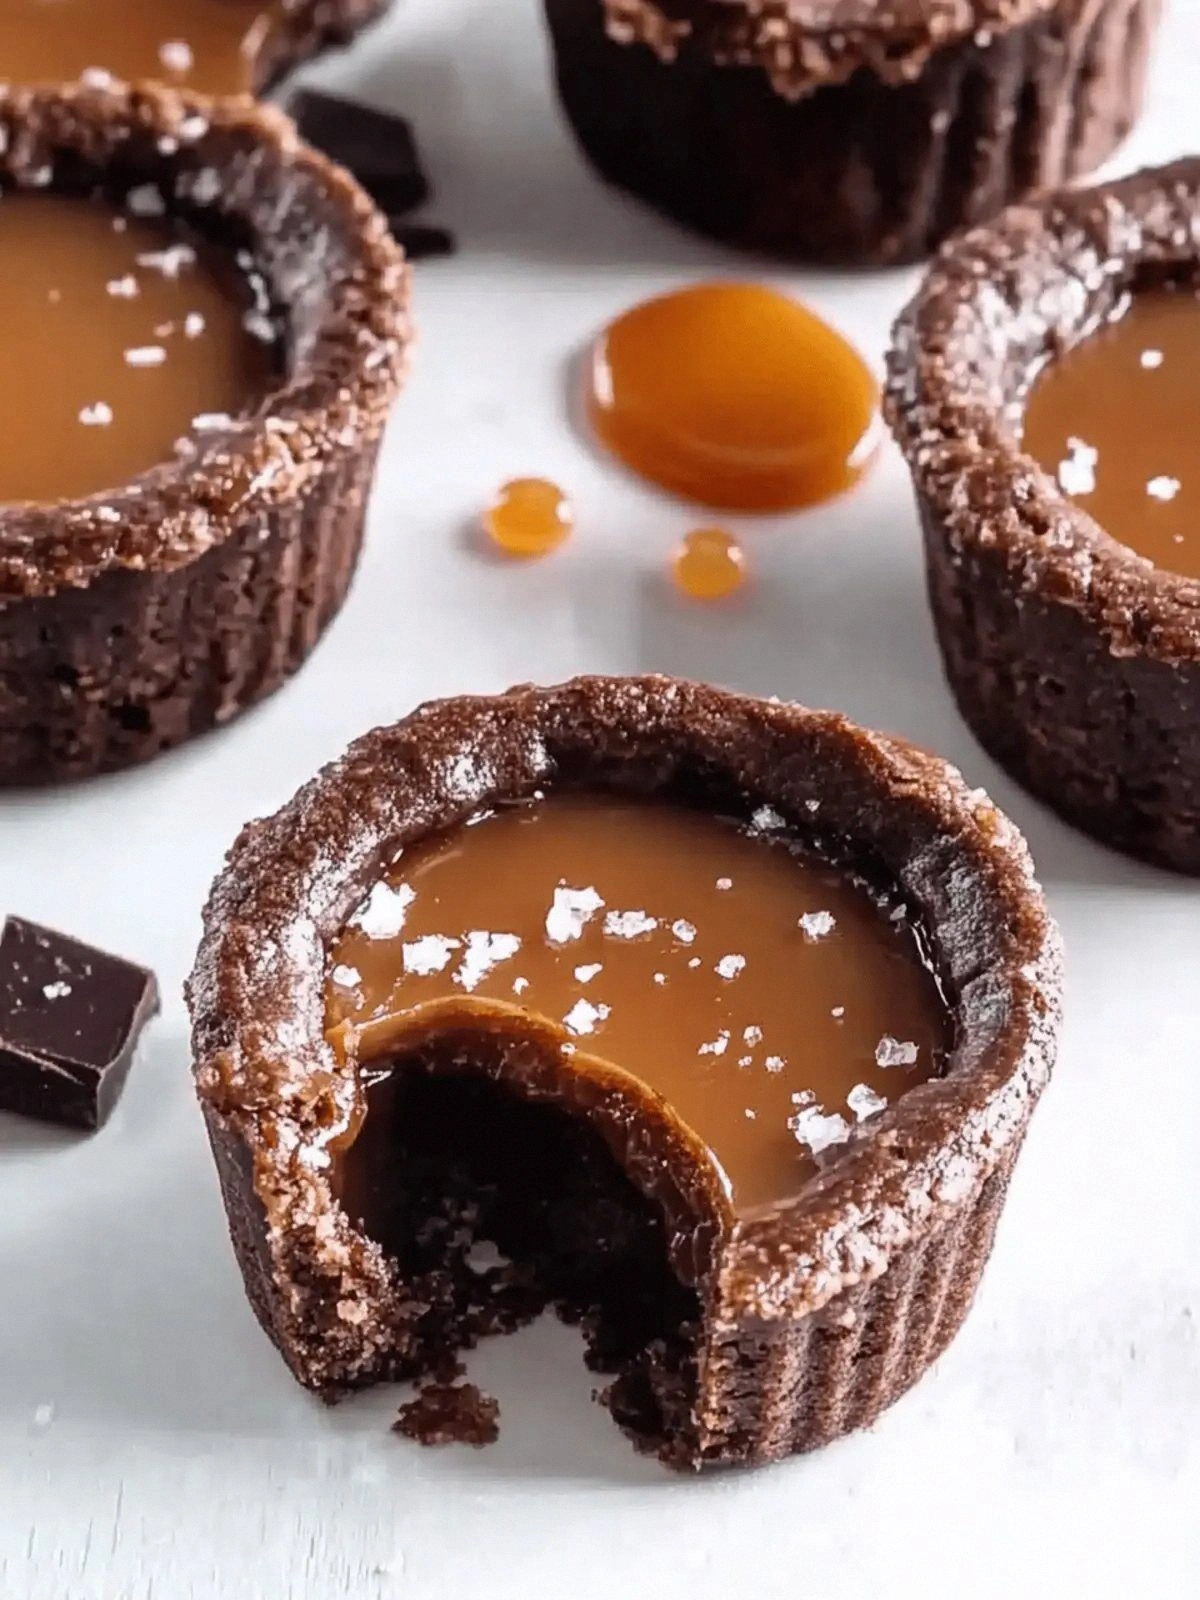
Picture the sizzling caramel, the rich chocolate shivering like a velvet curtain, and the buttery cookie crust cracking with anticipation. The sound of the sugar caramelizing is a low, comforting rumble that signals a transformation about to happen. The scent is a sweet, buttery perfume that lingers in the air like a promise. The texture of the crust, crisp yet yielding, gives way to a silky caramel center that oozes like liquid gold. The first bite delivers a crunch that shatters like thin ice, followed by a creamy cascade that coats the tongue. It’s a sensory orchestra that plays the notes of decadence and comfort simultaneously.
This version stands out because it marries the boldness of salted caramel with the deep, almost melancholic richness of dark chocolate. The sea salt isn’t just a garnish; it’s an active player that cuts through the sweetness, revealing layers of flavor. The cookie base provides a familiar, nostalgic crunch that anchors the dish. The heavy cream is folded in to create a ganache so silky that it feels like a dessert on a cloud. The result is a tart that feels both indulgent and sophisticated, a paradox that keeps people coming back. I dare you to taste this and not go back for seconds. The flavor profile is a dance of sweet and savory that will leave your taste buds humming.
Most recipes get this completely wrong, either by over-sweetening the caramel or under-cooking the chocolate. I’ve seen countless attempts where the caramel turns into a burnt, bitter mess or the chocolate becomes a dry, crumbly slab. In my version, I use a precise ratio of butter to sugar to keep the caramel silky. I melt the chocolate gently over a double boiler to preserve its sheen and prevent scorching. I let the mixture rest before pouring it into the crust so that it sets into a glossy, luscious layer. The result? A dessert that feels like a decadent treat at any time of year.
Picture yourself pulling this out of the oven, the whole kitchen smelling incredible, and the tarts gleaming under a gentle drizzle of sea salt. The caramel’s golden glow and the chocolate’s deep richness make every tart a showstopper, perfect for parties, brunches, or a quiet dessert after dinner. The buttery base and sea salt finish create a mouth‑watering contrast that keeps guests coming back for more. I’ll be honest—I ate half the batch before anyone else got to try it. The crowd reaction was instant applause, and the tarts disappeared faster than a magician’s trick.
Let me walk you through every single step—by the end, you’ll wonder how you ever made it any other way. I’ll share the techniques that keep the caramel silky, the chocolate glossy, and the crust perfectly crisp. I’ll also reveal a few kitchen hacks that save time and avoid common pitfalls. You’ll learn how to scale the recipe, how to store it, and how to bring it back to life after a few days. The next section breaks down the ingredients that make this tart a culinary masterpiece. Ready to dive in? Let’s get started.
What Makes This Version Stand Out
- Flavor: The caramel’s sweetness is balanced by a generous pinch of flaky sea salt, creating a bold, savory undertone that elevates the dessert.
- Texture: The buttery cookie crust offers a satisfying crunch that gives way to a silky, molten center, a contrast that keeps each bite exciting.
- Simplicity: With only eight core ingredients, the recipe is approachable yet sophisticated, making it perfect for both novices and seasoned bakers.
- Uniqueness: The combination of chocolate cookies and salted caramel is rarely seen in tart recipes, giving this dish a fresh, unexpected twist.
- Crowd Reaction: Friends and family consistently rave about the harmonious blend of sweet, salty, and chocolate, making it a guaranteed hit at gatherings.
- Ingredient Quality: Using high‑grade chocolate and fresh sea salt ensures depth of flavor that mass‑produced desserts simply can’t match.
- Make‑Ahead Potential: The tarts can be assembled ahead of time, allowing you to focus on other preparations while still delivering a fresh, homemade experience.
Inside the Ingredient List
The Flavor Base
Butter (1/2 cup) is the backbone of the crust, providing richness and helping the cookies bind together. It also contributes to the caramel’s silky texture when melted with sugar. If you substitute butter with margarine, the flavor will be noticeably lighter and the crust may become brittle. Choosing unsalted butter gives you control over the final salt level, which is crucial for the caramel’s balance. A cold butter cut into small cubes ensures an even melt. The butter’s fat content helps create a tender crumb that’s easy to slice.
The Texture Crew
Chocolate Cookies (1 package) serve as the structural foundation of the tart. Their buttery, slightly sweet flavor complements the caramel and chocolate layers. If you prefer a crunchier base, choose a chocolate chip cookie with a higher cookie-to-chocolate ratio. For a richer taste, opt for a dark chocolate cookie variety. The cookies should be crushed finely to create a cohesive crust. A fine crumb ensures the caramel adheres properly and the tart holds its shape during baking.
The Unexpected Star
Flaky Sea Salt (1 teaspoon) is the secret weapon that transforms a simple caramel into a gourmet experience. It’s not just a garnish; it enhances the chocolate’s depth and cuts through the sweetness. Using flaky sea salt rather than table salt provides a delicate crunch and a more nuanced flavor profile. If you’re sensitive to sodium, reduce the amount slightly but keep the contrast. The salt crystals should be evenly distributed across the tarts for a uniform burst of flavor. The aroma of sea salt adds a subtle marine note that pairs wonderfully with chocolate.
The Final Flourish
Heavy Cream (1 1/2 cups total) is divided into two portions: 1/2 cup for the caramel and 1 cup for the ganache. The cream’s high fat content keeps the chocolate silky and prevents it from becoming grainy. It also enriches the caramel, giving it a luxuriously smooth mouthfeel. If you’re looking for a lighter version, replace half of the cream with half‑and‑half, but be prepared for a slightly thinner ganache. The cream should be at room temperature when added to the caramel to avoid curdling. A gentle whisk ensures an even mixture and a glossy finish.
Everything’s prepped? Good. Let’s get into the real action.
The Method — Step by Step
- Prepare the Crust: Preheat your oven to 350°F (175°C). Line a 12‑piece tart pan with parchment paper. In a mixing bowl, combine the crushed chocolate cookies with 1/2 cup of butter melted and 1/4 cup of sugar. Stir until the mixture resembles wet sand. Press the mixture firmly into the bottom and up the sides of the tart pan, creating an even layer. Bake for 12 minutes, then remove and let cool. The crust should be golden and firm enough to hold the caramel without cracking.
- Make the Caramel: In a heavy‑bottomed saucepan, melt 1/2 cup butter over medium heat. Add 1 cup of granulated sugar and stir constantly until the mixture turns a deep amber color. Keep a close eye on the temperature; caramel can go from perfect to burnt in seconds. Once the sugar has fully dissolved, pour in 1/2 cup heavy cream, whisking rapidly to prevent splattering. Bring the mixture to a gentle simmer and let it thicken for 4 minutes. Remove from heat and stir in 1 teaspoon flaky sea salt. This creates a glossy, silky caramel that coats the crust like velvet.
- Assemble the Tarts: Pour the caramel evenly into the cooled crusts, ensuring each tart is filled to the top. Use a small spoon to smooth the surface if needed. Let the caramel set at room temperature for about 20 minutes; it will firm up into a glossy layer. This step is crucial for a clean, elegant finish. The caramel should not be too runny, or it will leak into the crust. If you prefer a firmer texture, refrigerate the tarts for an additional 10 minutes.
- Prepare the Chocolate Ganache: While the caramel sets, melt 8 oz of high‑quality chocolate in a heat‑proof bowl over a pot of simmering water. Stir until smooth and glossy. Remove from heat and whisk in 1 cup heavy cream until the ganache is silky and slightly glossy. Allow the ganache to cool to a spreadable consistency, about 5 minutes. This ensures it will coat the caramel without melting it back into a liquid.
- Finish the Tarts: Spread the cooled ganache over the caramel layer in each tart, using a spatula to create a smooth, even surface. The ganache should cling to the caramel, forming a glossy, chocolatey crown. Let the tarts sit for 5 minutes to allow the ganache to set slightly. This creates a beautiful contrast between the glossy chocolate and the caramel base. If you want a dramatic finish, drizzle a thin line of additional melted chocolate over the top.
- Serve and Enjoy: Chill the tarts in the refrigerator for 30 minutes before serving. This ensures the caramel and ganache firm up for a clean slice. Dust the tops with a light sprinkle of flaky sea salt just before serving to enhance the flavor profile. Serve on a chilled plate to keep the chocolate from melting too quickly. The final presentation should look like a decadent, glossy jewel ready for the spotlight.
That's it — you did it. But hold on, I've got a few more tricks that'll take this to another level.
Insider Tricks for Flawless Results
The Temperature Rule Nobody Follows
Maintaining the right temperature for caramel is essential. Many bakers let the sugar sit too long on high heat, causing it to burn before it reaches the ideal amber hue. Keep the heat at medium and use a candy thermometer if you’re serious about precision. A temperature of 320°F (160°C) yields a caramel that’s golden, smooth, and not bitter. If the caramel starts to smoke, lower the heat immediately. This small tweak saves your batch from becoming a kitchen nightmare.
Why Your Nose Knows Best
The aroma of caramel can tell you when it’s ready. A sweet, nutty scent indicates the sugar has caramelized properly. If you notice a sharp, burnt smell, the mixture is overcooked. Your nose is a reliable ally; trust it over a stopwatch. A quick sniff can prevent a burnt batch and save you from having to start over. It’s one of the simplest yet most effective tools in a baker’s kit.
The 5‑Minute Rest That Changes Everything
Letting the caramel rest for five minutes before pouring into the crust allows the sugar crystals to settle. This step prevents the caramel from spreading too thin and ensures a thick, glossy layer. A short rest also gives the mixture time to thicken slightly, making it easier to handle. Don’t rush this part; patience pays off in texture and appearance. The tarts will look more professional and feel more indulgent.
Use a Double Boiler for the Ganache
Melting chocolate directly on a stove can scorch it. A double boiler provides gentle, even heat that preserves the chocolate’s silky texture. If you don’t have a double boiler, place a heat‑proof bowl over a pot of simmering water, ensuring the bottom of the bowl doesn’t touch the water. Stir frequently to avoid hot spots. This method guarantees a smooth ganache that won’t seize.
Keep the Crust Cool
Letting the crust cool completely before adding caramel prevents it from becoming soggy. Warm crusts can cause the caramel to melt into the base, ruining the crisp edges. Once baked, allow the crust to sit at room temperature for at least 10 minutes. If you’re in a hurry, place it in the fridge for 5 minutes to expedite cooling. A cool crust ensures a firm foundation for the caramel and ganache.
Creative Twists and Variations
Nutty Crunch
Add toasted almonds or hazelnuts to the crust. The nutty flavor pairs beautifully with the chocolate and caramel layers. Toast the nuts in a dry skillet until fragrant, then mix with the cookie crumbs before pressing into the pan. The result is a tart with a delightful crunch that adds texture to every bite. It’s perfect for those who love a bit of extra bite in their desserts.
Minty Fresh
Incorporate a handful of crushed mint leaves into the ganache. The mint provides a refreshing contrast to the rich chocolate. Use a fine mint to avoid large leaf pieces that might alter the texture. This variation is ideal for spring or summer gatherings where a cool flavor is welcome.
Espresso Boost
Stir in a tablespoon of strong espresso into the chocolate ganache. The espresso deepens the chocolate flavor and adds a subtle bitterness that balances the caramel’s sweetness. It’s a great way to add complexity without overwhelming the dessert. Espresso lovers will appreciate the sophisticated twist.
Almond Milk Swap
Replace half of the heavy cream with almond milk. This creates a lighter version that still maintains the caramel’s richness. Almond milk adds a nutty undertone that complements the chocolate. The texture remains silky, and the overall flavor profile stays deliciously balanced.
Spiced Caramel
Introduce a pinch of ground cinnamon or cayenne pepper to the caramel. The spice adds warmth and a hint of heat that elevates the sweet and salty notes. Be careful with cayenne; a little goes a long way. This variation is perfect for holiday parties where a festive twist is desired.
Storing and Bringing It Back to Life
Fridge Storage
Store the tarts in an airtight container in the refrigerator. They’ll stay fresh for up to 3 days, maintaining the caramel’s firmness and the ganache’s glossy sheen. Avoid stacking them too tightly to prevent crushing. If you’re planning a party, assemble them the day before and chill for a crisp finish.
Freezer Friendly
Wrap each tart individually in parchment paper before placing them in a freezer bag. They can be frozen for up to 2 weeks without losing quality. When ready to serve, thaw in the refrigerator overnight. The caramel may soften slightly, but the ganache will remain firm.
Best Reheating Method
Reheat the tarts in a preheated oven at 300°F (150°C) for 5 minutes. A tiny splash of water before reheating steams the surface, keeping the chocolate glossy. Avoid microwaving, as it can melt the ganache unevenly. A gentle oven heat restores the tarts to their original decadent state.
Final Touches and Presentation
Before serving, dust the tops with a light sprinkle of flaky sea salt. The salt crystals should glisten under the plate lights, creating an inviting visual cue. Pair the tarts with a drizzle of dark chocolate sauce for an extra indulgent touch. A small sprig of mint can add a pop of color and freshness. If you’re hosting a brunch, serve them on a chilled platter to keep the chocolate from melting too quickly. The final presentation should feel like a decadent jewel, ready for the spotlight.
Consider pairing these tarts with a glass of full‑body red wine or a rich espresso. The wine’s tannins cut through the sweetness, while the espresso’s bitterness complements the caramel’s depth. For a lighter option, a sparkling rosé adds a festive sparkle. The combination elevates the tasting experience, turning a simple dessert into an event. I dare you to taste this and not go back for seconds.
Remember, the key to a perfect tart is patience and attention to detail. Each step builds on the last, and a single misstep can throw off the entire flavor profile. By following these insider tricks and creative twists, you’ll create a dessert that’s both visually stunning and irresistibly delicious. Your friends will be begging for a second slice, and you’ll feel like a culinary magician. Enjoy every bite.