I was standing in my kitchen at 2 a.m., half‑asleep, staring at a half‑finished batch of coffee that had somehow turned into a bitter swamp. I had promised my roommate that I’d bring something “cool and caffeinated” to our movie marathon, but the only thing I could find in the pantry was a lonely tub of sweetened condensed milk and a bag of chocolate cookies that had been sitting there for weeks. I stared at the mess, took a deep breath that smelled like burnt toast and espresso, and thought, “What if I could turn this disaster into a dessert that looks like a fancy café‑style parfait, but in a cute, bite‑size cup?” That moment of desperation sparked the creation of the Mini Iced Coffee Parfait Cups that you’re about to read about.
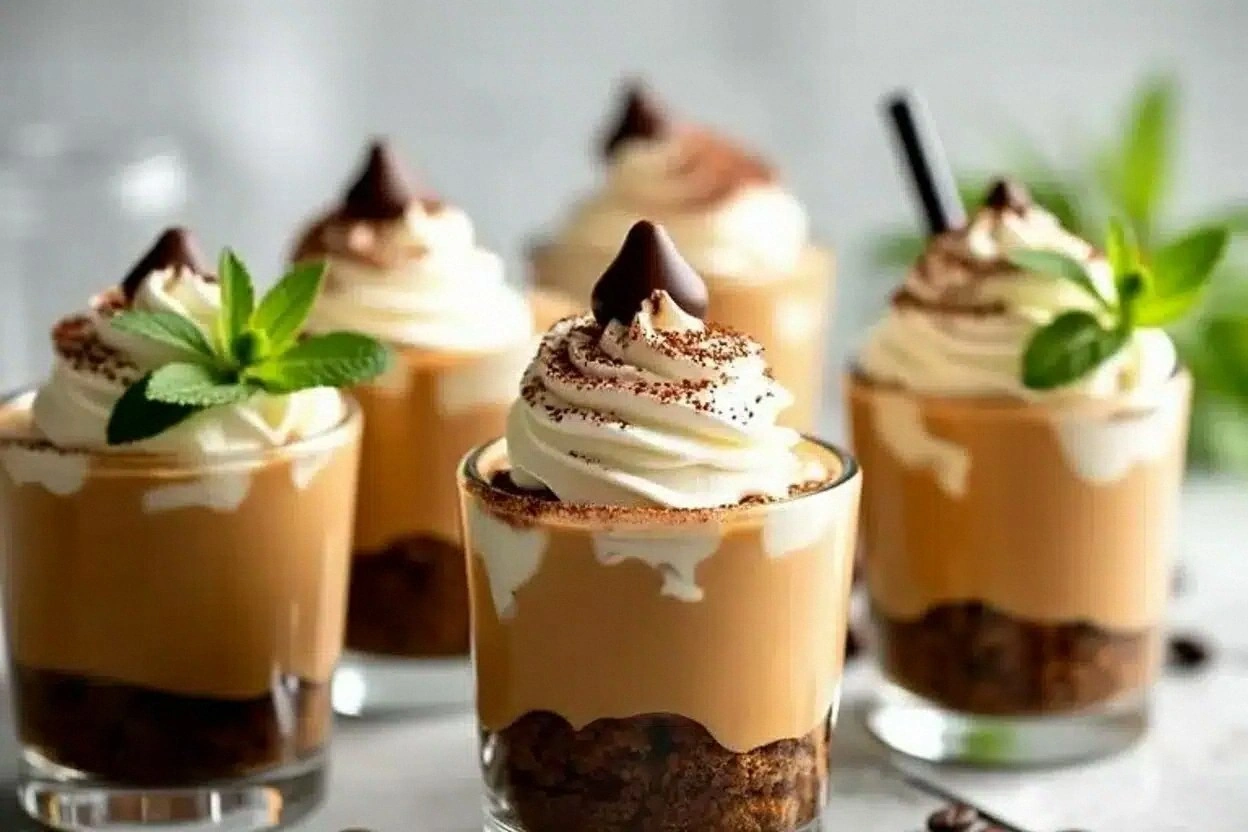
Picture this: a glass cup filled with layers that glisten like a sunrise over a coffee plantation. The first layer is a silky coffee‑condensed milk blend that clings to the bottom like a dark velvet carpet. On top of that, a crunchy cookie crumble adds a satisfying crack that reminds you of stepping on fresh snow. Then a cloud of whipped cream, light as a summer breeze, sits crowned with a drizzle of chocolate syrup that pools in little rivers, and finally a dusting of instant coffee granules that sparkle like espresso‑colored confetti. When you bite in, the cold coffee hits your tongue first, followed by the sweet milk, the buttery crunch, and the airy cream—an orchestra of textures that makes you gasp, “I dare you to taste this and not go back for seconds.”
Most recipes for coffee parfaits either drown the coffee flavor in too much cream or make the dessert feel like a soggy cereal. This version is different because it respects the boldness of a strong brewed coffee while balancing it with just the right amount of sweetness and crunch. I’m talking about a dessert that can stand on its own at a brunch buffet, impress guests at a cocktail party, and even serve as a midnight pick‑me‑up for the insomniac in you. The secret? A simple technique of chilling the coffee, whisking the condensed milk into a glossy custard, and layering everything while the ingredients are still cold—this locks in flavor and texture the way a mason jar preserves a summer peach.
You might be wondering where the magic really hides. Spoiler alert: it’s in the “coffee‑condensed milk swirl” where I fold a splash of vanilla extract and a whisper of cinnamon into the chilled brew before swirling in the condensed milk. This creates a glossy, caramel‑kissed coffee sauce that coats each bite like a satin sheet. It’s a small step, but it makes the whole dessert feel like it was crafted by a pastry chef who has a secret stash of espresso beans. Okay, ready for the game‑changer? Let me walk you through every single step — by the end, you’ll wonder how you ever made it any other way.
What Makes This Version Stand Out
- Bold Coffee Flavor: We use a strong brewed coffee that’s chilled, so the caffeine punch is front‑and‑center. No weak, watery coffee that gets lost under the cream.
- Creamy Sweetness: Sweetened condensed milk adds a buttery, caramel‑like richness that you simply can’t get from regular milk.
- Crunch Factor: Chocolate cookie crumbles give a satisfying snap that contrasts the smooth layers, making each bite an adventure.
- Quick Assembly: The entire process takes under an hour, and you don’t need any baking—perfect for a last‑minute dessert.
- Make‑Ahead Friendly: These cups keep beautifully in the fridge for up to 24 hours, letting the flavors meld together overnight.
- Versatile Toppings: A drizzle of chocolate syrup and a sprinkle of instant coffee granules turn this into a coffee‑lover’s dream.
- Optional Boosts: A splash of coffee liqueur or a pinch of cinnamon can elevate the flavor profile for adult‑only gatherings.
- Eye‑Candy Presentation: Served in clear mini cups, the layers are visible, creating a Instagram‑ready dessert without any extra effort.
Inside the Ingredient List
The Flavor Base
Strong Brewed Coffee (chilled): This is the heart of the parfait. I always use a bold espresso blend because its deep, earthy notes cut through the sweetness of the condensed milk. If you use a weak drip coffee, the dessert will taste flat and watery. A good rule of thumb is to brew it double‑strength, then let it cool completely. For those who don’t have a coffee maker, instant coffee dissolved in hot water works fine—just make sure it’s a strong solution.
The Texture Crew
Sweetened Condensed Milk: This is the secret to that creamy, dreamy layer. Its thick, syrupy texture binds with the coffee, creating a glossy custard that doesn’t separate when you layer it. Skipping it means you’ll end up with a watery coffee layer that sags at the bottom. If you’re avoiding dairy, a coconut condensed milk can be a decent alternative, though the flavor will shift toward tropical.
Whipped Cream: Whether you whip it yourself or grab a can, the cream adds a light, airy contrast. I like to fold in a splash of vanilla extract for extra depth. If you’re dairy‑free, coconut whipped cream works, but be sure to chill the can beforehand so it whips up nicely.
The Unexpected Star
Chocolate Cookie Crumbles: Oreo‑style chocolate cookies give a bittersweet crunch that balances the sweet coffee sauce. You can also use chocolate graham crackers or espresso‑infused biscuits for a more sophisticated flavor. If you love nuts, toss in a handful of chopped hazelnuts or almonds for an extra layer of texture.
Chocolate Syrup: A drizzle of chocolate syrup adds a fudgy finish that looks gorgeous when it pools at the bottom of the cup. It also deepens the chocolate notes, making the dessert feel richer. For a twist, try caramel or caramel‑salt syrup for a salty‑sweet contrast.
The Final Flourish
Instant Coffee Granules (for topping): A light dusting of these granules adds a final coffee punch and a visual pop. It’s like confetti for coffee lovers. If you’re feeling adventurous, swap them for a pinch of finely ground espresso beans for a more intense aroma.
Optional Flavors: Vanilla extract, cinnamon, or a splash of coffee liqueur can be added to the coffee‑condensed milk mixture. Vanilla smooths the edge, cinnamon adds warmth, and coffee liqueur gives an adult‑only kick. Use these sparingly; a little goes a long way.
Everything's prepped? Good. Let's get into the real action…
The Method — Step by Step
Start by brewing 2 cups of strong coffee. Use a French press or espresso machine, and make it double‑strength. Let the coffee cool to room temperature, then pop it in the freezer for about 10 minutes. You’ll know it’s ready when the surface is slightly frosted but not solid. This chilling step is crucial because it prevents the coffee from melting the whipped cream later on.
Kitchen Hack: Transfer the coffee to a shallow metal pan before freezing; this speeds up the cooling process and gives a uniform chill.While the coffee chills, combine 1 cup of sweetened condensed milk with 1 tsp vanilla extract, ½ tsp ground cinnamon, and 2 Tbsp coffee liqueur (if using) in a medium bowl. Whisk until the mixture is smooth and glossy. The vanilla and cinnamon are optional but they add depth that makes the coffee sing.
When the coffee is nicely frosted, pour it into the condensed milk mixture and whisk vigorously. The result should be a thick, caramel‑colored sauce that coats the back of a spoon. This is the “coffee‑condensed milk swirl” that will become the foundation of every cup. Taste it; it should be sweet, slightly bitter, and aromatic. If it feels too bitter, add a splash more condensed milk; if too sweet, a pinch of instant coffee granules will balance it.
Next, whip 1 cup of heavy cream until soft peaks form. Add a pinch of salt and a drizzle of chocolate syrup while whipping to create a subtle chocolate‑infused whipped cream. This step is where you get that cloud‑like texture that will sit atop the coffee layer.
Take your favorite mini clear cups (about 4‑ounce size). Spoon a thin layer of the coffee‑condensed milk sauce into the bottom of each cup—just enough to cover the base. This layer should be about a quarter‑inch thick. Let it set for a minute; you’ll see it firm up slightly as the chilled coffee solidifies.
Now sprinkle a generous handful of chocolate cookie crumbles over the coffee layer. Press lightly so the crumbs stick to the wet surface. The crumbs should form an even blanket, providing that crunchy contrast you crave.
Top the crumble with a generous dollop of the chocolate‑whipped cream. Use a spatula to smooth the surface, creating a gentle dome. This is the “soft landing” for the final drizzle.
Watch Out: If you over‑fill the cups, the layers may spill when you add the final drizzle. Keep each component to a manageable height.Drizzle 1 Tbsp of chocolate syrup over each whipped cream dome, allowing it to cascade down the sides. The syrup should pool slightly at the bottom, creating a visual contrast of dark and light.
Finish with a light dusting of instant coffee granules. Use a fine mesh sieve to ensure an even distribution. This final touch adds a subtle bitterness that balances the sweetness and gives the parfait a professional café look.
Refrigerate the assembled cups for at least 15 minutes before serving. This allows the flavors to meld and the layers to set, ensuring each bite is perfectly balanced. When you’re ready, pull them out, serve with a spoon, and watch your guests’ faces light up.
That’s it — you did it. But hold on, I’ve got a few more tricks that’ll take this to another level…
Insider Tricks for Flawless Results
The Temperature Rule Nobody Follows
Never let any component sit at room temperature for more than five minutes once it’s been prepared. The coffee should stay chilled, the whipped cream should stay cold, and the cookie crumbs should stay dry. When everything stays cold, the layers stay distinct and you avoid a soggy bottom. I once tried to assemble everything on a warm kitchen counter and ended up with a mushy mess—lesson learned.
Why Your Nose Knows Best
Before you add the chocolate syrup, give it a quick sniff. If you detect any burnt sugar notes, it means the syrup has been heated too long and will taste bitter. A fresh, sweet aroma signals it’s ready to drizzle. Trust your nose; it’s a better gauge than a timer.
The 5‑Minute Rest That Changes Everything
After assembling, let the parfait cups rest in the fridge for at least five minutes. This short rest lets the coffee‑condensed milk layer firm up and the whipped cream settle, creating a clean separation between layers. Skipping this rest can cause the cream to melt into the coffee, ruining the visual appeal.
Cookie Crumble Consistency
If you want the crumble to stay crunchy longer, lightly toast the cookie pieces in a dry skillet for 30 seconds. The heat removes excess moisture, ensuring the crunch stays crisp even after refrigeration. A friend once stored the cups with un‑toasted crumbs, and they turned soggy within an hour—don’t let that happen to you.
Layering Order Magic
Always start with the coffee layer, then the crumble, and finish with the whipped cream. If you reverse the order, the crumble will sink, and the coffee will seep into the cream, making everything mushy. This hierarchy keeps each texture in its rightful place.
Creative Twists and Variations
This recipe is a playground. Here are some of my favorite ways to switch things up:
Mocha Madness
Add a tablespoon of melted dark chocolate to the coffee‑condensed milk mixture. The result is a richer, more intense chocolate‑coffee flavor that will please any chocolate aficionado.
Nutty Delight
Swap the cookie crumbles for chopped toasted hazelnuts or almonds. The nutty aroma pairs beautifully with coffee, and the extra crunch adds a sophisticated touch.
Spiced Autumn
Incorporate a pinch of pumpkin spice or nutmeg into the coffee layer. This variation is perfect for cooler months and gives the parfait a warm, cozy vibe.
Vegan Velvet
Use coconut whipped cream and coconut condensed milk. The flavor shifts toward tropical, but the texture remains just as luscious. Top with dairy‑free chocolate chips for extra indulgence.
Alcohol‑Infused
Replace the coffee liqueur with a splash of Irish cream or Kahlúa. This adds an adult‑only depth and makes the dessert suitable for after‑dinner drinks.
Fruit Fusion
Stir in a teaspoon of orange zest into the coffee layer for a citrusy brightness that cuts through the richness. Garnish with a tiny candied orange peel for visual flair.
Storing and Bringing It Back to Life
Fridge Storage
Seal the cups with airtight lids or plastic wrap and store them in the refrigerator for up to 24 hours. The coffee layer will continue to set, and the whipped cream will stay firm. Before serving, give each cup a quick stir of the coffee layer to re‑integrate any settled syrup.
Freezer Friendly
If you need to make them ahead, you can freeze the assembled cups for up to one month. Freeze without the whipped cream; add fresh whipped cream after thawing for the best texture. Thaw in the fridge overnight before serving.
Best Reheating Method
When you want to enjoy a warm version, place the cup (without the whipped cream) in a microwave for 15‑20 seconds, then stir the coffee layer and top with freshly whipped cream. Add a tiny splash of water before microwaving; it creates steam that revives the coffee’s silky texture without drying it out.