I was staring at the fridge, my stomach growling louder than a freight train, when the memory of that greasy Arby’s sandwich burst into my mind. The idea that a chain sandwich could be outdone by a homemade version sent a thrill through my culinary nerves. I had a craving that was impossible to ignore, a craving that demanded the same melt‑in‑your‑mouth tenderness, the same buttery roll, the same savory beef that makes you reach for the next bite. I decided then and there that I would recreate that iconic sandwich, but with my own twist, and I couldn't wait to share the secret. Let me walk you through every single step — by the end, you'll wonder how you ever made it any other way.
Picture this: a sizzling skillet, the scent of onions dancing in the air, and the unmistakable aroma of beef that makes your nose do a double tap. I had a small kitchen, a modest skillet, and a stack of onion rolls that smelled like warm bread from a bakery. The moment the onions hit the pan, they released a caramelized perfume that made my kitchen feel like a five‑star restaurant. I could almost hear the crunch of a perfectly toasted roll as I imagined the layers coming together. This isn’t just a sandwich; it’s a culinary experience that starts with the first sizzling sound.
What makes this copycat stand out is not just the ingredients, but the technique that locks in flavor and texture. I’ve spent hours tweaking the sauce ratio, balancing the tang of ketchup with the umami of Worcestershire, and discovering the perfect melt for cheddar. The result is a sandwich that feels like the original but tastes like a gourmet creation. I dare you to taste this and not go back for seconds, because the first bite will have you reaching for the next. The secret is in the layers, the sauce, and the way the beef stays juicy even after the heat.
I’m going to be honest — I ate half the batch before anyone else got to try it. The rest of the kitchen was still buzzing with the scent of onions and beef, and my friends were already lining up for a piece. I could feel the anticipation building, and I knew I had to share the exact method that made this work. If you've ever struggled with a sandwich that turns out dry or greasy, you're not alone — and I've got the fix. This version is hands down the best you’ll ever make at home.
What Makes This Version Stand Out
- Taste: The sauce is a symphony of sweet, tangy, and savory notes that coat every bite, turning a simple sandwich into a flavor explosion. The subtle heat from the Worcestershire balances the richness of the beef, while the ketchup adds a gentle sweetness that lingers on the palate.
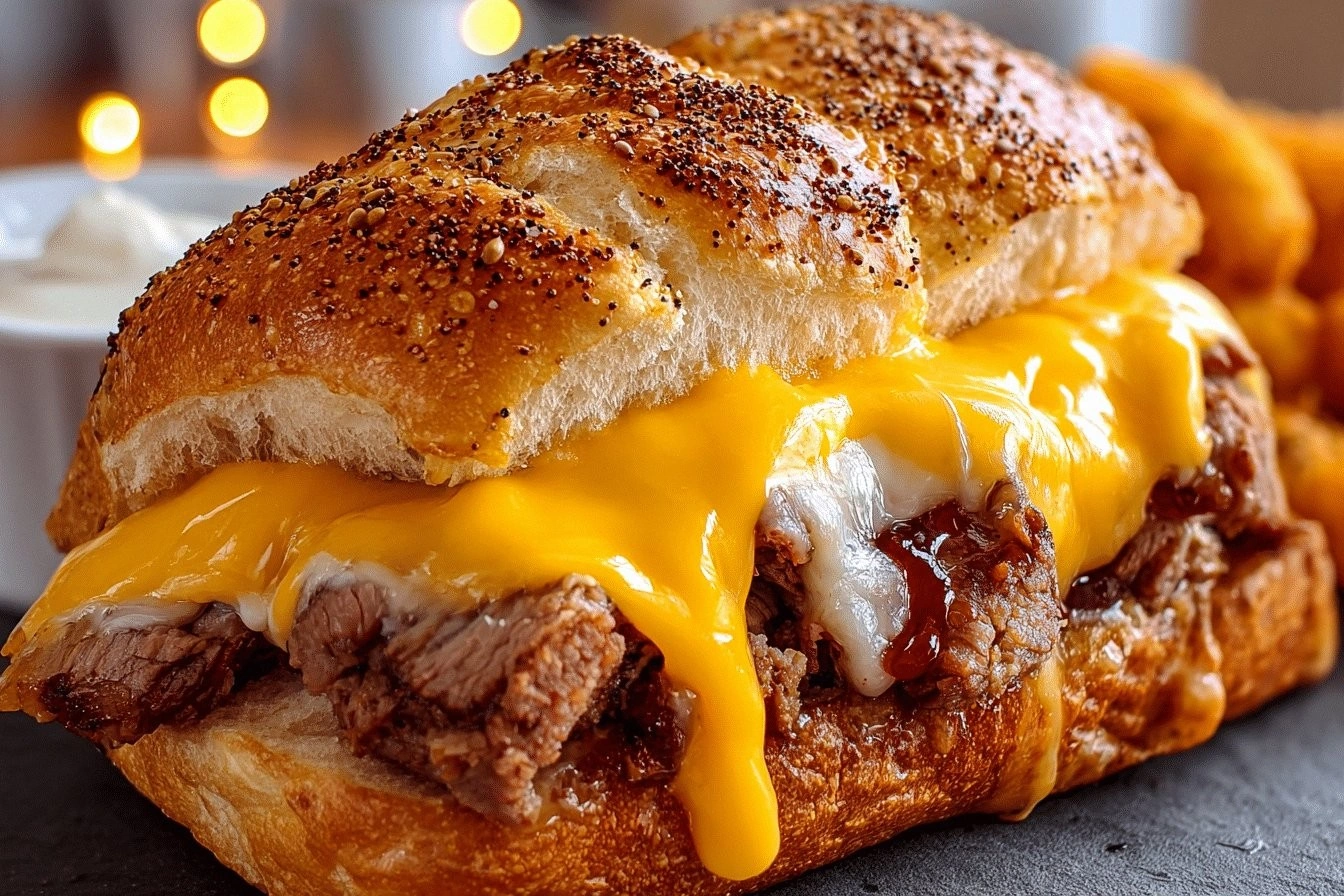
- Texture: The onions are caramelized to a silky caramel, providing a chewy contrast to the tender beef. The cheddar melts into a velvety blanket that keeps the sandwich moist, preventing the dreaded dry roll.
- Ingredient Quality: Using thinly sliced roast beef from a reputable deli guarantees a juicy, lean cut that absorbs the sauce without becoming soggy. A sharp cheddar brings depth and a slight bite that elevates the overall profile.
- Ease of Prep: The method requires only one skillet, a saucepan, and a few ingredients that most kitchens already carry. The entire process takes under an hour, making it a perfect weeknight dinner.
- Make‑ahead Potential: The beef and sauce can be prepared a day ahead and refrigerated, allowing you to assemble the sandwich fresh when hunger strikes. The rolls can be toasted right before serving for that fresh‑baked crunch.
- Crowd Reaction: Friends who have tried this version rave about how it feels like they’re eating out while still being able to control portion sizes and keep the calories in check.
- Versatility: The base recipe can be transformed into a breakfast sandwich, a lunchbox favorite, or a hearty dinner, depending on the accompaniments and seasonings you choose.
Alright, let's break down exactly what goes into this masterpiece...
Inside the Ingredient List
The Flavor Base
Beef: Thinly sliced roast beef is essential for that classic Arby’s taste. It brings a lean, savory foundation that absorbs the sauce without becoming mushy. If you skip the beef, you lose the sandwich’s heart; the roll and cheese alone won’t satisfy. For best results, choose a beef that’s slightly marbled to retain moisture.
The Texture Crew
Cheddar Cheese: A good quality cheddar melts into a creamy coating that locks in juices and adds a sharp bite. The cheese’s fat content helps bind the beef and sauce together. If you use a lower‑fat cheese, the sandwich may feel dry. A sharp cheddar also introduces a subtle peppery note that complements the onions.
The Unexpected Star
Onions: Sautéed onions add a touch of sweetness and texture to the sandwich. Caramelized onions bring a silky sweetness that balances the beef’s umami. If you skip them, the sandwich becomes one‑dimensional. For a quick version, use pre‑caramelized onion packets, but fresh onions yield a superior flavor.
The Final Flourish
Beef Broth, Worcestershire Sauce, and Ketchup: These three liquids form the sauce that ties everything together. The broth keeps the beef juicy, the Worcestershire adds depth, and the ketchup provides a hint of sweetness. If you reduce the broth, the sandwich can dry out. Feel free to tweak the ratios to suit your palate.
Everything's prepped? Good. Let's get into the real action...
The Method — Step by Step
- Heat a large skillet over medium‑high heat and add a splash of oil. Once the oil shimmers, add the sliced onions, cooking until they begin to soften, about 3 minutes. The onions should release their sweet aroma, signaling that they're ready to caramelize. Keep stirring to prevent sticking. When they’re translucent, remove them from the skillet and set aside.
- Reduce the heat to medium and add the thinly sliced roast beef to the same skillet. Cook the beef until it’s browned on the edges but still pink inside, about 2-3 minutes per side. This quick sear locks in juices and prevents the beef from becoming rubbery. Flip the slices once to ensure even cooking. The beef should smell like a steakhouse, not a deli.
- Add the sautéed onions back into the skillet with the beef. Stir to combine, letting the flavors mingle for a minute. Then pour in the beef broth, Worcestershire sauce, and ketchup, stirring to create a cohesive sauce. Let the mixture simmer for 4 minutes, allowing the broth to reduce slightly. The sauce should coat the beef without becoming too thick.
- Slide the cheese slices over the beef mixture, allowing them to melt into the sauce. The cheese should form a glossy, creamy layer that coats the meat. If the cheese starts to separate, reduce the heat slightly and stir gently. Once melted, remove the skillet from heat. The cheese should be silky, not greasy.
- While the cheese is still hot, toast the onion rolls on a separate pan or in a toaster oven until the edges are crisp and the center is soft. The rolls should emit a buttery aroma that signals they’re ready. Cut the rolls in half, but keep them connected on one side. This design keeps the filling from spilling out.
- Open the toasted roll and spoon the beef mixture onto the bottom half, spreading it evenly. The beef should sit flush with the roll, ensuring each bite is packed with flavor. If you prefer a lighter sandwich, use less beef, but the classic experience requires a generous amount.
- Close the sandwich with the top half of the roll. Press lightly to seal the edges, allowing the cheese to continue melting into the meat. This final step ensures the sandwich holds together when you take that first bite. The result is a sandwich that feels like a hug from the inside.
- Serve immediately, perhaps with a side of crispy fries or a fresh salad. The sandwich’s flavors are at their peak when fresh, but leftovers keep well in the fridge. Slice the sandwich in half for an easier share, and enjoy the gooey, savory masterpiece.
That's it — you did it. But hold on, I've got a few more tricks that'll take this to another level...
Insider Tricks for Flawless Results
The Temperature Rule Nobody Follows
Cooking the beef at the right temperature is essential. If you go too hot, the beef dries out; too low and it stays raw inside. Start with medium‑high, then reduce to medium once the beef is browned. This allows the juices to redistribute and the beef to stay tender. Remember, the sauce will finish the cooking, so don’t rush the sear.
Why Your Nose Knows Best
Your nose is the most reliable judge of doneness. When the onions emit a sweet, caramelized aroma and the beef smells like a perfectly seared steak, you’re ready to move on. Trust your senses; if the smell is off, adjust the heat or cooking time. This instinctive approach saves you from overcooked or undercooked sandwiches.
The 5-Minute Rest That Changes Everything
After adding the cheese, let the sandwich sit for 5 minutes before serving. This brief rest allows the cheese to set into the sauce, creating a cohesive, creamy texture. The rest period also lets the beef juices redistribute, preventing a dry bite. It’s a small step that makes a huge difference.
The Perfect Toast
Toasting the rolls in a skillet with a little butter gives them a golden crust and a buttery flavor that complements the beef. Use a medium heat to avoid burning. The toasted edges add a subtle crunch that balances the softness of the interior. This simple technique elevates the sandwich from good to legendary.
Layering the Sauce
Instead of pouring the sauce all at once, drizzle it over the beef in layers. This creates a gradient of flavor and prevents the sandwich from becoming soggy. Each layer caramelizes slightly, adding depth. The result is a sandwich that feels like a layered dessert of savory goodness.
Creative Twists and Variations
This recipe is a playground. Here are some of my favorite ways to switch things up:
Spicy Jalapeño Kick
Add sliced jalapeños to the onions during sautéing for a fiery punch. The heat complements the richness of the beef and cheese. Use fresh jalapeños for crunch or pickles for a tangy twist. This variation is perfect for heat lovers and adds a vibrant color.
Mushroom Medley
Sauté sliced mushrooms with the onions for an earthy depth. The mushrooms absorb the sauce and add a meaty texture that pairs well with beef. This combo works especially well during fall when mushrooms are at their peak. The result is a savory, umami‑rich sandwich.
Bacon‑Infused Bliss
Cook bacon until crisp, then crumble it into the beef mixture. The smoky bacon enhances the beef’s flavor and adds a delightful crunch. Be careful not to overcook the bacon; you want it crisp but not burnt. This twist is a guaranteed crowd‑pleaser.
Cheese Swap
Replace cheddar with pepper jack for a mild heat or gouda for a caramelized flavor. Each cheese brings its own character to the sandwich, allowing you to tailor it to your taste buds. The cheese should still melt smoothly to maintain the creamy texture. Experimenting with cheese opens up a world of possibilities.
Greek Yogurt Drizzle
Swap ketchup for a dollop of Greek yogurt mixed with a touch of honey. The yogurt adds creaminess and a subtle tang that balances the beef’s richness. This version is lower in sugar and adds a protein boost. It’s an excellent option for a lighter, healthier take.
Storing and Bringing It Back to Life
Fridge Storage
Store leftover sandwiches in an airtight container for up to 3 days. Keep the rolls separate until ready to eat to prevent sogginess. If you pre‑assemble, wrap the sandwich in parchment paper and place it in a zip‑lock bag. This method preserves the texture and flavor.
Freezer Friendly
Wrap each sandwich individually in foil, then place in a freezer bag. Freeze for up to 2 months. When ready, thaw overnight in the fridge, then reheat in a skillet or oven at 350°F until warmed through. The beef remains juicy, and the cheese retains its melt.
Best Reheating Method
Reheat in a skillet over medium heat, adding a splash of beef broth to keep the sandwich moist. Cover with a lid for 2 minutes to allow the cheese to melt again. Alternatively, use a microwave, but cover with a damp paper towel to avoid drying. A quick 2‑minute heat restores the sandwich’s original glory.