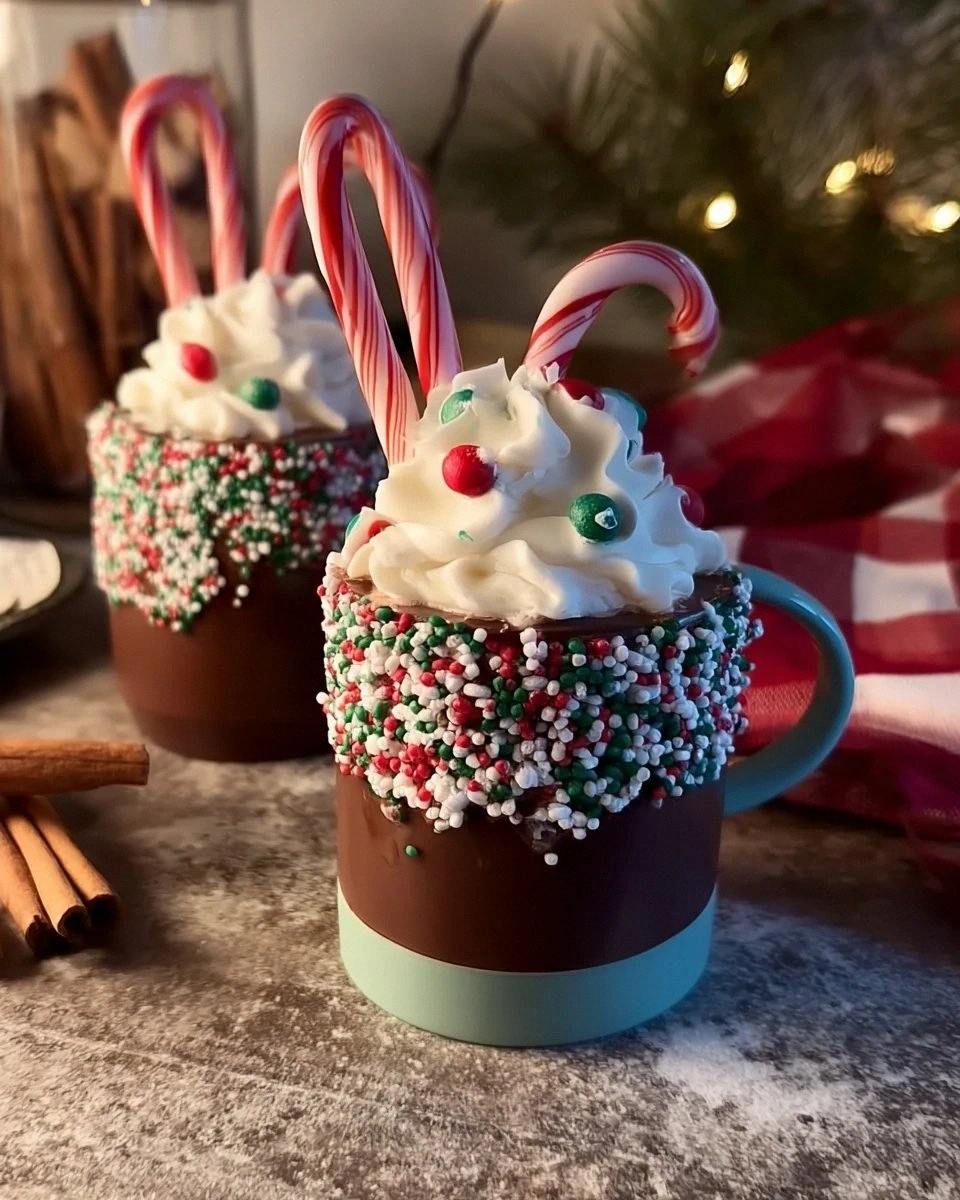
I still remember the Great Hot Chocolate Catastrophe of 2018 like it was yesterday. There I was, Christmas Eve, armed with nothing but good intentions and a packet of powdered mix that promised "rich, authentic flavor" but delivered something closer to brown water with a hint of disappointment. My nephew took one sip, looked me dead in the eye, and asked if Santa was bringing better cocoa next year. That stung. But here's the beautiful thing about epic kitchen fails — they send you on obsessive quests for perfection. Over the next twelve months, I became the Goldilocks of hot chocolate, testing every method from ancient Aztec techniques to molecular gastronomy wizardry. I burned through three saucepans, gained seven pounds in the name of research, and may have permanently stained my favorite sweater with molten chocolate. The result? These Christmas Chocolate Hot Cups that have become legendary in my family. They're like drinking liquid velvet that's been kissed by winter itself, with layers of complexity that make those sad little packets taste like dishwater in comparison.
Picture this: It's December 23rd, snow is falling in those perfect movie-set flakes, and you're standing at your stove watching premium cocoa powder bloom into a glossy, mahogany river. The scent that wafts up is intoxicating — dark chocolate with hints of espresso, cinnamon, and something mysteriously festive that makes everyone ask "what is that incredible smell?" as they wander into the kitchen like chocolate-seeking zombies. That first sip coats your tongue like silk, warming you from the inside out while tiny marshmallows melt into cloud-like puffs of sweetness. But here's the kicker — these aren't just any hot chocolate cups. We're talking about individual servings baked right into festive mugs, creating a molten chocolate experience that sits somewhere between pudding and soufflé. It's the kind of dessert that makes grown adults close their eyes and sigh with contentment.
What makes this recipe absolutely game-changing is the technique I stumbled upon after my tenth attempt. Instead of just mixing everything together like every other recipe suggests, we're creating layers of chocolate intensity through a combination of blooming cocoa, tempering eggs, and a final bake that transforms simple ingredients into something magical. The edges develop these slightly crispy, brownie-like corners while the center stays gloriously molten. It's like having your cake and drinking it too — except it's hot chocolate, and it's infinitely better than cake. Trust me, once you serve these at your holiday gathering, you'll become the person everyone begs for the recipe. I know because I've been that person for five years running now.
Stay with me here — this is worth it. We're about to create something that'll make you the hero of every cold winter night, the savior of last-minute dinner parties, and quite possibly the most popular person in your neighborhood. Let me walk you through every single step — by the end, you'll wonder how you ever made it any other way.
What Makes This Version Stand Out
Velvet Revolution: Most hot chocolate recipes throw everything in a pot and hope for the best. We're blooming cocoa powder in hot cream first, unlocking flavor compounds that stay dormant in traditional methods. This creates a depth that makes cheap cocoa taste like cardboard in comparison.
Molten Magic: Instead of just drinking chocolate, we're baking individual servings that create a hot chocolate lava cake effect. The edges set while the center stays fluid, giving you two textures in every spoonful. It's like having your pudding and drinking it too.
Spice Alchemy: A whisper of cardamom and espresso powder amplifies the chocolate without announcing themselves. They work behind the scenes like culinary ninjas, making people say "wow, this tastes incredible" without being able to pinpoint why.
Foolproof Technique: Water bath baking prevents curdling while ensuring even heat distribution. This means no grainy texture, no separated fats, just smooth chocolate perfection every single time. Even kitchen novices nail this on their first attempt.
Make-Ahead Marvel: Mix everything the night before, refrigerate, then bake fresh when guests arrive. The flavors actually deepen overnight, making this the ultimate stress-free entertaining weapon. I've prepped these three days ahead and they're somehow even better.
Crowd Psychology: Individual servings make people feel special, like you've created something just for them. Plus, presentation is Instagram-gold without any fancy piping or decorating skills required. They look professionally crafted but take minimal effort.
Year-Round Versatility: Swap peppermint for orange zest in summer, add chili for Cinco de Mayo, or spike with bourbon for New Year's. This base recipe adapts to every season and celebration, making it your new go-to dessert.
Inside the Ingredient List
The Chocolate Foundation
Let's talk cocoa powder, because this is where most recipes go tragically wrong. That bargain bin cocoa that's been sitting in your pantry since 2019? It's going to make your hot cups taste like cardboard. You want Dutch-processed cocoa — it's been alkalized to remove bitterness while developing those deep, complex chocolate notes that make people weak in the knees. The difference between natural and Dutch-processed cocoa is like comparing instant coffee to a perfectly pulled espresso shot. Both technically work, but only one makes you close your eyes and sigh with satisfaction.
Dark chocolate is our next non-negotiable. Reach for something between 60-70% cacao — enough bitterness to balance the sweetness but not so intense that it overpowers the delicate dance of flavors. I've made these with everything from grocery store brands to single-origin craft chocolate, and honestly, anything above "baking chocolate" quality works. The key is avoiding chocolate chips, which contain stabilizers that prevent proper melting. Chop your chocolate into thumbnail-sized pieces so they melt evenly and create those gorgeous molten pockets throughout each cup.
The Creamy Dream Team
Heavy cream isn't just for richness — it's the carrier that helps bloom our cocoa powder and creates that velvety mouthfeel that separates good hot chocolate from life-changing hot chocolate. Don't even think about substituting milk here; we need the fat content to create proper emulsification. When the hot cream hits the cocoa, something magical happens. The heat activates flavor compounds that stay locked away in cold liquid, releasing aromatics that'll have neighbors knocking on your door asking what smells so incredible.
Whole eggs provide structure while keeping the texture silky rather than rubbery. Room temperature eggs incorporate more smoothly, preventing those annoying white streaks that can appear when cold eggs meet warm chocolate. If you forget to take them out ahead (and we all do), submerge them in warm water for five minutes while you prep everything else. The protein in eggs sets during baking, creating that perfect contrast between the firm edges and molten center that makes these cups absolutely irresistible.
The Festive Flavor Boosters
Vanilla extract might seem basic, but it's the backbone that ties everything together. Real vanilla, not the imitation stuff that tastes like regret. The alcohol in extract burns off during baking, leaving behind those warm, floral notes that make chocolate taste more chocolatey. It's like adding a bass line to music — you might not consciously notice it, but you'd definitely miss it if it wasn't there.
Our spice blend is where the Christmas magic happens. Cinnamon provides warmth without overwhelming, while a pinch of nutmeg adds that nostalgic holiday feeling. The secret weapon? A whisper of cayenne pepper that you'd never identify but somehow makes the chocolate taste deeper and more complex. It's the culinary equivalent of adding a pinch of salt to chocolate chip cookies — it doesn't make things spicy, just more interesting.
The Sweet Science
Granulated sugar dissolves completely during baking, but brown sugar adds moisture and a subtle caramel note that makes these cups taste like they came from a professional bakery. I use a 50/50 blend for the perfect balance. Too much brown sugar and they become cloying; too much white and they lose that depth that makes people ask for your secret.
Marshmallows aren't just for topping — we fold mini marshmallows right into the batter. They melt during baking, creating pockets of sweetness that burst in your mouth like tiny sugar fireworks. Use the fresh, soft ones, not the stale bag that's been hiding in your pantry since last summer. Pro tip: Freeze them for ten minutes before folding in to prevent complete dissolution during baking.
The Method — Step by Step
- Start by positioning your oven rack in the center and preheating to 325°F. This lower temperature is crucial — too hot and your edges will overcook before the center sets properly. While the oven heats, bring a kettle of water to boil for the water bath. This isn't just fancy chef nonsense; the steam creates gentle, even heat that prevents the dreaded scrambled egg texture that ruins so many custards. Your future self will thank you for this patience.
- Heat the heavy cream in a small saucepan over medium heat until it just begins to steam. You want tiny bubbles forming around the edges but not a rolling boil. This is where most people mess up — boil the cream and you'll scorch the chocolate later. The surface should shimmer like satin, and when you stir it, you should see wisps of steam curling up. This takes about three minutes if you started with cold cream, so don't wander off to check Instagram.
- Remove the cream from heat and whisk in the cocoa powder vigorously. This blooming step is pure magic — the hot liquid releases flavor compounds that stay locked away in dry cocoa. Whisk until you have a smooth, glossy mixture that looks like melted chocolate. Let it cool for exactly five minutes. Too hot and you'll scramble the eggs later; too cool and it won't incorporate properly. Set a timer and use this break to grease your ramekins with butter.
- While the chocolate mixture cools, whisk together eggs, sugar, vanilla, and spices in a large bowl. Use room temperature eggs for the smoothest incorporation. Whisk vigorously for about thirty seconds — you're not trying to incorporate air, just ensuring everything is well combined. The mixture should be pale yellow and slightly thickened. If you see sugar granules at the bottom, keep whisking. This step prevents grainy texture in your final cups.
- Now comes the crucial tempering step. While whisking constantly, slowly pour the warm chocolate mixture into the egg mixture in a thin stream. This raises the temperature of the eggs gradually, preventing them from scrambling. Think of it like introducing two friends who need time to warm up to each other. If you dump it all in at once, you'll end up with chocolate scrambled eggs that no amount of straining can fix. Patience now means perfection later.
- Add your chopped chocolate and marshmallows to the mixture, folding gently with a spatula. The residual heat will melt the chocolate slightly, creating those gorgeous pockets of molten goodness. Don't overmix — you want distinct chocolate chunks, not homogenous chocolate soup. The batter should be thick and glossy, coating your spatula like liquid velvet. If it seems too thin, your cream was too hot; too thick and it was too cool. Either way, forge ahead — it'll still taste incredible.
- Pour the mixture into buttered ramekins, filling them about three-quarters full. Place these in a roasting pan and pour the hot water from your kettle around them, coming halfway up the sides. This water bath is your insurance policy against overcooking. Carefully transfer to the oven — any sloshing here will result in water in your cups, which is about as appealing as it sounds. Bake for 22-25 minutes until the edges are set but the centers still jiggle slightly when you gently shake the pan.
- Remove from the water bath immediately to prevent carryover cooking. Let them rest for exactly five minutes — this sets the edges while keeping the centers fluid. Dust with powdered sugar or cocoa, add a few mini marshmallows on top, and serve warm. The transformation from liquid batter to molten cups is pure kitchen alchemy that never gets old. Your guests will think you're a wizard, and honestly, you're not going to correct them.
That's it — you did it. But hold on, I've got a few more tricks that'll take this to another level...
Insider Tricks for Flawless Results
The Temperature Rule Nobody Follows
Here's the thing about chocolate desserts — they're divas when it comes to temperature. Serve these too hot and you lose the textural contrast; too cool and they set into regular chocolate pudding. The sweet spot is exactly 140°F in the center. How do you achieve this without a thermometer? After five minutes of resting, the ramekin should feel warm but not hot when you touch the bottom. It's like testing a baby bottle — if it's too hot for your wrist, it's too hot for optimal enjoyment. This temperature allows the flavors to bloom while maintaining that crucial molten center.
Why Your Nose Knows Best
Your sense of smell is actually a more reliable indicator than timing when it comes to these cups. When they're perfectly baked, your kitchen fills with the scent of rich chocolate that's slightly nutty and deeply aromatic. If you smell something sharp or burnt, you've gone too far. The chocolate aroma should be inviting, not overwhelming. I once had a friend who set a timer and walked away, only to return to chocolate that smelled like disappointment. Trust your senses — they've been honed over thousands of years of human evolution for exactly this purpose.
The 5-Minute Rest That Changes Everything
I know it's torture, but those five minutes of resting aren't optional. During this time, the proteins finish setting and the temperature equalizes throughout the cup. It's like letting a steak rest — the difference between amateur and restaurant quality. Use this time to gather your toppings, warm your serving spoons, or just bask in the adoration of your guests. The anticipation actually makes them taste better — it's science. Well, it's psychology, but same difference when it comes to dessert enjoyment.
The Serving Ritual That Impresses
Presentation matters more than you think. Serve these on small dessert plates with a proper dessert spoon, not a teaspoon. The wider spoon allows guests to get both the molten center and the firmer edge in each bite. Add a small pitcher of cold cream on the side — the temperature contrast elevates the experience from great to unforgettable. And always, always serve with napkins. These are gloriously messy in the best possible way, and your guests will thank you for planning ahead.
Creative Twists and Variations
This recipe is a playground. Here are some of my favorite ways to switch things up:
Peppermint Bark Dreams
Replace the cinnamon with 1/4 teaspoon peppermint extract and fold in crushed candy canes instead of marshmallows. The mint cuts through the richness while the candy adds delightful crunch. Top with a dollop of whipped cream and more crushed candy for a dessert that tastes like Christmas morning. Kids go absolutely wild for this version, and adults appreciate the sophisticated balance of flavors.
Salted Caramel Seduction
Swirl in two tablespoons of dulce de leche before baking, then sprinkle with flaky sea salt when serving. The caramel creates ribbons of sweetness that complement the dark chocolate perfectly. Use Maldon salt — the pyramid-shaped crystals provide satisfying crunch and burst of salinity that makes the chocolate taste even more intense. This version converts even self-professed "not dessert people" into believers.
Mexican Hot Chocolate Adventure
Add 1/2 teaspoon cinnamon, 1/4 teaspoon cayenne, and replace the vanilla with almond extract. The combination creates a subtle heat that builds slowly, making each spoonful more addictive than the last. Serve with churros for dipping if you're feeling particularly indulgent. This variation has become my signature for dinner parties — it's sophisticated enough for foodies but approachable enough for everyone.
Orange Chocolate Elegance
Swap the vanilla for Grand Marnier and add the zest of one orange to the cream while heating. Strain out the zest before adding to the chocolate mixture. The orange oil infuses the cream with bright citrus notes that make the chocolate taste more complex. This version pairs beautifully with espresso or dessert wine after a fancy dinner party.
White Chocolate Wonder
For those who don't love dark chocolate (I know, I don't get it either), substitute white chocolate and add freeze-dried raspberries. The tart berries cut through white chocolate's notorious sweetness while creating gorgeous pink swirls. It's like a grown-up version of those raspberry white chocolate cookies everyone pretends not to love but secretly devours.
Nutella Knockout
Replace half the chopped chocolate with Nutella and add chopped hazelnuts for texture. This creates a gianduja-like flavor that's absolutely addictive. The hazelnuts toast slightly during baking, adding nutty aroma that fills your kitchen with the scent of an Italian bakery. Fair warning: this version rarely makes it to the table in my house.
Storing and Bringing It Back to Life
Fridge Storage
If you somehow have leftovers (a rare phenomenon in my experience), these keep beautifully for up to three days refrigerated. Cover each ramekin tightly with plastic wrap, pressing it directly onto the surface to prevent a skin from forming. When you're ready to enjoy, let them come to room temperature for thirty minutes, then warm in a 300°F oven for 8-10 minutes. The texture won't be quite as molten as fresh, but they'll still be deliciously pudding-like with incredible flavor.
Freezer Friendly
These freeze surprisingly well, making them perfect for emergency chocolate cravings. Prepare them completely, let cool, then wrap individually and freeze for up to two months. Thaw overnight in the refrigerator, then reheat as above. Pro tip: underbake by two minutes if you plan to freeze them — this compensates for the additional cooking during reheating. I've been known to keep a stash for those "I need chocolate now" moments that strike at 9 PM on Tuesday.
Best Reheating Method
Microwave reheating is the enemy of molten centers — it creates hot spots and rubbery texture. Always use the oven method described above for best results. If you must use a microwave (I won't judge, we've all been there), do 10-second bursts at 50% power, checking after each burst. Add a tiny splash of cream before reheating to restore some moisture. They won't be as perfect as fresh, but they'll still satisfy that chocolate craving better than anything from a mix.