Picture this: you’re halfway through a midnight snack, the kitchen lights flicker, and suddenly the pantry feels like a treasure trove of forgotten cookies. I had just finished a batch of stale, flat chocolate chip cookies that left me staring at the oven like a detective at a crime scene. The moment I cracked the cookie dough open, the buttery aroma hit me like a warm hug, and I realized I’d stumbled on the secret to a single‑serve masterpiece that would change my cookie game forever. I’m talking about a cookie that’s the size of a thumb‑sized bite, yet packs a punch that’s hard to resist.
This isn’t just another cookie recipe; it’s a culinary confession. I’ll be honest — I ate half the batch before anyone else even had a chance to taste it. The first bite was a burst of sweet chocolate, a hint of toasted flour, and that unmistakable buttery crunch that makes you wonder if you’re eating a dessert or a snack. The texture is a delicate balance of soft center and crisp edges, and the chocolate chips melt just enough to create pockets of molten delight. That sizzle when the dough hits the pan? Absolute perfection. The kitchen smells like a bakery, and you can hear the faint crackle of butter melting into the flour.
What makes this version stand out is that it’s not just a cookie; it’s a single‑serve experience. I dare you to taste this and not go back for seconds. The recipe uses a precise ratio of flour to sugar that creates the perfect crumb, a touch of baking soda to lift the dough, and a splash of vanilla that gives it that extra depth of flavor. The chocolate chips are chosen for their balance of sweetness and richness, and the butter is melted to a silky consistency that coats every bite. The result is hands down the best version you’ll ever make at home, and it’s so simple that even a beginner can pull it off without a single mishap. Picture yourself pulling this out of the oven, the whole kitchen smelling incredible, and sharing a single cookie that feels like a personal indulgence.
Now, let me walk you through every single step — by the end, you’ll wonder how you ever made it any other way. This recipe is a game‑changer, a tiny cookie that packs a flavor punch, and a perfect way to satisfy cravings without the guilt of a full batch. If you’ve ever struggled with cookies that turn out too dry or too sticky, you’re not alone — and I’ve got the fix. The next part? Pure magic. Stay with me here — this is worth it.
What Makes This Version Stand Out
- Precision: Every measurement is calibrated for the perfect bite‑size cookie. The ratio of flour to sugar is just right to create a tender crumb that still holds its shape.
- Texture: The melted butter gives the dough a silky mouthfeel, while the baking soda lifts the cookie just enough to keep it airy.
- Flavor: A splash of vanilla and a pinch of sea salt elevate the chocolate, turning each bite into a harmonious blend of sweet and savory.
- Simplicity: No fancy techniques or hard‑to‑find ingredients. Just a handful of pantry staples and a few minutes of prep.
- Make‑Ahead: The dough can be prepped a day in advance and frozen, so you’re always ready for a quick treat.
- Presentation: The single‑serve size makes it perfect for gifting, portion control, or a quick dessert that doesn’t overwhelm.
Alright, let’s break down exactly what goes into this masterpiece…
Inside the Ingredient List
The Flavor Base
All‑purpose flour is the backbone of any cookie. It provides structure without overpowering the delicate sweetness. If you’re feeling adventurous, try substituting half the flour with whole‑wheat for a nuttier profile. Skipping flour will result in a gooey mess that won’t hold its shape.
The Sweetener Crew
Granulated sugar gives the cookie its crisp edges, while brown sugar adds depth and moisture. Together, they create a balanced sweetness that doesn’t overwhelm the chocolate. If you prefer a darker, caramel‑like flavor, increase the brown sugar by ¼ cup and reduce the granulated sugar accordingly.
The Unexpected Star
Melted unsalted butter is the secret weapon that coats every grain of flour, ensuring a tender crumb. The butter’s natural fats carry the chocolate’s aroma and create that buttery aftertaste you can’t get enough of. If you’re vegan, substitute with equal parts coconut oil or a plant‑based butter alternative.
The Final Flourish
Chocolate chips are the showstopper. I use a mix of dark and milk chips for a balanced bite. If you’re a chocolate connoisseur, add a handful of sea‑salted chips for an extra crunch. The chips should be evenly distributed to avoid clusters of pure chocolate.
Everything’s prepped? Good. Let’s get into the real action…
The Method — Step by Step
- Preheat your oven. Set it to 350°F (175°C) and line a baking sheet with parchment. The temperature is critical for a balanced rise and crisp edges. Don’t skip the parchment; otherwise you’ll have a sticky mess to clean up. This is the moment of truth.
- Combine dry ingredients. In a medium bowl, whisk together flour, baking soda, and a pinch of sea salt. The salt will enhance the chocolate’s flavor profile. Keep the mixture dry to prevent clumping. If you’re feeling fancy, add a tablespoon of cocoa powder for a mocha twist.
- Sift the sugars. In a separate bowl, combine granulated and brown sugars. The brown sugar adds moisture, while the granulated sugar ensures crispness. Whisk them until they’re evenly mixed. This step ensures a consistent crumb throughout.
- Mix butter with sugar. Add the melted butter to the sugar mixture and whisk until it’s glossy and smooth. The butter should coat every sugar grain, creating a silky base. If the mixture looks lumpy, give it another quick whisk.
- Beat in the egg. Add the beaten egg to the butter‑sugar mix, whisking until fully incorporated. The egg binds the dough and adds richness. Avoid over‑whisking; you only need a smooth blend.
- Incorporate vanilla. Stir in the vanilla extract. Vanilla brings depth and a subtle floral note that complements the chocolate. It also helps the dough rise slightly.
- Combine wet and dry. Gradually fold the dry mixture into the wet. Use a spatula to stir until just combined. Overmixing can make the cookie tough. The dough should feel slightly sticky but manageable.
- Add chocolate chips. Gently fold in the chocolate chips, ensuring they’re evenly distributed. This step is crucial for a uniform chocolate experience in every bite.
- Shape the dough. Using a tablespoon, scoop portions of dough onto the prepared baking sheet. Leave 2 inches between each to allow for spreading. The dough should be about the size of a golf ball for a single‑serve cookie.
- Bake. Place the sheet in the preheated oven and bake for 12–15 minutes. The cookies should be golden around the edges and slightly soft in the center. Don’t overbake; you want that chewy center.
- Cool. Remove the cookies from the oven and let them sit on the sheet for 5 minutes. Then transfer them to a wire rack to cool completely. The cookies will firm up as they cool, giving that perfect bite.
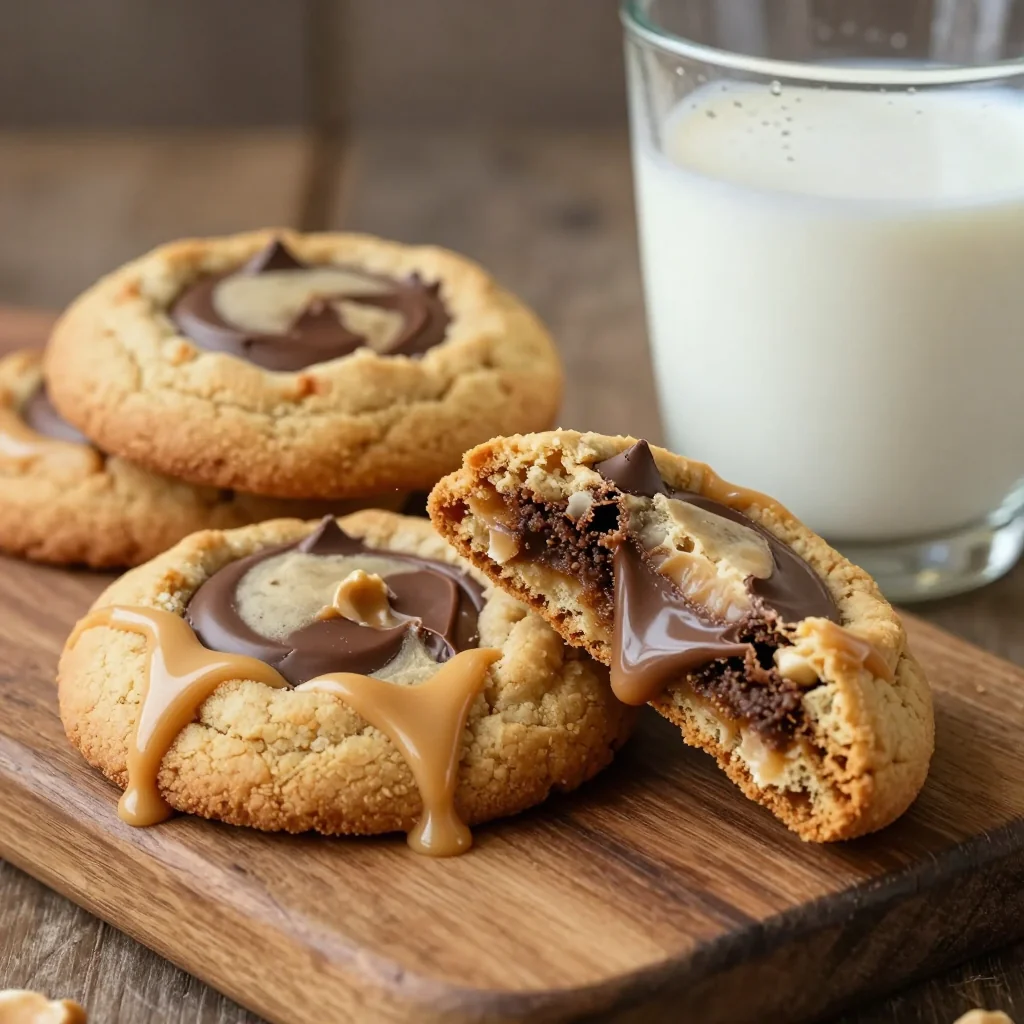
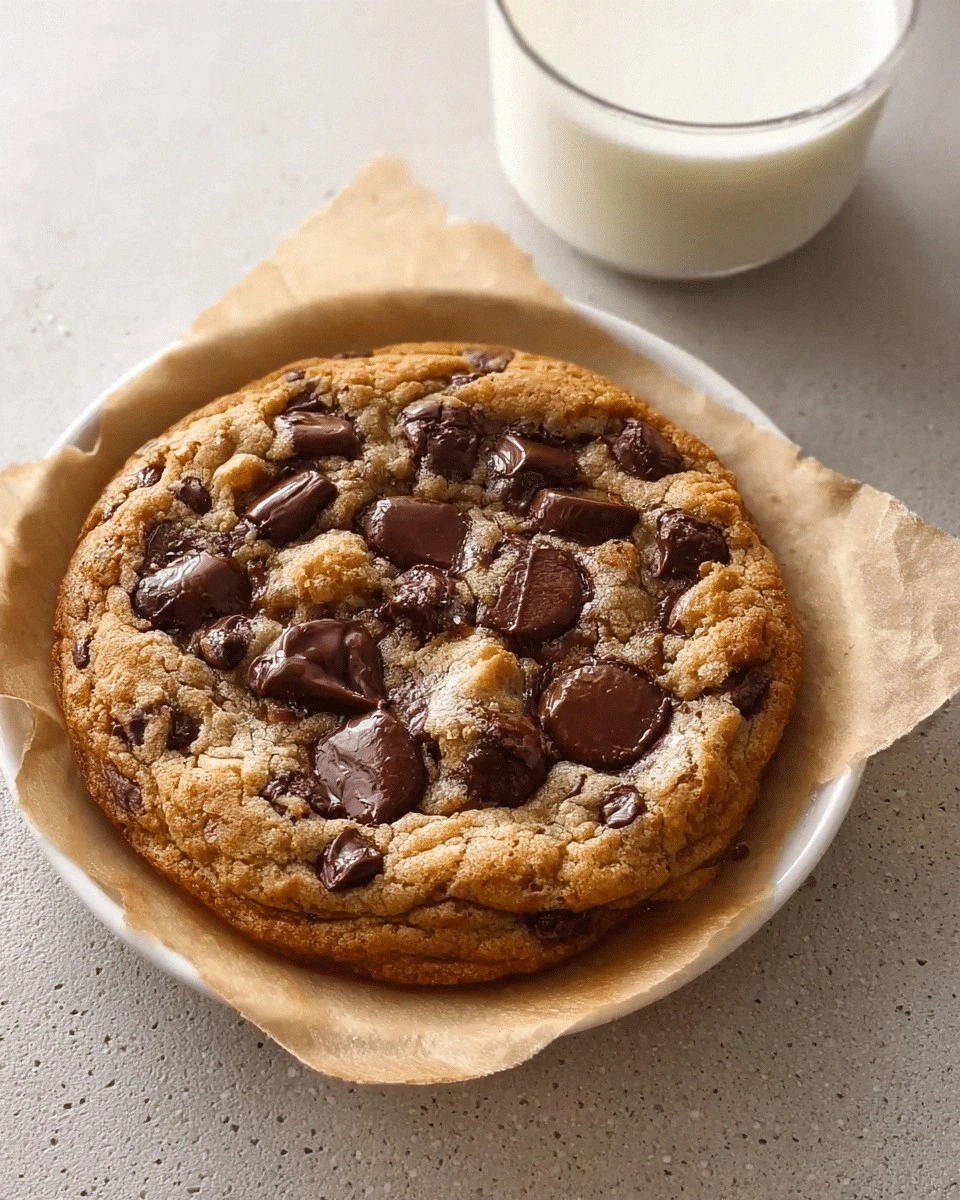
- Enjoy. Serve warm or at room temperature. Pair with a glass of cold milk or a cup of coffee for a classic dessert experience. Store any leftovers in an airtight container.
That’s it — you did it. But hold on, I’ve got a few more tricks that’ll take this to another level…
Insider Tricks for Flawless Results
The Temperature Rule Nobody Follows
Many bakers bake at 375°F, thinking higher heat equals crispier cookies. The truth is, 350°F gives the dough enough time to rise and caramelize sugars without burning. I’ve baked at 350°F for years and never had a cookie that was too hard or too soft. Try it and taste the difference.
Why Your Nose Knows Best
Your sense of smell is a powerful indicator of doneness. As the butter melts and the sugars caramelize, you’ll notice a warm, sweet scent. When the aroma turns slightly nutty, it’s a sign the cookies are ready. Trust your nose and pull them out when the scent is just right.
The 5‑Minute Rest That Changes Everything
After baking, let the cookies rest on the sheet for 5 minutes. This allows the steam to redistribute, ensuring the center is set while the edges remain crisp. Skipping this step can leave the cookies too soft or too dry.
The Secret of Even Distribution
When you fold in chocolate chips, use a gentle motion. Over‑mixing can cause the chips to clump, leading to uneven chocolate distribution. A light fold ensures every bite has a balanced amount of chocolate.
The Magic of Chill
If you have time, chill the dough for 30 minutes before baking. The chilled dough spreads less, giving a thicker cookie with a chewy center. It also helps the flavors meld together, creating a more complex taste profile.
Creative Twists and Variations
This recipe is a playground. Here are some of my favorite ways to switch things up:
Nutty Delight
Add ¼ cup chopped walnuts or pecans to the dough. The nuts add a satisfying crunch and a subtle earthy flavor that pairs beautifully with chocolate. They also increase the protein content, making the cookie a more balanced snack.
Spiced Up
Stir in ½ tsp cinnamon or a pinch of cardamom. The warm spices create a cozy, aromatic experience that’s perfect for fall. The spices complement the chocolate, giving a new depth of flavor.
Citrus Burst
Add 1 tsp lemon zest or orange zest to the batter. The citrus brightens the dough, cutting through the richness and adding a fresh zing. It’s especially refreshing on hot summer days.
Vegan Version
Replace the butter with melted coconut oil and use a flax egg (1 tbsp ground flaxseed + 3 tbsp water). Substitute dairy chocolate chips with dairy‑free options. The result is a cookie that’s just as indulgent but vegan‑friendly.
Guilt‑Free
Swap the all‑purpose flour for almond flour and use a sugar substitute like stevia or monk fruit. The cookie will be lower in carbs and have a nutty undertone. It’s a perfect treat for those watching their sugar intake.
Storing and Bringing It Back to Life
Fridge Storage
Place leftover cookies in an airtight container and store them in the refrigerator for up to 5 days. The cooler temperature keeps the chocolate from melting and preserves the cookie’s texture. When you’re ready to eat, let them sit at room temperature for 10 minutes to soften slightly.
Freezer Friendly
Wrap each cookie individually in parchment paper and place them in a freezer bag. They’ll stay fresh for up to 3 months. When you’re ready, pop a cookie out and let it thaw for 5 minutes. The cookies will retain their original flavor and texture.
Best Reheating Method
To revive a cold cookie, microwave on medium power for 10–12 seconds. The brief heat melts the chocolate slightly, giving it that fresh‑baked feel. For a crispier result, place the cookie on a preheated skillet for 30 seconds on each side.