Love this? Pin it for later! 📌
Since then, this recipe has become my edible greeting card. I ship little gold-tucked boxes to college friends, slip squares into stockings, and tuck a row of it—wrapped like a candy cane ribbon—onto every dessert platter from Thanksgiving through New Year’s. It’s the recipe that turns frantic last-minute guests into planned-for VIPs, because you can make it tonight, let it set while you wrap gifts, and wake up to 64 perfect one-inch pieces that look like they came from a swank chocolatier. If you’ve ever struggled with grainy fudge or cloyingly sweet versions, prepare to be converted. We’re using a hybrid technique—no candy thermometer, no boiling sugar syrups—just good-quality chocolate, a can-do attitude, and a refrigerator. Let’s make your kitchen smell like December.
Why This Recipe Works
- Silky Emulsion: Melting chocolate with butter and condensed milk creates a fool-proof emulsion that never seizes.
- Two-Layer Peppermint Hit: A whisper of extract in the fudge plus crunchy candy-cane topping gives balanced, not overwhelming, mint flavor.
- Dark-Chocolate Forward: 72 % cacao keeps the sweetness in check and pairs beautifully with cool peppermint.
- No Thermometer Needed: Eliminates the fear of sugar crystallization—perfect for beginners.
- Make-Ahead Magic: Tastes even better after 24 h, so your treat-box assembly is stress-free.
- Freezer Friendly: Quadruple the batch; layers of fudge freeze beautifully for up to 3 months.
- Professional Gift Appeal: Clean edges from a hot-knife trick give bakery-counter presentation.
Ingredients You'll Need
Great fudge starts with great chocolate—no negotiating there. I reach for a 72 % Belgian bittersweet baking bar because its floral, winey notes stand up to peppermint without turning harsh. If you can only find 60 %, drop the sweetened condensed milk by two tablespoons to compensate for the extra sugar. Avoid chocolate chips; their stabilizers inhibit that satiny melt.
Condensed milk is our insurance policy against graininess. Buy a brand with only milk and sugar on the label—no additives—and warm the can briefly in a bowl of hot water so it folds into the chocolate effortlessly. Unsalted butter should be cool-room-temp; too warm and the fat can split. A tablespoon of neutral oil (grapeseed or rice-bran) helps the fudge slice cleanly once set.
Peppermint extract strength varies wildly by brand. I use a pure, not imitation, version at ¼ tsp for the whole batch; you can always dot a little more on a test square before it firms up. Crushed candy canes add snap and sparkle: place three standard canes in a zip bag and roll with a wine bottle until you have rice-sized shards—dusty powder makes the top sticky.
Optional but lovely: a teaspoon of espresso powder deepens cocoa notes without coffee flavor, and a pinch of flaky sea salt on top makes the candy cane pop. If you’re shipping the fudge, swap the crushed canes for sifted powdered sugar—safer against humidity.
How to Make Rich Dark Chocolate Peppermint Fudge for Holiday Treat Boxes
Prep the Pan & Peppermint
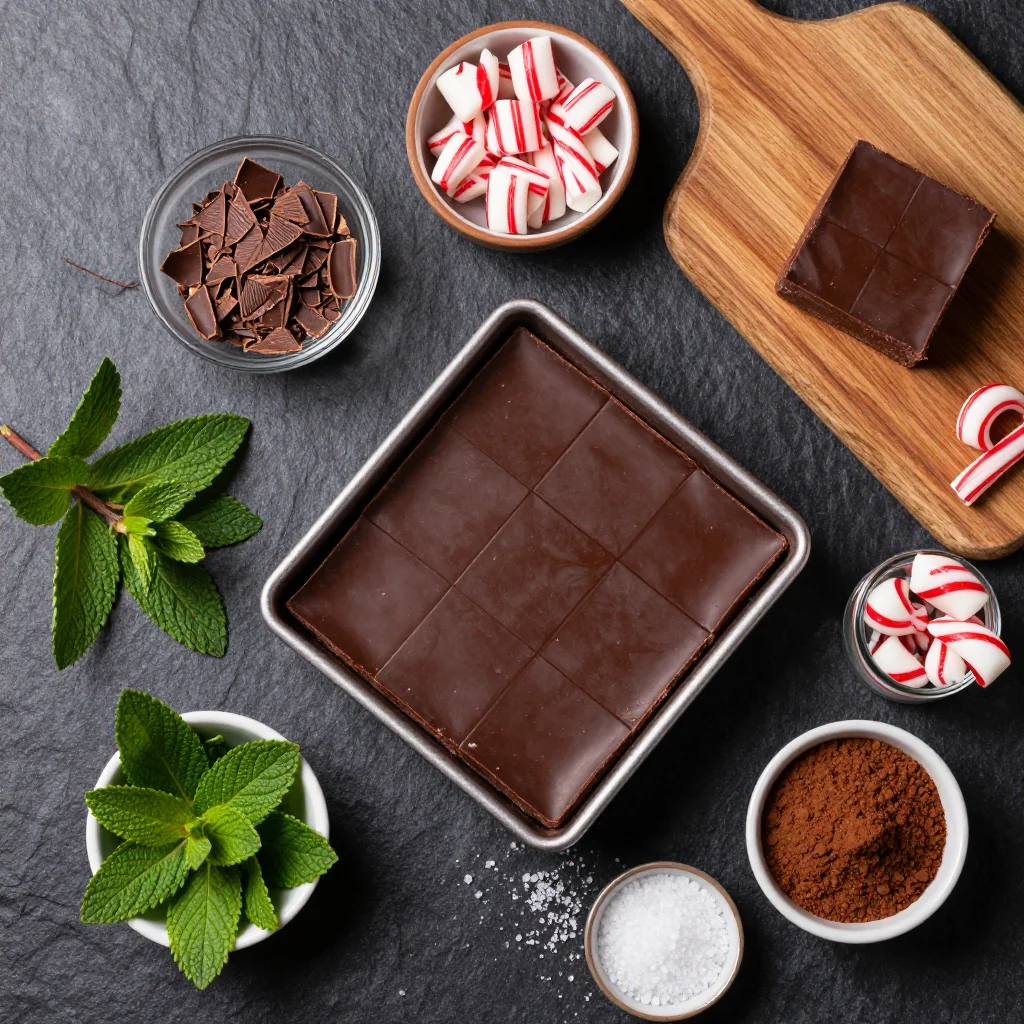
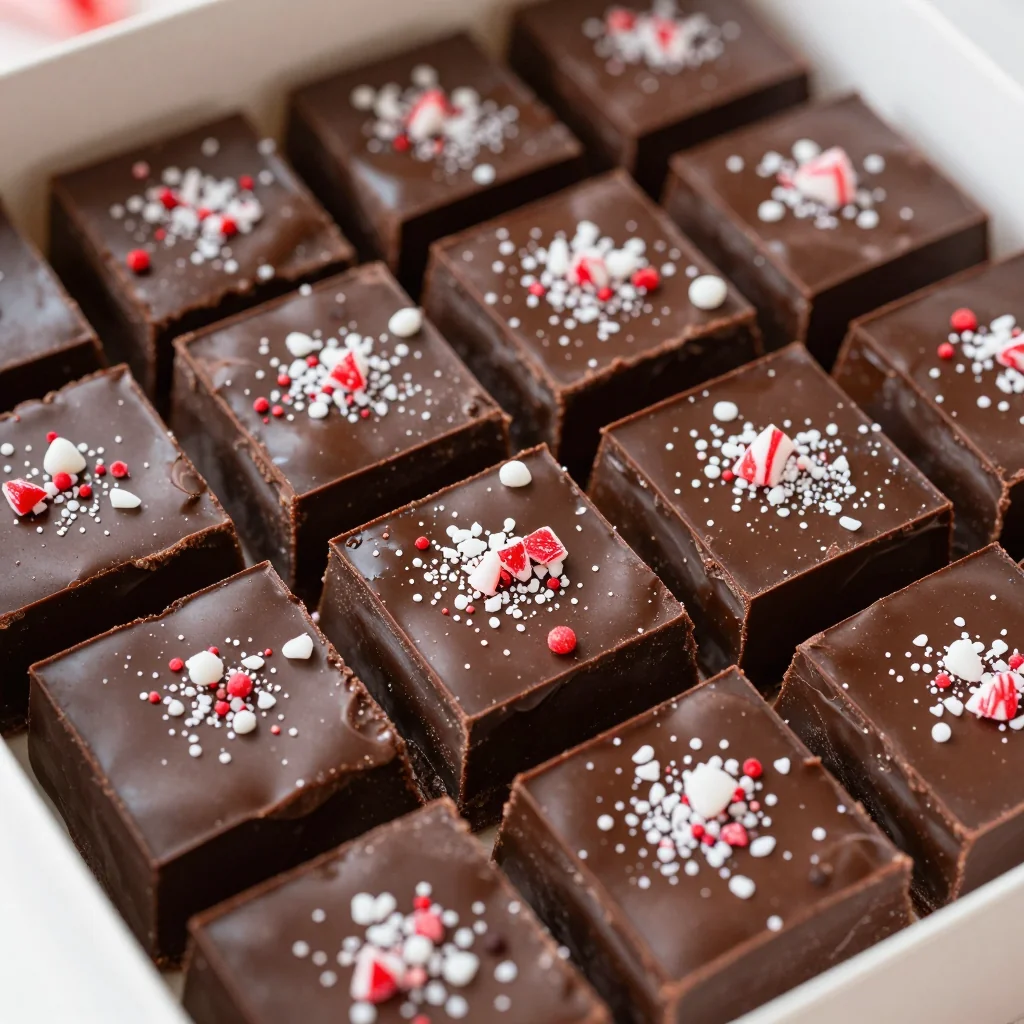
Line an 8-inch square baking pan with parchment, leaving wings on two sides for easy lifting. Lightly butter exposed pan sides. Unwrap three candy canes, seal in a heavy zip bag, and crush until you have a mix of rice-grain shards and sparkly dust; set aside.
Build the Chocolate Base
Chop 18 oz (510 g) bittersweet chocolate to almond-sized pieces. In a heavy saucepan combine chocolate, ⅓ cup unsalted butter (cubed), and 14 oz can sweetened condensed milk. Cook over the lowest heat, stirring constantly with a silicone spatula, until 75 % melted.
Emulsify & Flavor
Remove pan from heat; add 1 Tbsp neutral oil and ¼ tsp peppermint extract. Stir vigorously until the mixture turns glossy and thick like brownie batter. If mixture looks broken, set the pan over a bowl of steam for 30 s and stir again; the gentle heat will re-emulsify the fat.
Pour & Smooth
Scrape the fudge into the lined pan. Use an offset spatula warmed under hot water to spread evenly. Rap the pan on a towel-covered counter to pop air bubbles. Immediately sprinkle the crushed candy cane across the surface; press gently so pieces adhere.
Chill Until Set
Cover the pan loosely with foil (tent so it doesn’t touch the top) and refrigerate at least 3 h, preferably overnight. Fudge is ready when the surface is firm to light finger pressure and candy canes are locked in place.
Unmold & Trim
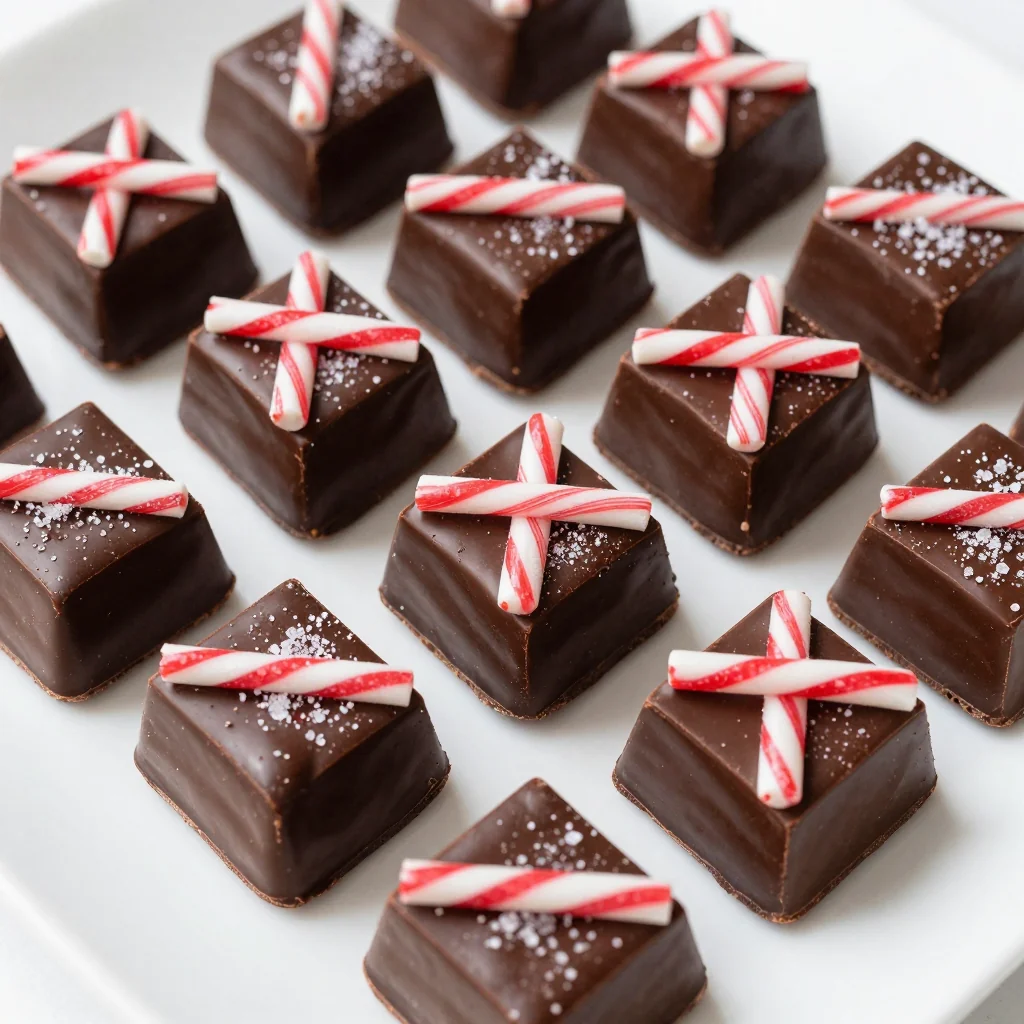
Use parchment wings to lift the slab onto a cutting board. With a long sharp knife dipped in hot water and wiped dry, trim ⅛ inch from each edge for bakery-perfect squares. Slice into eight even rows each direction to yield 64 one-inch squares.
Package for Gifting
Place fudge in mini cupcake liners, then into treat boxes or mason jars. Add a sachet of silica gel if shipping to humid climates. Store finished boxes in the refrigerator until gifting; let sit 15 min at room temp before serving for ultimate creaminess.
Expert Tips
Control the Chill
Over-chilling can make fudge brittle. If your fridge runs extra-cold, set the pan on the middle shelf and cover with a slightly vented lid rather than tight foil.
Avoid Water at All Costs
Even a few drops can cause chocolate to seize. Make sure spatulas and pans are bone-dry; if adding extracts, drip onto a spoon first to avoid splash.
Hot Knife, Clean Cuts
Re-dip and wipe the blade every two cuts. For show-stopping diagonal lines, rotate the slab 45° after each row.
Freeze in Layers
If doubling, separate slabs with parchment, slip into a freezer bag, evacuate air with a straw, and freeze flat for up to 3 months. Thaw overnight in the fridge.
Humidity Shield
In tropical climates, brush the top with a whisper of melted cocoa butter (5 g) before adding candy canes to create a moisture barrier.
Color Pop
Mix 1 Tbsp of the crushed candy cane with edible gold dust for a quick swirl on top—gorgeous against dark chocolate.
Variations to Try
-
Midnight Orange
Swap peppermint for 1 tsp orange extract and top with candied zest curls for a grown-up chocolate-orange vibe.
-
Peppermint Mocha
Dissolve 1 tsp espresso powder in the extract before adding to the chocolate; garnish with crushed chocolate-covered espresso beans.
-
White Chocolate Swirl
Drizzle 3 oz melted white chocolate in thin lines across the surface, then drag a toothpick for a marbled effect.
-
Spicy Holiday
Add ⅛ tsp cayenne and ½ tsp cinnamon to the melted chocolate for a Mexican-hot-chocolate twist.
-
Vegan Deluxe
Substitute sweetened condensed coconut milk and plant-based butter; the texture is every bit as lush.
-
Nutty Crunch
Fold in ½ cup finely chopped toasted pistachios; their green hue looks festive against the dark chocolate backdrop.
Storage Tips
Fudge keeps beautifully, but chocolate is a sponge for odors—keep it away from last night’s garlic pasta. In an airtight container, layers separated by parchment, it will stay silky for 2 weeks in the refrigerator. For longer storage, vacuum-seal slabs and freeze up to 3 months; thaw unwrapped in the fridge overnight to prevent condensation spots on the candy cane.
If gifting in treat boxes, add a food-safe silica packet and tuck the boxes into cellophane bags tied with waxed twine. Fudge travels best when chilled, so ship overnight or via two-day service with a cool pack during warmer months. Label “Perishable—Refrigerate upon Arrival” so recipients know what to do.
Homemade fudge has no preservatives; if you notice a dull, grey bloom on the surface it’s just cocoa butter rising—still safe, though slightly less photogenic. A quick blast from a hair-dryer on low, held 12 in away, will re-melt the surface and restore the sheen. Let it reset in the fridge for 10 min before slicing.
Frequently Asked Questions
Rich Dark Chocolate Peppermint Fudge for Holiday Treat Boxes
Ingredients
Instructions
- Prep Pan: Line an 8-inch square baking pan with parchment, leaving overhang.
- Melt: Combine chocolate, condensed milk, and butter in a heavy saucepan; melt over low heat, stirring until 75 % smooth.
- Flavor: Off heat, stir in oil and peppermint extract until glossy.
- Set: Spread into the pan, top with crushed candy cane, chill 3 h.
- Slice: Lift out, trim edges, cut 8 × 8 grid with a hot knife.
- Gift: Place in mini liners, box, refrigerate until ready to share.
Recipe Notes
For clean edges, heat knife under hot water and wipe dry between cuts. Store fudge up to 2 weeks refrigerated or 3 months frozen.