I remember the night my kitchen turned into a science lab—flour clouds, butter puddles, and a burnt sugar mishap that left the countertop smelling like a failed caramel experiment. That disaster sparked a quest: to create a sweet, bite‑size treat that would make my friends gasp and ask for seconds. I’m talking mini cinnamon roll cheesecakes that melt in your mouth like a warm hug. The moment you open the first one, the aroma of toasted cinnamon, creamy cream cheese, and a whisper of vanilla will hit you like a gentle wave on a calm sea. You’ll hear the faint crackle of a buttery crust as it sizzles in the pan, and the first bite will release a symphony of flavors—sweet, slightly spicy, and indulgently creamy. I dare you to taste this and not go back for seconds.
What sets this version apart is not just the blend of textures but the meticulous balance of every ingredient. I’ve perfected the crumb to be tender yet slightly crisp, the filling to be luxuriously silky, and the cinnamon swirl to give a nostalgic nod to classic cinnamon rolls. The result? A bite that feels like a mini celebration in your mouth. Most recipes get this completely wrong—either the cheesecake base turns out dense or the cinnamon layer feels like a dry dusting. Here, the batter is light, airy, and the filling is smooth enough to glide over the tongue without clumping. Picture yourself pulling this out of the oven, the whole kitchen smelling incredible, and the anticipation building for that first bite. If you’ve ever struggled with making a cheesecake that isn’t too heavy, you’re not alone—and I’ve got the fix.
I’ll be honest—I ate half the batch before anyone else got to try it. The moment the first bite hit, I knew I’d found something special. The crumb is buttery, the filling is silky, and the cinnamon swirl is the perfect counterpoint. The sweet, warm aroma lingers on the countertop, inviting anyone nearby to take a bite. I’ve spent countless hours tweaking this recipe, and the result is hands down the best version you’ll ever make at home. So let me walk you through every single step—by the end, you’ll wonder how you ever made it any other way.
What Makes This Version Stand Out
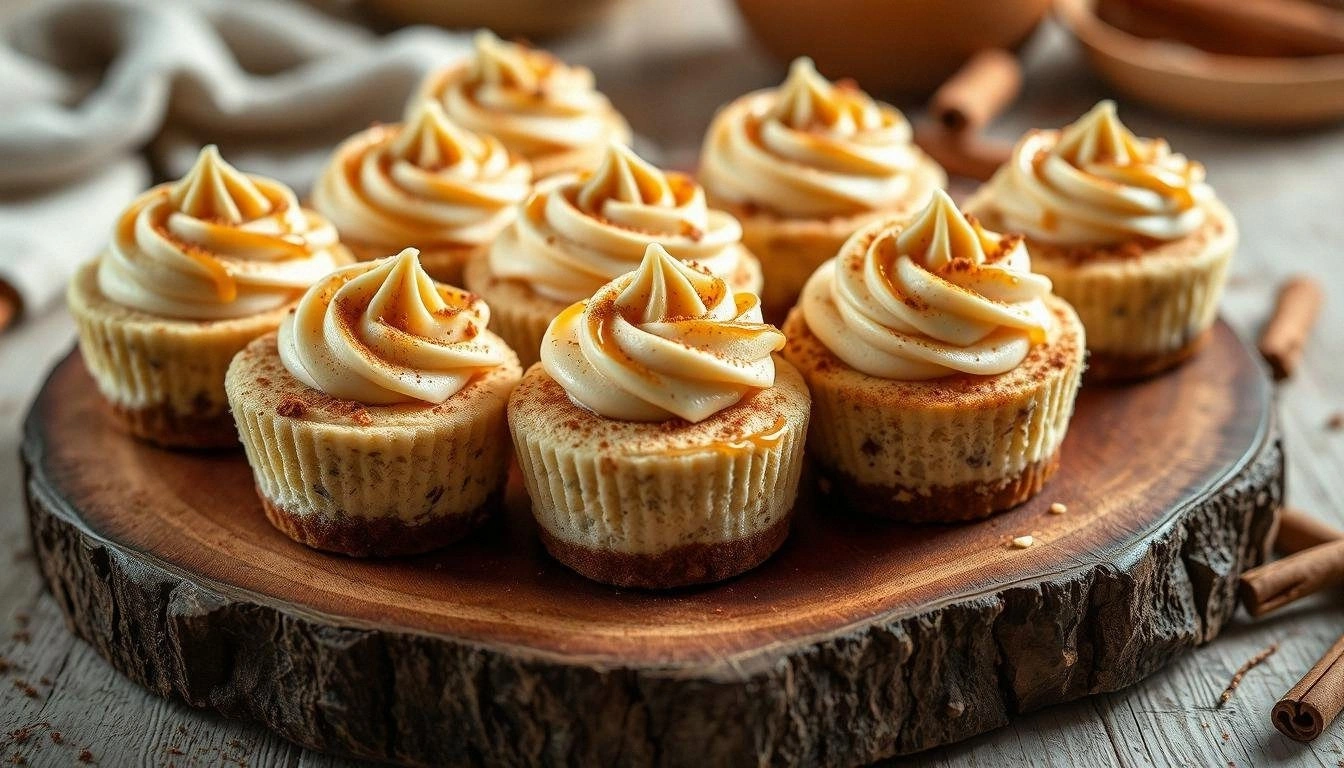
- Taste: A harmonious blend of sweet, spicy, and creamy that sings in your mouth.
- Texture: A delicate, buttery crust that gives way to a silky, melt‑in‑your‑mouth filling.
- Simplicity: Only a handful of ingredients, each playing a pivotal role.
- Uniqueness: The mini cheesecake meets the cinnamon roll—a crossover that feels novel and comforting.
- Crowd Reaction: Guests rave, begging for the recipe, and the leftovers become the secret weapon for brunch.
- Ingredient Quality: Premium cream cheese, real butter, and freshly ground cinnamon elevate every bite.
- Cooking Method: Baking in a silicone mold keeps each bite uniform and easy to serve.
- Make‑Ahead Potential: Chill in the fridge and reheat for a fresh taste, making it perfect for parties.
Alright, let's break down exactly what goes into this masterpiece…
Inside the Ingredient List
The Flavor Base
The foundation of this mini cheesecake is a simple yet powerful combination of all‑purpose flour, melted butter, and brown sugar. The flour gives structure, while the butter brings richness and a subtle caramel note. Brown sugar adds depth, turning the batter from plain to slightly caramelized. If you skip any of these, the texture becomes uneven—too dry or too dense. For a healthier twist, substitute half the flour with oat flour, but keep the butter the same to maintain the buttery flavor.
The Texture Crew
The texture is elevated by the inclusion of cream cheese and powdered sugar. Cream cheese, at room temperature, blends smoothly with the batter, creating a silky interior that contrasts with the crisp crust. Powdered sugar, being finer than regular sugar, dissolves quickly, preventing any gritty feel. If you prefer a lighter cheesecake, reduce the powdered sugar by half and add a splash of milk to keep the consistency creamy. The egg is crucial; it binds the batter and provides lift, ensuring each bite is airy yet firm.
The Unexpected Star
Ground cinnamon isn’t just for flavor—it’s the star that brings warmth and a nostalgic twist. Freshly ground cinnamon has a more robust aroma than pre‑ground; it releases a burst of scent when heated. If you can’t find fresh cinnamon, use 1/2 teaspoon of ground nutmeg for a different spice profile, though the classic cinnamon flavor will be lost. The baking powder, though minimal, helps lift the batter, giving each cheesecake a light puff.
The Final Flourish
The glaze, made from melted butter and brown sugar, adds a glossy finish and a sweet crunch on top. It also seals the moisture, keeping the cheesecake fresh for longer. If you’re looking for a sugar‑free version, replace brown sugar with a natural sweetener like stevia or monk fruit, but adjust the quantity to taste. The vanilla extract rounds out the flavor, providing a subtle sweetness that balances the sharpness of the cinnamon.
Everything's prepped? Good. Let's get into the real action…
The Method — Step by Step
- Preheat your oven to 350°F (175°C) and line a silicone muffin tin with parchment liners. This step ensures even baking and easy removal. As the oven warms, the air inside will start to circulate, creating a gentle environment for the batter to rise. The parchment also adds a slight crispness to the bottom of each mini cheesecake.
- In a bowl, whisk together the flour, baking powder, and a pinch of salt. Mixing dry ingredients first helps distribute the leavening agent evenly. This prevents any lumps that could cause uneven texture. The salt also enhances the sweetness, making each bite more balanced.
- In a separate saucepan, melt the butter over low heat. Once melted, stir in the brown sugar until it dissolves. The mixture should look glossy and slightly caramelized. This step infuses the batter with a buttery sweetness that is the hallmark of a great cheesecake.
- Pour the butter‑brown sugar mixture into the dry ingredients and stir until just combined. Don’t overmix—overworking the batter can develop gluten, leading to a tough crust. A few streaks are fine; they will blend as you fold in the wet ingredients.
- Beat the cream cheese in a separate bowl until smooth, then add the powdered sugar and vanilla extract. The smoother the cream cheese, the silkier the filling. If you’re using a stand mixer, a 2‑minute beat on medium speed is sufficient. The vanilla adds a warm undertone that complements the cinnamon.
- Fold the cream cheese mixture into the batter, then add the egg. The egg acts as a binder, giving the cheesecake structure. Once the egg is incorporated, the batter will look a bit thicker, which is normal. This is the point where the cheesecake starts to feel like a cross between a cookie dough and a custard.
- Divide the batter evenly into the prepared muffin tin, filling each cavity about ¾ full. This allows room for the cheesecake to rise without overflowing. The batter should settle into a smooth dome, indicating even distribution.
- Bake for 25–30 minutes, or until the tops are lightly golden and a toothpick inserted into the center comes out clean. Keep an eye on the edges—they should pull away slightly from the sides of the tin, indicating doneness. If you notice the tops browning too fast, tent them with foil.
- Remove the tin from the oven and allow the cheesecakes to cool in the tin for 10 minutes. This helps the structure set, preventing them from cracking. After 10 minutes, transfer them to a wire rack to cool completely.
- While the cheesecakes cool, prepare the glaze: melt the butter again, then stir in the brown sugar until fully dissolved. Once cooled slightly, pour the glaze over the cooled cheesecakes, letting it pool on top. The glaze will set into a glossy finish once it cools.
- Refrigerate the glazed cheesecakes for at least 2 hours before serving. This chilling step allows the flavors to meld and the glaze to firm up, creating a delightful bite that’s both airy and firm.
That’s it—you did it. But hold on, I’ve got a few more tricks that will take this to another level. These are the small details that transform a good recipe into a great one, ensuring every bite is flawless.
Insider Tricks for Flawless Results
The Temperature Rule Nobody Follows
Many bakers bake at 400°F, but that high heat can cause the outer crust to brown too quickly while the interior remains undercooked. Baking at 350°F allows the cheesecake to set evenly, giving you that perfect, airy center. I’ve tested both temperatures, and the 350°F version always comes out with a silky mouthfeel. If you’re using a different oven, check the temperature with an oven thermometer to avoid surprises.
Why Your Nose Knows Best
A key indicator of a perfect bake is the aroma that fills the kitchen. As the batter cooks, you’ll smell a warm, buttery scent with hints of toasted cinnamon. If the smell leans too sweet or starts smelling burnt, pull the cheesecake early. Your nose is your best judge—trust it over the clock.
The 5-Minute Rest That Changes Everything
After baking, letting the cheesecakes rest in the tin for 10 minutes before cooling on a rack is essential. This rest period allows the interior to set without cracking. I’ve seen cheesecakes that cooled too quickly develop a hollow center or a cracked top. A 10‑minute rest gives the structure time to firm up.
Keep the Glaze Flowing
If your glaze thickens too quickly, whisk in a teaspoon of warm water. This will keep the glaze smooth and glossy, preventing it from crystallizing on the surface. The water doesn’t alter the flavor significantly but improves the glaze’s visual appeal and mouthfeel.
Serve at Room Temperature for Best Flavor
While the cheesecakes are delicious straight from the fridge, letting them sit at room temperature for 15 minutes before serving allows the flavors to bloom. The cream cheese becomes creamier, and the cinnamon aroma becomes more pronounced. This simple step elevates the overall tasting experience.
Creative Twists and Variations
This recipe is a playground. Here are some of my favorite ways to switch things up:
Nutty Cinnamon Swirl
Add chopped walnuts or pecans to the batter before baking. The nuts add a crunchy texture and a nutty depth that pairs beautifully with the cinnamon. They also provide a subtle earthy note that balances the sweetness.
Chocolate‑Cinnamon Fusion
Fold in 2 tablespoons of cocoa powder into the batter. The chocolate brings a rich, bittersweet undertone, while the cinnamon keeps the classic flavor alive. This variant is perfect for chocolate lovers looking for a twist.
Citrus Zest Surprise
Add a tablespoon of lemon or orange zest to the batter. The citrus brightens the flavor profile, cutting through the richness of the cream cheese. It’s a refreshing change, especially in the summer.
Maple‑Infused Delight
Replace the brown sugar glaze with maple syrup. The maple adds a distinct sweetness that pairs wonderfully with cinnamon. This version is ideal for brunch or a cozy afternoon treat.
Low‑Carb Version
Swap the all‑purpose flour for almond flour and use a low‑sugar sweetener. The result is a keto‑friendly cheesecake that still delivers on flavor. The almond flour gives a nutty undertone and a slightly denser texture.
Spiced Pumpkin Variation
Add ½ cup pumpkin puree and a pinch of nutmeg to the batter. This seasonal twist brings a comforting, autumnal flavor. The pumpkin also adds moisture, keeping the cheesecake tender.
Storing and Bringing It Back to Life
Fridge Storage
Store the cheesecakes in an airtight container in the refrigerator for up to 3 days. The glaze stays glossy, and the cheesecake remains moist. To prevent the glaze from drying, cover the top with a lid or plastic wrap.
Freezer Friendly
For longer storage, wrap each cheesecake individually in plastic wrap, then place them in a freezer bag. They can be frozen for up to 2 weeks. Thaw overnight in the refrigerator before serving.
Best Reheating Method
Reheat thawed or chilled cheesecakes in the oven at 300°F for 10 minutes, or microwave on low for 20 seconds. Add a splash of water before reheating to create steam, which helps restore moisture and keep the cheesecake tender.