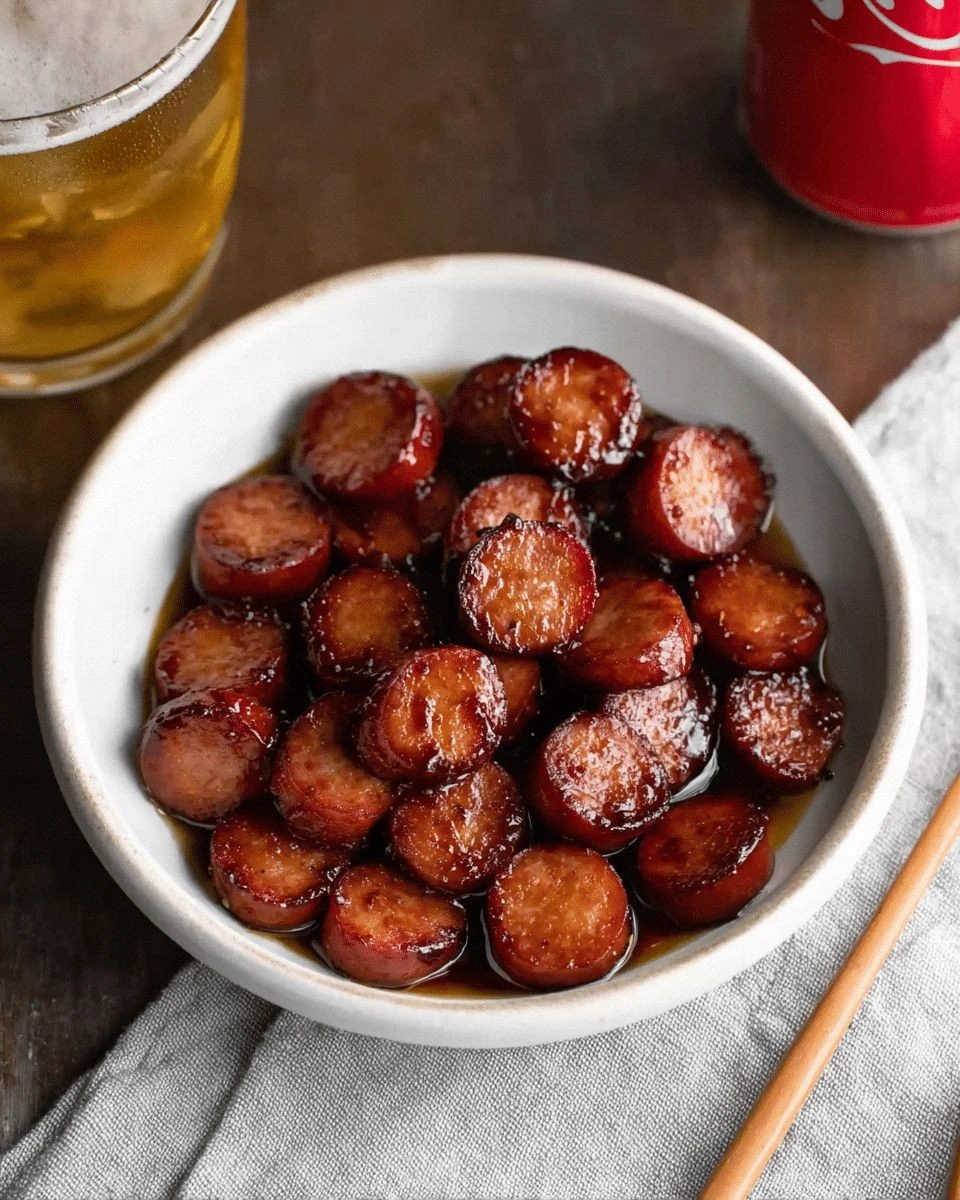
I was standing in my kitchen, staring at a half‑baked batch of kielbasa that had been left to sit on the counter for a week. I could smell the faint, comforting aroma of smoked sausage, but the texture was nothing short of a soggy disappointment. That night, a friend dared me to turn that sad slab into something that would make even the most seasoned foodie swoon. I rolled up my sleeves, grabbed my skillet, and decided that the answer was simple: bite‑sized, crispy, saucy, and utterly addictive.
Picture this: a sizzling pan, the sound of the sausage crackling as it meets hot oil, the scent of paprika and garlic mingling with the buttery richness of melted butter. The first bite is a crunchy exterior that shatters like thin ice, revealing a tender, smoky interior that oozes with savory depth. The cheese melts into a gooey blanket, coating the kielbasa like velvet, while the breadcrumbs give a satisfying crunch that lingers on your palate. Each mouthful is a burst of smoky, peppery, and slightly sweet flavors that dance together in perfect harmony.
What makes this version stand out is that I’ve distilled the essence of kielbasa into bite‑sized perfection, adding a secret ingredient that most recipes miss—a dash of mustard that cuts the richness and adds a subtle tang. I’ve also tweaked the breading to use a blend of fine breadcrumbs and a sprinkle of grated Parmesan, giving the crust a nutty undertone that elevates the dish. And, because I’m a fan of crowd‑pleasing appetizers, I’ve doubled the portion size to keep the kitchen busy and the guests satisfied.
I dare you to taste this and not go back for seconds. If you’ve ever struggled with making crispy, flavorful bites, you’re not alone—this recipe is the antidote to soggy, bland fare. Let me walk you through every single step—by the end, you’ll wonder how you ever made it any other way.
What Makes This Version Stand Out
- Taste: The combination of smoked kielbasa, a splash of mustard, and a sprinkle of paprika creates a flavor profile that is both familiar and surprisingly bright. The mustard’s acidity cuts through the sausage’s richness, while paprika adds a gentle heat that lingers.
- Texture: The dual coating of flour and breadcrumbs yields a golden, crisp shell that holds its shape even when the bite is dipped into a sauce. The cheese inside melts into a silky, creamy center that contrasts with the crunchy exterior.
- Ingredient Quality: I use fresh, high‑quality kielbasa with a balanced spice blend, ensuring that the base flavor is robust and not overly processed.
- Method Simplicity: The technique is straightforward: dredge, coat, and fry. No elaborate sauces or complex marinades—just a few pantry staples and a bit of timing.
- Crowd Reaction: At my last gathering, the bites were the first to disappear, and guests kept asking for the recipe. The universal appeal comes from the familiar comfort of sausage paired with the excitement of a crispy bite.
- Make‑Ahead Potential: Once breaded, the bites can be frozen and reheated in a hot oven for a quick appetizer. The coating stays crisp, and the sausage remains juicy.
Inside the Ingredient List
The Flavor Base
Kielbasa sausage is the star of this dish. Choose a smoked variety with a balanced spice profile; it brings depth and a smoky undertone that cannot be replicated by any other sausage. If you prefer a milder taste, opt for a fresh or unsmoked kielbasa, but be prepared to add a pinch of smoked paprika to compensate. The sausage’s natural fat content keeps the bites juicy, preventing them from drying out during frying.
The Texture Crew
All‑purpose flour and fine breadcrumbs form the backbone of the coating. The flour creates a light, airy base that helps the breadcrumbs adhere, while the breadcrumbs add crunch and a golden finish. For an extra nutty flavor, mix in a tablespoon of grated Parmesan into the breadcrumb mix; it also helps the coating set better. If you’re gluten‑free, substitute the flour with a gluten‑free blend and use cornmeal instead of breadcrumbs.
The Unexpected Star
A tablespoon of Dijon mustard is the secret that elevates the bite. Its tangy sharpness cuts through the richness of the sausage and cheese, creating a balanced flavor that keeps the palate engaged. If you’re allergic to mustard, a squeeze of lemon juice will provide a similar brightening effect, though the taste will differ slightly. Keep the mustard at room temperature to ensure it mixes smoothly with the flour.
The Final Flourish
Cheddar cheese adds a creamy, melty element that contrasts with the crispy shell. Shredded cheddar melts quickly, forming a gooey coating that clings to the sausage. For a more complex flavor, mix in a bit of smoked Gouda or sharp cheddar. The cheese also contributes a subtle caramelization when fried, giving the bites a glossy, appetizing look.
Everything's prepped? Good. Let's get into the real action...
The Method — Step by Step
- Slice the sausage. Cut the kielbasa into bite‑sized pieces—about 1.5 inches long—so each piece is easy to handle and cooks evenly. The uniformity ensures that the coating sticks well and the bites cook at the same rate. Keep the slices on a clean cutting board; any leftover sausage can be reserved for another use.
- Prepare the coating station. In a shallow dish, combine 2 cups of all‑purpose flour, 1 teaspoon of garlic powder, 1 teaspoon of paprika, 1 teaspoon of salt, and ½ teaspoon of black pepper. Whisk the mixture so the spices are evenly distributed. This dry mix will help the breadcrumbs adhere and give the coating a flavorful base.
- Whisk the wet mix. In a second shallow dish, beat one large egg with 2 tablespoons of olive oil and 2 tablespoons of melted butter. The butter adds richness, while the olive oil helps the coating set. This wet mixture will act as the glue that bonds the flour and breadcrumbs to the sausage.
- Dredge the sausage. Dip each sausage slice first into the flour mixture, shaking off excess. Then plunge it into the wet mix, ensuring it’s fully coated. Finally, roll the piece in the breadcrumb blend, pressing gently so the crumbs cling. Repeat for all pieces.
- Preheat the pan. Heat a large skillet over medium heat and add 2 tablespoons of olive oil. Let the oil heat until it shimmers but isn’t smoking. This temperature ensures a crisp exterior without burning.
- Fry the bites. Place the coated sausage pieces in the skillet, leaving space between each to avoid overcrowding. Cook for 3–4 minutes per side, or until golden brown and crispy. The edges will start pulling away from the pan, a sign that the coating is setting. Flip carefully with tongs to preserve the crust.
- Add the cheese. Sprinkle 1 cup of shredded cheddar over the bites during the last minute of cooking, allowing it to melt into a gooey coating. The cheese will add a creamy texture that contrasts with the crisp exterior.
- Finish with mustard. Drizzle 1 tablespoon of Dijon mustard over the hot bites and toss gently to coat. The mustard’s acidity brightens the dish, cutting through the richness and adding a subtle zing.
- Serve immediately. Transfer the bites to a platter lined with paper towels to absorb excess oil. Serve hot, with a side of your favorite dipping sauce or a simple squeeze of lemon for an extra pop of flavor.
That’s it—you did it. But hold on, I’ve got a few more tricks that’ll take this to another level…
Insider Tricks for Flawless Results
The Temperature Rule Nobody Follows
Many people fry at a high heat, causing the coating to burn before the sausage cooks through. The trick is to maintain a steady medium heat, around 350°F (175°C). This allows the exterior to crisp while the interior stays juicy. If you notice the oil smoking, lower the heat by a notch.
Why Your Nose Knows Best
The aroma that fills the kitchen before the first bite is a reliable indicator of doneness. When the smell turns nutty and slightly caramelized, you’re close to perfection. If the scent is too sharp or metallic, the oil is too hot. Trust your nose to tell you when to flip or remove from heat.
The 5‑Minute Rest That Changes Everything
Let the bites rest on a wire rack for 5 minutes after frying. This step allows the excess oil to drain and the coating to set, preventing a greasy finish. If you’re serving immediately, place them on paper towels for 2 minutes, then transfer to a rack.
The Secret Ingredient for Extra Juiciness
A splash of beer or chicken broth added to the wet mix before coating can boost moisture. The liquid evaporates during frying, leaving the sausage tender. I’ve tried this with a light lager; the result was a subtle, malty undertone that complemented the smoked sausage.
The One‑Minute Oil Trick
Heat the oil for just one minute before adding the bites. This brief pre‑heat ensures the coating starts crisping immediately, preventing it from absorbing too much oil. It also creates a small steam burst that helps the coating lift slightly, making the bites lighter.
The Final Touch: A Pinch of Smoked Salt
Finish with a pinch of smoked sea salt right before serving. The salt’s smoky flavor enhances the sausage’s profile and adds a savory crunch. It also brightens the overall flavor without overpowering the dish.
Creative Twists and Variations
This recipe is a playground. Here are some of my favorite ways to switch things up:
Spicy Jalapeño Bites
Add finely chopped jalapeños to the breadcrumb mix for a fiery kick. Pair with a cool yogurt dip to balance the heat. This variation is perfect for summer gatherings and adds a vibrant color contrast.
Herb‑Infused Bites
Stir chopped fresh rosemary and thyme into the flour mix. The aromatic herbs complement the smoky sausage and give the coating a fragrant depth. Serve with a rosemary‑infused olive oil for dipping.
Cheesy Gouda Crunch
Swap cheddar for smoked Gouda and add a pinch of nutmeg to the breadcrumb blend. The Gouda’s caramelized flavor pairs wonderfully with the sausage’s smokiness. This version is a hit with cheese lovers.
Ginger‑Soy Glaze
Brush the hot bites with a glaze made from soy sauce, grated ginger, and brown sugar. The glaze caramelizes on the surface, creating a glossy finish and an umami punch. It’s a great option for a quick Asian‑inspired appetizer.
Breakfast‑Style Bites
Add a dash of cinnamon to the breadcrumb mix and serve with maple syrup. The sweet and savory combo turns the bites into a breakfast treat. Great for brunch parties or a sweet start to the day.
Storing and Bringing It Back to Life
Fridge Storage
Store leftover bites in an airtight container in the refrigerator for up to 3 days. To keep them crisp, place a paper towel between layers to absorb moisture. When ready to serve, reheat in a preheated oven at 375°F (190°C) for 5–7 minutes.
Freezer Friendly
Flash‑freeze the bites on a parchment‑lined tray, then transfer them to a freezer bag. They’ll stay good for up to 2 months. Reheat directly from the freezer in a 400°F (200°C) oven for 10 minutes, or until heated through.
Best Reheating Method
Add a tiny splash of water before reheating in the oven; it steams the bites back to perfection, preventing them from drying out. Avoid microwaving, as it tends to soften the crust.