Picture this: I’m in the middle of a scorching July afternoon, the kitchen air thick as a sauna, and my fridge is a barren wasteland. I stare at the glass of water on the counter, the kind that would have been a miracle if it were flavored. Then, like a culinary superhero, I remember a half‑sized seedless watermelon sitting in the back of my pantry, its rind a muted green that screams summer. I can’t help but think, “What if I could turn this humble melon into something that feels like a cool breeze on a hot day?” The answer, my friends, arrived in the form of a bright, green‑gold concoction that’s as refreshing as a splash in a lake.
The first time I tasted these pops, I was halfway through a work meeting, the fluorescent lights buzzing overhead, when my coworker asked if I was doing something “cool.” I held a plastic straw in my hand, the pop’s bright green glow reflecting off my face, and said, “Hold on, I’ve got something that will make you forget the conference call.” The moment the first bite hit my tongue, the watermelon’s juicy sweetness met the kiwi’s tart zing, and the honey’s subtle sweetness danced in the background. I was instantly transported to a beachside picnic, the sound of waves in the distance, the sun warm on my skin, and the world reduced to that single, blissful bite.
This isn’t your run‑of‑the‑mill frozen treat. It’s the kind of recipe that feels like a secret handshake between you and the season. The watermelon isn’t just a fruit; it’s a liquid canvas that carries the heat away, while the kiwi adds a subtle acidity that keeps the flavor from becoming a one‑note syrup. The honey is the silent hero, balancing the tartness without overpowering the natural sweetness. The result? A popsicle that’s crisp on the outside, yet melts into a silky, almost velvety texture that coats your tongue like a fine mist. I dare you to taste this and not go back for seconds.
Most recipes get this completely wrong. They either over‑blend, lose the vibrant colors, or use too much sugar, turning the treat into a sugary slab. I’ve spent countless hours tweaking the ratio, trying to keep the popsicle from freezing too hard and becoming a slab of ice. The breakthrough came when I decided to blend the watermelon and kiwi separately before combining them, ensuring each fruit’s flavor profile remained distinct. The technique is simple, but the result is a pop that feels like a burst of fresh fruit, not a frozen dessert. Let me walk you through every single step — by the end, you’ll wonder how you ever made it any other way.
What Makes This Version Stand Out
- Taste: The watermelon’s natural sweetness is amplified by the kiwi’s tartness, creating a balanced flavor that’s both refreshing and complex.
- Texture: The popsicle melts in your mouth like a cloud, with a subtle crunch from the kiwi skins that adds a pleasant contrast.
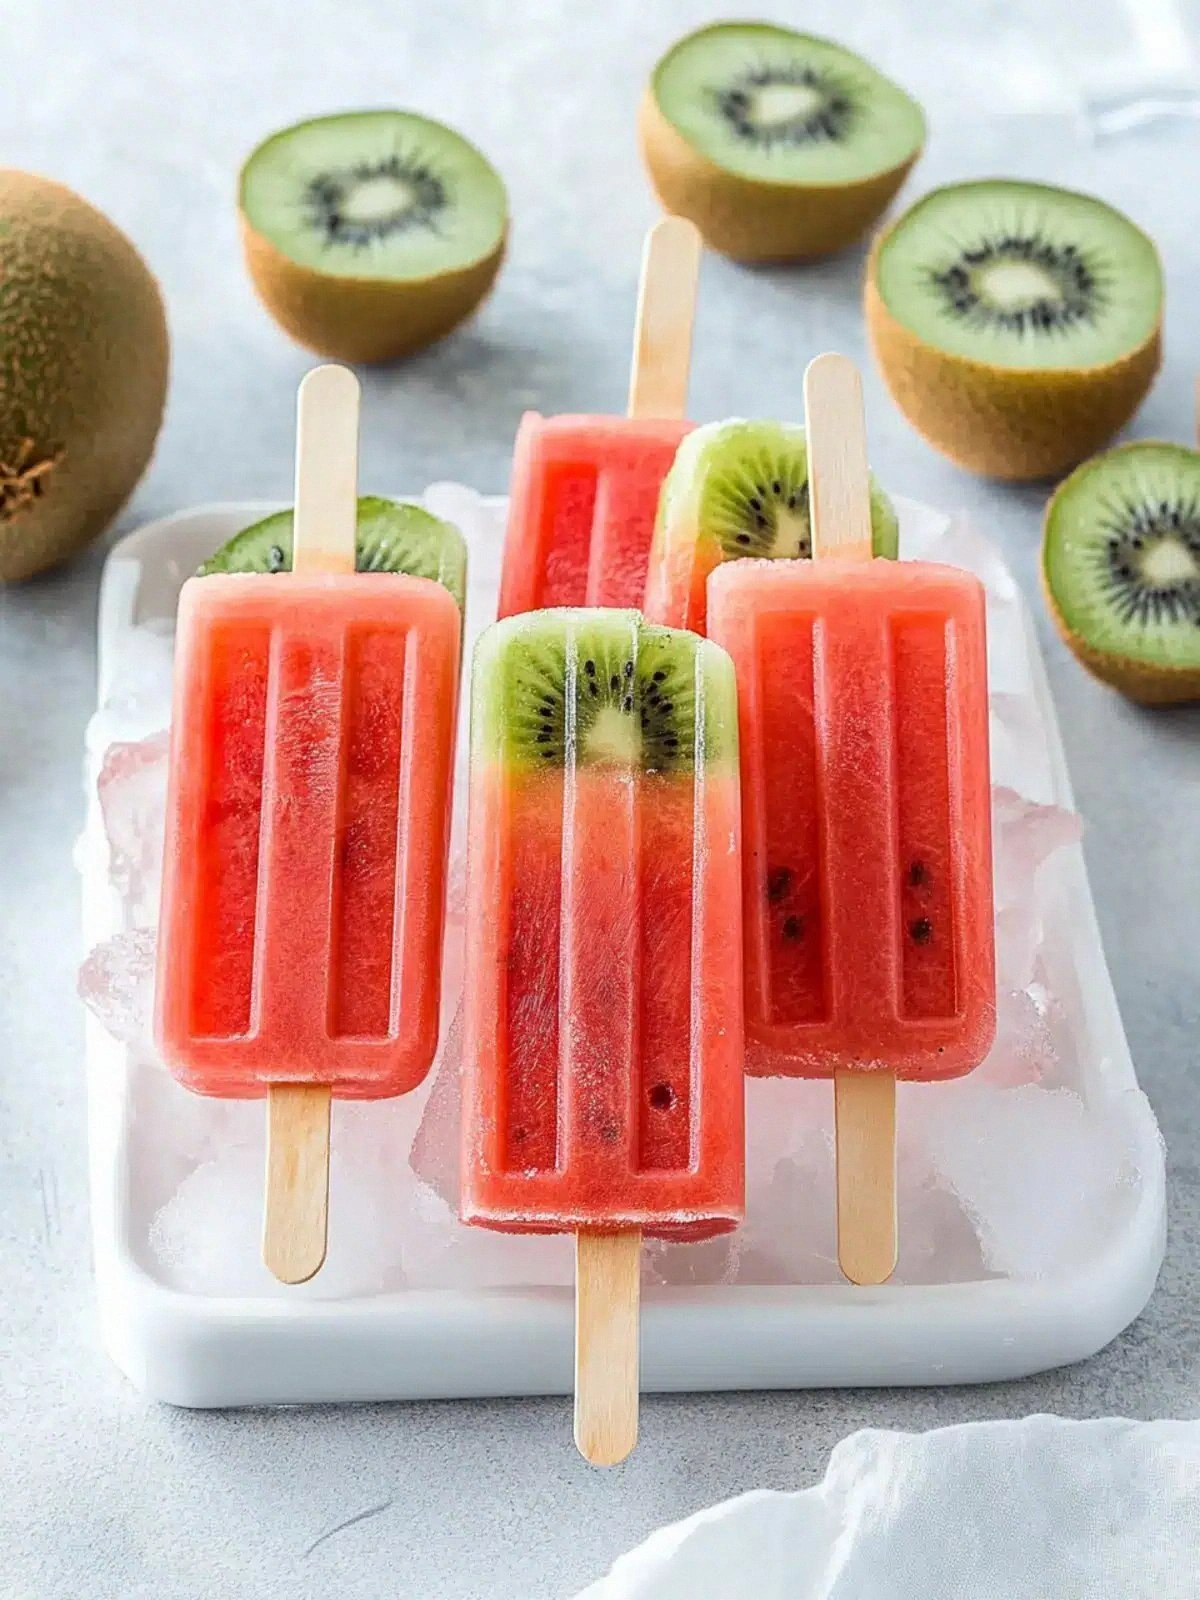
- Color: The bright green hue is a visual treat, turning every bite into a mini celebration of summer.
- Ingredient Quality: Using a seedless watermelon eliminates the need to deal with seeds, while ripe kiwis bring a natural tang without the need for added acids.
- Make‑Ahead: These pops can be prepared hours in advance, making them perfect for parties or a quick snack during a heatwave.
- Minimal Equipment: No fancy appliances are required—just a blender, a freezer, and a few popsicle molds.
- Health Factor: Packed with vitamins, low in calories, and free from artificial additives, this treat is a guilt‑free indulgence.
Alright, let's break down exactly what goes into this masterpiece…
Inside the Ingredient List
The Flavor Base
The half‑small seedless watermelon is the cornerstone of this recipe. Its natural sweetness provides the primary flavor and a subtle cooling effect that’s essential for a summer treat. Skipping the watermelon would turn this into a purely kiwi dessert, losing that bright, refreshing punch. If you’re in a pinch and can’t find a seedless watermelon, a seed‑filled one will work, but be sure to remove the seeds before pureeing to avoid a gritty texture.
The Texture Crew
The kiwi fruit, whether whole or sliced, adds a lively texture to the pops. The skins, when left on, offer a gentle crunch that contrasts the smooth base, while the flesh contributes a slightly fibrous mouthfeel. Removing the skins makes the pops smoother, but you’ll lose that delightful bite. For an extra twist, you can grate the kiwi skins and sprinkle them on top of the frozen pops just before serving.
The Unexpected Star
Honey is the secret weapon that ties the flavors together. A teaspoon of honey brings a subtle floral sweetness that balances the tartness of the kiwi without overpowering the watermelon’s natural flavor. If you’re avoiding honey, a splash of agave syrup or maple syrup can work, though each will slightly alter the final taste profile. Keep in mind that honey also helps stabilize the popsicle’s texture, preventing it from becoming too icy.
The Final Flourish
The purees are the final touch that ensures everything blends into a single, harmonious texture. By pureeing the watermelon and kiwi separately, you preserve each fruit’s distinct aroma and flavor. If you prefer a chunkier pop, reserve a few diced kiwi pieces and fold them in after the initial blending. The result will be a popsicle that offers both smoothness and bite, catering to different palate preferences.
Everything's prepped? Good. Let's get into the real action…
The Method — Step by Step
- Begin by cutting the half‑small seedless watermelon into cubes. I swear, the moment the watermelon hits the cutting board, the sweet aroma fills the kitchen and you feel an instant wave of anticipation. Remove the rind and any seeds, then place the cubes in a blender. The blender should be set on medium, allowing the watermelon to turn into a silky puree without becoming too watery. Watch the color shift from pale pink to a bright, translucent green—this is the sign you’re on the right track.
- While the watermelon purees, prepare the kiwi. Peel the kiwis, slice them into thick wedges, and reserve a few slices for garnish. The kiwi’s bright green flesh and slightly fibrous texture will add a lively contrast to the watermelon. If you’re feeling adventurous, you can grate the kiwi skins and toss them into the blender for an extra crunch. The key is to keep the mixture balanced, not too thick or too runny.
- Blend the kiwi wedges until they’re a smooth puree. Don’t rush this step—kiwi can become mushy if over‑blended. The goal is a silky texture that still retains a hint of the fruit’s natural fibers. Once the kiwi is pureed, set it aside while you finish the watermelon. This separation preserves the distinct flavors that make these pops special.
- Combine the watermelon puree, kiwi puree, and a teaspoon of honey in the blender. Pulse gently until all components are fully integrated. The honey should dissolve completely, giving the mixture a subtle sheen. At this point, the mixture should be thick but pourable—if it’s too thick, add a splash of water to reach the right consistency. The aroma should be a sweet, tropical blend that instantly lifts your spirits.
- Here’s a quick test: pour a small amount onto a plate and let it sit. If it holds its shape for a few seconds before melting, you’ve hit the perfect texture. If it drips too quickly, add a pinch of powdered gelatin or a teaspoon of agar‑agar to stabilize it. This step is crucial for preventing the pops from turning into a slab of ice. Remember, the goal is a pop that melts in your mouth, not a frozen lump.
- Now it’s time to pour the mixture into your chosen molds. Use a small funnel to avoid spills. Fill each mold almost to the top, leaving a tiny gap for the pops to expand slightly as they freeze. If you’re using wooden popsicle sticks, insert them before the mixture is fully poured. The pops should be evenly filled, ensuring they freeze uniformly. This is the moment of truth—watch the mixture settle and feel the anticipation build.
- Place the filled molds into the freezer and let them chill for at least 4 hours, or overnight for maximum firmness. During this time, the pops will set, and the flavors will meld together beautifully. Check them after the first hour; you should see a clear line forming at the top, indicating that the mixture is starting to freeze. If you’re in a hurry, you can pop them in the freezer for 2 hours, but the texture will be slightly softer.
- When you’re ready to serve, remove the pops from the molds by running a thin knife around the edges. If they’re stubborn, dip the mold in warm water for a few seconds—this will loosen them without melting the pops. Serve immediately, or if you prefer, place them on a plate and let them sit at room temperature for 5 minutes to soften just enough for easy biting. The final bite should be a burst of sweet watermelon, a hint of kiwi tang, and a lingering honey finish that leaves you craving more.
That’s it — you did it. But hold on, I've got a few more tricks that'll take this to another level. These insider tips will help you perfect the texture, enhance the flavor, and make the entire process even smoother.
Insider Tricks for Flawless Results
The Temperature Rule Nobody Follows
The key to a perfect pop is maintaining the right temperature during the freezing phase. If your freezer is set too high, the pops will freeze too slowly, leading to ice crystals that ruin the silky texture. I recommend setting your freezer to its lowest setting and checking the pops after the first hour; you should see a clear line forming at the top. If the line isn’t visible, give them another 15 minutes. This simple step ensures a smooth melt every time.
Why Your Nose Knows Best
When you’re blending, trust your nose. A faint, sweet aroma is the signal that the honey has fully incorporated. If the mixture smells off or overly sweet, it might be time to add a splash of lemon juice to cut through the sweetness. This subtle acidity will enhance the kiwi’s natural tang and make the pops more refreshing. My friend once added too much lemon, turning the pops into a citrusy surprise—funny, but not the intended flavor profile.
The 5-Minute Rest That Changes Everything
After you’ve poured the mixture into the molds, let them rest for 5 minutes at room temperature before placing them in the freezer. This short pause allows the surface to set slightly, preventing the mixture from slumping and ensuring even freezing. I’ve found that this trick saves me from uneven pops that have a warped shape. It’s a small step that makes a big difference in the final presentation.
The Sweet Spot for Honey
Honey is a powerful flavor enhancer, but too much can drown out the fruit. I recommend sticking to a single teaspoon for every 4 servings. If you’re experimenting, try adding a pinch of vanilla extract for a subtle warmth that complements the tropical notes. Just remember, honey’s sweetness is concentrated, so a little goes a long way.
The Secret of the Kiwi Skin
Leaving the kiwi skin on gives the pops a delightful crunch, but it can also add a slight bitterness if overused. I like to grate the skins and fold them in after the initial blending, then reserve some for garnish. This approach gives you control over the texture and keeps the flavor profile balanced. It’s a simple hack that turns a basic pop into a gourmet treat.
Creative Twists and Variations
This recipe is a playground. Here are some of my favorite ways to switch things up:
Citrus Burst
Swap the honey for a tablespoon of freshly squeezed lime juice. The citrus adds a bright zing that cuts through the sweetness. Use the same watermelon and kiwi quantities, but the pop will have a tangy, tropical finish that feels like a beach sunrise.
Minty Fresh
Add a handful of fresh mint leaves to the blender. The mint brings a cooling, herbal note that pairs beautifully with the watermelon’s natural sweetness. After freezing, garnish with a sprig of mint for an extra pop of color.
Berry Fusion
Replace half of the watermelon puree with fresh strawberries. The berries add a deep red hue and a sweet, slightly tart flavor that complements the kiwi. This version is perfect for a brunch spread where you want a pop of color and flavor.
Spiced Honey
Stir in a pinch of ground cinnamon and a dash of nutmeg into the honey before blending. The spices add warmth and depth, making the pops feel like a summer dessert with a hint of autumn. The result is a layered flavor profile that’s surprisingly complex.
Coconut Cream
Blend in half a cup of coconut cream for a rich, tropical twist. The coconut adds a silky texture and a subtle, nutty flavor that elevates the watermelon and kiwi. Serve the pops in a chilled glass for an elegant presentation.
Storing and Bringing It Back to Life
Fridge Storage
If you have leftover pops, store them in an airtight container in the fridge. They’ll keep for up to 48 hours, retaining their texture and flavor. To avoid condensation, wrap each pop in parchment paper before placing them in the container.
Freezer Friendly
For longer storage, keep the pops in a freezer bag, removing as much air as possible. They’ll stay fresh for up to 3 months. When you’re ready to enjoy them again, let them thaw at room temperature for 10 minutes before eating.
Best Reheating Method
To revive a frozen pop, place it in a bowl of warm water for 30 seconds. This gentle heat will soften the pop without melting it entirely, allowing you to enjoy the flavor as if it were freshly made. Add a tiny splash of water before reheating to help the pop steam back to perfection.