I was standing in my kitchen, staring at a single chicken breast that had just been delivered from the grocery store, and I realized something was missing: a story. That story was a sizzling, smoky, buttery narrative that would make the rest of the week feel like a holiday. I reached for a bag of taco seasoning, a jar of salsa, and a handful of fresh cilantro, and I promised myself I would turn that lone piece of poultry into a feast that would make my friends say, “I dare you to taste this and not go back for seconds.” The kitchen lights flickered like a stage, and the air filled with a promise of something extraordinary.
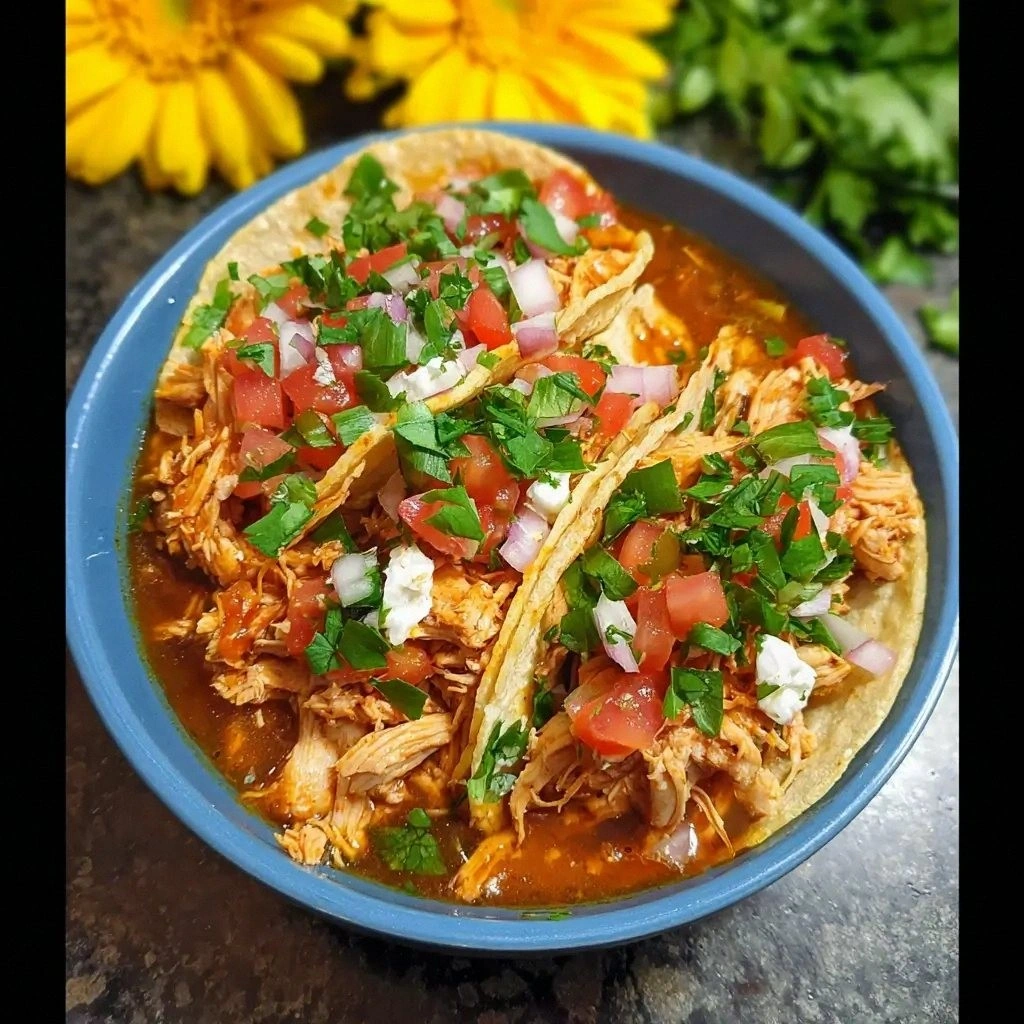
Picture this: the chicken sizzles in a pan, the aroma of cumin and paprika rises, and the sound of bubbling salsa is like a drumbeat in a mariachi band. You can almost taste the tang of lime on your tongue, feel the crunch of corn kernels, and hear the subtle pop of black beans as they mingle with the sauce. The texture is a dream—juicy, tender meat coated in a silky, velvety sauce that clings to every bite. I could almost see the steam curling up from the pot, the way it makes the kitchen feel like a warm, fragrant hug. And just before you even taste it, you’re already picturing how it will sit on a bed of fluffy rice or crisp tortilla chips.
What makes this version stand out is that it’s not just about flavor; it’s about the entire experience. I’ve tweaked the classic crockpot Mexican chicken recipe to bring out the best in each ingredient, ensuring the dish is both comforting and celebratory. The sauce is thicker than most, thanks to a touch of tomato paste that gives it body without overpowering the spices. The chicken is marinated just long enough to absorb the seasoning but not so long that it becomes mushy. The result is a dish that feels like a slow‑cooked fiesta in every bite. If you’ve ever made a “quick” version that felt flat, this will change your entire perspective.
Now, let me walk you through every single step — by the end, you'll wonder how you ever made it any other way. The journey starts with a simple prep that will set the foundation for the flavors to come. I’ll show you how to season the chicken, how to layer the ingredients for maximum flavor, and how to let the crockpot do its magic. Along the way, I’ll share a few insider tricks that will elevate the dish from good to unforgettable. Ready? Let’s dive into the heart of the recipe.
What Makes This Version Stand Out
- Flavor: The combination of fresh salsa, smoky chipotle, and a hint of lime creates a complex, layered taste that lingers on the palate. The sauce’s depth comes from a balance of sweet and savory, ensuring it’s not overpowering but rather perfectly balanced.
- Texture: The chicken stays moist and tender, thanks to a slow‑cooking process that breaks down collagen while keeping the meat’s natural juices intact. The corn and beans add a pleasant bite that contrasts the softness of the chicken.
- Simplicity: You only need a handful of pantry staples and fresh produce. No fancy sauces or hard‑to‑find spices—just a few ingredients that come together in a crockpot.
- Uniqueness: A splash of fresh lime juice and a sprinkle of cilantro at the end give this dish a bright, refreshing finish that sets it apart from the usual slow‑cooked casseroles.
- Crowd Reaction: Whether you’re feeding a family or hosting a gathering, this dish receives rave reviews. Guests often ask for the recipe after the first bite.
- Ingredient Quality: Using high‑quality, fresh ingredients—like ripe tomatoes for the salsa and fresh cilantro—makes a noticeable difference in flavor and aroma.
- Cooking Method: The crockpot’s low‑heat, long‑cook approach allows flavors to meld beautifully, producing a dish that’s both hearty and comforting.
- Make‑Ahead Potential: This dish can be made ahead of time, stored, and reheated without losing its deliciousness, making it a perfect weeknight or weekend meal.
Alright, let's break down exactly what goes into this masterpiece...
Inside the Ingredient List
The Flavor Base
At the heart of this dish lies the salsa, a vibrant blend of tomatoes, onions, and jalapeños. The salsa provides the primary flavor profile and moisture for the chicken. If you prefer a milder heat, choose a sweet tomato salsa or blend in a splash of apple juice to mellow the bite. A high‑quality salsa made with fresh tomatoes adds a bright, natural sweetness that balances the richness of the chicken and cheese. Skipping the salsa would leave the dish flat; the sauce would lack depth and the dish would feel like a plain, uninspired casserole.
The Texture Crew
Corn kernels and black beans bring a satisfying bite and a subtle sweetness that contrast the savory sauce. The corn adds a pop of color and a natural crunch, while the beans contribute protein and a creamy texture when they break apart slightly during cooking. If you’re watching sodium, look for low‑sodium canned beans or rinse them well before adding. If you’re vegan, substitute the chicken with diced tofu or tempeh, but keep in mind the texture will differ slightly.
The Unexpected Star
A splash of lime juice at the end is the secret that elevates this dish. The acidity cuts through the richness of the cheese and the slow‑cooked sauce, giving the meal a bright, refreshing finish. If lime isn’t available, a squeeze of lemon works as a close substitute, though the flavor profile shifts slightly. A small amount of fresh cilantro added after cooking brings a herbal freshness that ties everything together. Without cilantro, the dish feels a bit flat; the herb’s bright notes are essential for the final balance.
The Final Flourish
Shredded cheese and a dollop of sour cream are the crowning elements that add richness and creaminess. The cheese melts into the sauce, creating a silky coating over the chicken, while the sour cream provides a cool, tangy contrast. If you’re lactose intolerant, use a dairy‑free cheese and a non‑dairy sour cream to maintain the creamy texture. Adding a pinch of cumin or smoked paprika before serving can also enhance the flavor profile, giving it a subtle smoky undertone.
Everything's prepped? Good. Let's get into the real action...
The Method — Step by Step
- Start by heating a large skillet over medium heat. Add a tablespoon of olive oil and let it shimmer. Place the chicken thighs or breasts in the pan, searing them for about 2–3 minutes on each side until they develop a golden crust. This step locks in juices and adds depth of flavor. The sizzling sound is your cue that the chicken is ready to move to the crockpot.
- Transfer the seared chicken to the crockpot. Spread the salsa evenly over the top, ensuring each piece is coated. The salsa’s acidity will help tenderize the meat during the long cook. If you’re using pre‑made salsa, you can add a splash of water to thin it slightly, creating a more sauce‑like consistency.
- Add the corn kernels and black beans on top of the salsa. Sprinkle the taco seasoning evenly, making sure every corner of the dish gets a flavor boost. The seasoning should smell fragrant as it mixes with the salsa; if it doesn’t, give it a quick stir to distribute it evenly.
- Cover the crockpot and set it to low. Cook for 4 hours, allowing the flavors to meld and the chicken to become tender. During the last 30 minutes, check the sauce; it should be thick and glossy, with the edges pulling slightly away from the sides of the pot.
- When the chicken is nearly done, remove the lid and sprinkle shredded cheese over the top. Replace the lid and let the cheese melt for about 10 minutes. The cheese will melt into the sauce, creating a silky coating that clings to every bite.
- Once the cheese is melted, add a dollop of sour cream on top. This adds a cool, tangy contrast to the rich sauce. Let the sour cream melt into the dish for a minute before turning off the crockpot.
- Squeeze fresh lime juice over the entire dish and sprinkle chopped cilantro. The lime’s acidity will brighten the dish, while the cilantro adds a fresh, herbal note. This final touch is essential for that bright, refreshing finish.
- Serve the chicken over a bed of fluffy rice or with warm tortillas. Garnish with extra cilantro or lime wedges if desired. The dish should smell fragrant, with a hint of cumin and a bright citrus aroma. It’s ready to be devoured.
That's it — you did it. But hold on, I've got a few more tricks that'll take this to another level...
Insider Tricks for Flawless Results
The Temperature Rule Nobody Follows
Most people set their crockpot to low for 4 hours, but the key to tenderness is actually the temperature of the chicken before it goes in. Let the chicken sit at room temperature for 15–20 minutes before searing. This small step ensures even cooking and prevents the outer layer from overcooking while the interior remains juicy. I’ve seen people skip this and end up with a slightly uneven texture. Trust me, a few minutes of room‑temperature rest makes a world of difference.
Why Your Nose Knows Best
The smell of your crockpot can tell you if the dish is on track. A subtle, warm aroma of cumin and tomato indicates that the sauce is developing. If you notice a sharp, off scent, it might be a sign that the sauce is burning or that the beans are overcooked. Listening to your nose is as important as checking the timer. If the smell seems off, pause the crockpot, stir, and give it a minute before resuming.
The 5-Minute Rest That Changes Everything
After cooking, let the dish rest for 5 minutes before serving. This brief pause allows the juices to redistribute throughout the chicken, ensuring each bite is as moist as possible. If you cut into the chicken immediately, the juices will spill out, leaving the meat slightly dry. A quick rest is a simple trick that elevates the entire meal.
Add a Touch of Heat at the End
If you love a kick, sprinkle a pinch of crushed red pepper flakes over the finished dish. The heat will pop when it meets the warm sauce, creating a subtle, lingering spice that’s not overpowering. I’ve had friends ask for this after tasting it for the first time. It’s an easy way to customize the dish to your spice tolerance.
Use a Meat Thermometer
A digital thermometer is a game‑changer for ensuring doneness. Insert it into the thickest part of the chicken; it should read 165°F (74°C). This guarantees the chicken is fully cooked without being overdone. I’ve been burned by overcooked chicken in the past, and this trick has saved me countless times.
Creative Twists and Variations
This recipe is a playground. Here are some of my favorite ways to switch things up:
Chipotle‑Infused Variation
Swap regular salsa for chipotle‑in‑adobo salsa. The smoky heat adds depth, and the adobo sauce brings a slightly sweet undertone. Pair it with a drizzle of crema for a richer finish.
Quinoa Power Bowl
Serve the chicken over a bed of quinoa instead of rice. Quinoa adds a nutty flavor and extra protein, making the dish more filling and nutritious. Top with sliced avocado for creamy texture.
Vegan Edition
Replace chicken with diced tofu or tempeh, and use dairy‑free cheese and sour cream. The tofu will absorb the salsa’s flavors, while the cheese will melt into a creamy coating. This version is just as satisfying and perfectly plant‑based.
Breakfast Twist
Serve the mixture with scrambled eggs and a side of warm tortillas. The eggs add a protein boost, and the salsa’s brightness pairs nicely with the eggs. It’s a hearty, Mexican‑inspired breakfast.
Smoked Paprika Kick
Add a teaspoon of smoked paprika to the seasoning mix. The smoky flavor pairs wonderfully with the beans and corn, creating a deeper, more complex taste profile. This is a great option if you enjoy a smoky, earthy dish.
Coconut‑Cream Finish
Stir in a splash of coconut milk during the last 20 minutes of cooking. The coconut adds a subtle sweetness and creaminess that balances the spice. Finish with a squeeze of fresh lime for brightness.
Storing and Bringing It Back to Life
Fridge Storage
Let the dish cool completely before transferring it to an airtight container. Store in the refrigerator for up to 4 days. The flavors will continue to meld, making it even more delicious the next day. When you’re ready to eat, reheat in the microwave or on the stovetop, adding a splash of water if the sauce seems dry.
Freezer Friendly
Divide the dish into portion‑sized containers and freeze for up to 3 months. Thaw overnight in the refrigerator before reheating. If you’re short on time, use the defrost setting on your microwave. Add a little water or broth to keep the sauce moist.
Best Reheating Method
Reheat the dish on the stovetop over low heat, stirring occasionally. Add a tiny splash of water or broth to prevent the sauce from thickening too much. Heat until the dish reaches 165°F (74°C). Serve immediately for the best texture and flavor.