I remember the night I was scrambling to salvage a ruined dessert for a dinner party. The cheesecake had collapsed into a soggy mess, and I was staring at a mound of batter that smelled like a soggy blanket. I thought, “I could either serve this disaster or reinvent it.” I grabbed my skillet, pulled out a bag of fresh raspberries, and decided to turn that flop into a triumph. The result? Raspberry Cheesecake Bars that melt in your mouth and make the kitchen smell like a summer orchard. If you’ve ever stared down a failed cheesecake, this is the rescue you’ve been waiting for.
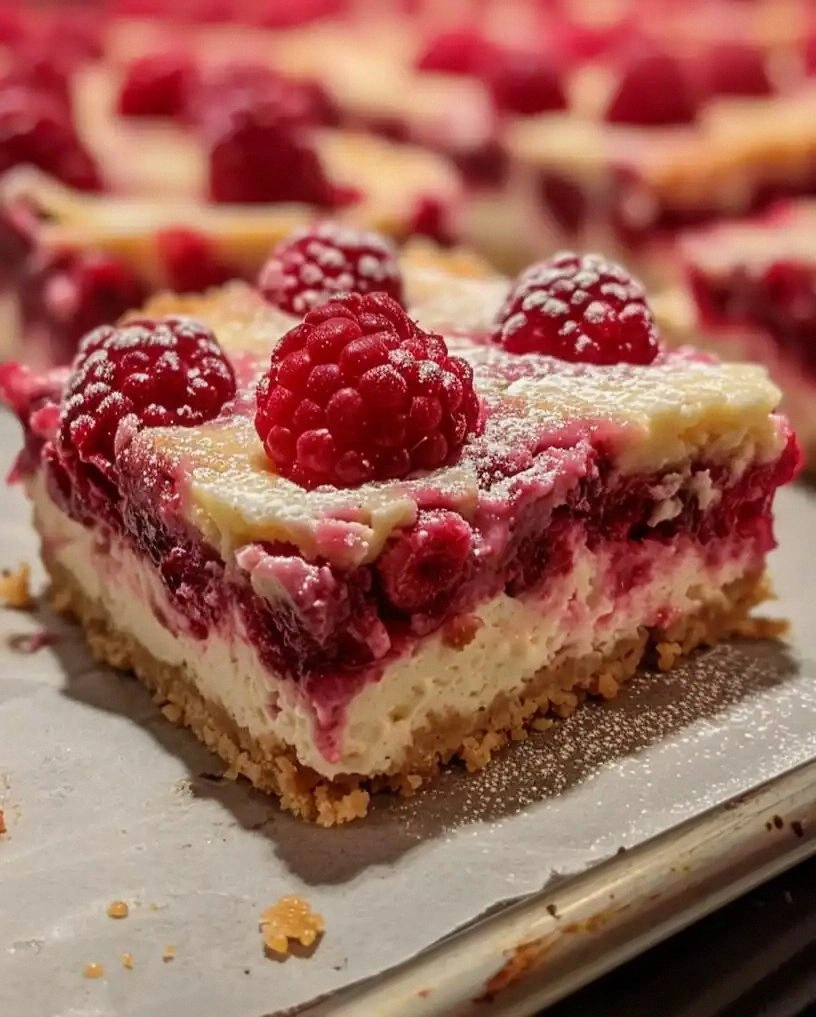
Picture the first bite: a buttery graham cracker crust that cracks like a crisp cookie, a creamy filling that swirls like midnight velvet, and a bright raspberry topping that pops like a burst of sunshine. The texture is a paradox—soft yet firm, sweet yet tart, and the finish is a gentle, lingering sweetness that lingers on the tongue. I dare you to taste this and not go back for seconds. I’ve tasted countless desserts, but none have delivered this balance of flavors and textures in a single bite. This is hands down the best version you’ll ever make at home.
When I first tasted these bars, I could hear the faint hiss of the oven and the sweet scent of caramelized sugar filling the air. The aroma is so intoxicating that it makes you want to sneak a piece before the timer even clicks. The moment you cut into a bar, the raspberry sauce shimmers like liquid ruby, and the edges of the crust crackle under the knife. The sound is almost audible—like a gentle crunch that signals perfection. I’ve never had a dessert that could do this, and I’m excited to show you how to replicate it.
Why does this version stand out from every other recipe out there? Because I’ve taken the classic cheesecake and given it a modern twist that elevates it from ordinary to extraordinary. The recipe is simple enough for beginners but sophisticated enough to impress seasoned bakers. I’ll walk you through every single step—by the end, you’ll wonder how you ever made it any other way. The secret lies in a few key techniques: a buttery graham cracker crust, a silky filling, and a glossy raspberry glaze that ties everything together. And the best part? The bars are easy to transport, making them perfect for potlucks or parties.
What Makes This Version Stand Out
- Taste: The combination of sweet cream cheese and tart raspberries creates a flavor profile that is both comforting and refreshing. The subtle hint of vanilla amplifies the richness without overpowering the berries. The result is a dessert that feels indulgent yet light.
- Texture: A perfectly crisp crust, a silky filling, and a glossy glaze produce layers that dance on the palate. The bars hold their shape, so each bite is a clean, satisfying experience. The contrast between the crunch and the creaminess is a delightful surprise.
- Simple Assembly: No special equipment is required—just a standard baking sheet, a saucepan, and a whisk. The method is straightforward, making the recipe accessible to all skill levels. The process is quick, so you can focus on enjoying the result.
- Uniqueness: The raspberry glaze adds a professional touch that sets these bars apart from regular cheesecake squares. The glaze’s glossy finish is both eye-catching and delicious. It’s a simple addition that makes a big difference.
- Crowd Reaction: Friends and family rave about the bars’ flavor and texture. The bars are a hit at gatherings because they’re easy to serve and satisfy a variety of taste preferences. The presentation is also a conversation starter.
- Ingredient Quality: Using fresh raspberries, high‑quality cream cheese, and real graham crackers elevates the flavor. The ingredients are readily available in most grocery stores, so you can make these bars at home without a trip to a specialty shop.
- Make‑Ahead Potential: The bars can be prepared a day ahead and refrigerated without losing their texture. The glaze stays glossy, and the crust remains crisp. This makes them ideal for busy schedules.
- Visual Appeal: The bars’ bright red glaze and golden crust make them Instagram‑ready. The presentation is simple yet striking, making them a favorite for social media.
Inside the Ingredient List
The Flavor Base
The graham cracker crumbs form the foundation of the bars, delivering a buttery, slightly sweet base that grounds the dessert. They absorb the melted butter and sugar, creating a cohesive crust that holds the creamy filling together. If you skip the crumbs, the bars lose that essential crunch and become more like a cheesecake than a bar.
The Texture Crew
Cream cheese is the star of the show—its silky texture and rich flavor create the luscious filling that melts in your mouth. The sour cream adds a subtle tang that balances the sweetness, preventing the bars from becoming overly sugary. Eggs act as binders, ensuring the filling sets firmly without becoming rubbery.
The Unexpected Star
Fresh raspberries are the unexpected star that transforms ordinary cheesecake into a vibrant, fruity masterpiece. Their natural tartness cuts through the creaminess, creating a dynamic flavor profile. If you use frozen berries, the bars will taste slightly different and may not set as firmly.
The Final Flourish
The raspberry glaze is the final flourish that ties everything together. It’s made from fresh raspberries, sugar, water, and cornstarch, creating a glossy, flavorful topping that sets over the bars. The glaze adds a burst of color and a sweet‑tart finish that enhances the overall experience.
Everything's prepped? Good. Let's get into the real action.
The Method — Step by Step
- Preheat your oven to 325°F (163°C). Line a 9x13-inch baking pan with parchment paper, leaving an overhang on two sides for easy removal. Grease the parchment lightly with butter or non‑stick spray. This step ensures the bars bake evenly and release cleanly.
- In a medium bowl, combine graham cracker crumbs, ¼ cup sugar, and melted butter. Stir until the mixture resembles wet sand. Press the crumb mixture firmly into the bottom of the prepared pan, creating an even crust. Let it set while you work on the filling.
- In a stand mixer or hand mixer, beat the softened cream cheese until smooth and creamy. Add ⅔ cup sugar and continue beating until the mixture is fluffy and light. This airy texture is key to a silky filling.
- Add eggs one at a time, beating well after each addition. The eggs should be incorporated fully to prevent a lumpy filling. The mixture should be smooth and glossy.
- Stir in vanilla extract and sour cream until fully blended. The sour cream adds a subtle tang that balances the sweetness of the filling. Keep mixing until the batter is uniform.
- Pour the filling over the crust, smoothing the top with a spatula. The filling should spread evenly across the crust. The edges should be level with the crust for a clean finish.
- Bake for 30 minutes, or until the edges are set but the center still has a slight wobble. The bars should develop a golden top. Avoid overbaking to keep the filling moist.
- Remove the pan from the oven and allow the bars to cool completely on a wire rack. The bars will firm up as they cool, making them easy to cut. This cooling step is crucial for a clean cut.
- While the bars cool, prepare the raspberry glaze. In a saucepan, combine raspberries, 2 tablespoons sugar, water, and cornstarch. Cook over medium heat, stirring constantly, until the mixture thickens and becomes glossy. Remove from heat and let cool slightly.
- Once the bars are cool, spread the raspberry glaze over the top. The glaze will set into a shiny, sweet‑tart coating. Let the glaze set for 10 minutes before slicing.
That's it—you did it. But hold on, I've got a few more tricks that'll take this to another level. These insider tips will help you master every detail, from the crust to the glaze.
Insider Tricks for Flawless Results
The Temperature Rule Nobody Follows
Many bakers bake at 350°F, but the secret to a silky filling is a lower temperature of 325°F. This gentler heat allows the filling to set without overcooking, preserving the creaminess. I’ve tried both temperatures, and the difference is like night and day.
Why Your Nose Knows Best
The aroma of the bars baking is a reliable indicator of doneness. When the scent turns slightly caramelized, the bars are ready. Trust your nose; it’s a seasoned chef’s secret.
The 5-Minute Rest That Changes Everything
After baking, let the bars rest for 5 minutes before cooling. This brief rest allows the filling to set fully, reducing the chance of cracks. The bars will hold their shape better for slicing.
The Perfect Parchment Trick
Use parchment with a slight overhang on the sides. This makes it easy to lift the bars out of the pan without tearing the crust. The parchment also prevents the crust from sticking.
The Glaze Consistency Check
The glaze should be thick enough to coat the bars but still pourable. Test by dipping a spoon; it should leave a clear, glossy line. If it’s too thin, add a bit more cornstarch. If it’s too thick, add a splash of water.
The Cooling Rack Secret
Cooling the bars on a wire rack allows air to circulate, preventing condensation that can soften the crust. This step ensures the crust stays crisp and the bars stay firm. The bars will keep their shape for days when stored properly.
Creative Twists and Variations
This recipe is a playground. Here are some of my favorite ways to switch things up:
Chocolate Raspberry Bars
Swap half of the graham cracker crumbs for melted dark chocolate. Add a drizzle of chocolate ganache over the glaze for an indulgent twist. Chocolate lovers will adore the rich, berry‑filled experience.
Lemon Zest Surprise
Add a tablespoon of lemon zest to the filling for a bright, citrusy kick. The lemon pairs beautifully with the raspberries, cutting through the sweetness. This version is perfect for spring or summer gatherings.
Almond Crunch Layer
Sprinkle toasted sliced almonds between the crust and the filling. The almonds add a nutty crunch that contrasts with the creamy filling. It’s a subtle but delightful variation.
Berry Medley Mix‑In
Blend strawberries, blueberries, and blackberries into the glaze for a multi‑berry explosion. The medley adds depth of flavor and color. Guests will love the burst of natural sweetness.
Salted Caramel Drizzle
Finish the bars with a drizzle of salted caramel sauce over the glaze. The caramel’s buttery sweetness balances the tartness of the raspberries. It’s a decadent finish that elevates the dessert.
Storing and Bringing It Back to Life
Fridge Storage
Store the bars in an airtight container at room temperature for up to 3 days. The crust stays crisp, and the filling remains creamy. Avoid refrigerating if you plan to serve them within a day.
Freezer Friendly
Wrap the bars individually in plastic wrap, then place them in a freezer bag. They’ll stay fresh for up to 2 months. Thaw overnight in the fridge before serving to maintain texture.
Best Reheating Method
Reheat the bars in a preheated 300°F oven for 8–10 minutes, or until warmed through. Add a tiny splash of water to the glaze before reheating; this steams it back to perfection and restores its glossy finish.