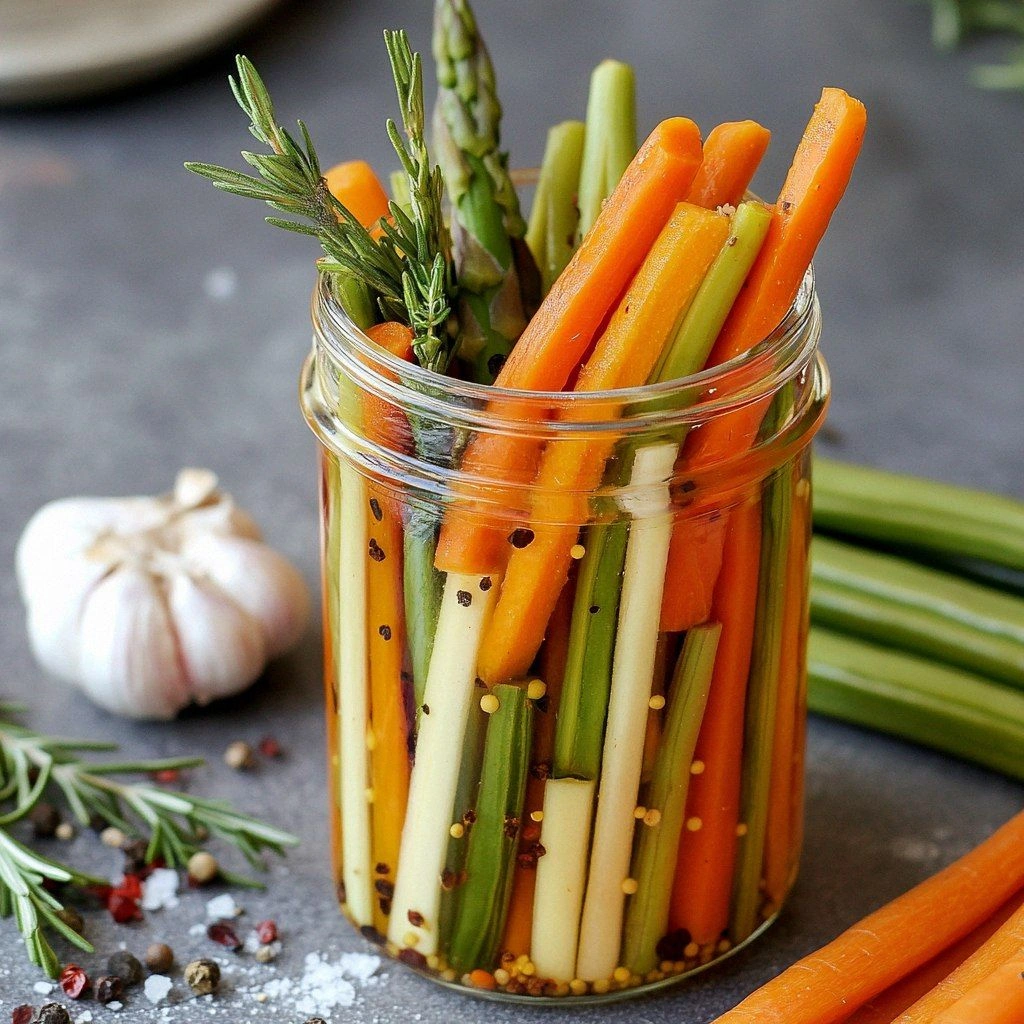
Picture this: you’re in the middle of a bustling dinner party, the kitchen humming like a well‑tuned orchestra, and the guests are all asking, “What’s that amazing aroma?” You turn, and there’s a steaming bowl of pickled veggie sticks on the counter, their bright colors glistening in the soft light. The moment you open the jar, the air is filled with the sharp, aromatic tang of garlic, the subtle sweetness of apple cider vinegar, and the fresh, green whisper of dill and rosemary. That instant burst of flavor is the kind of culinary revelation that turns a simple snack into a conversation starter.
I’ve spent years chasing the perfect pickled creation, and every time I think I’ve nailed it, life throws a curveball—an unexpected craving, a last‑minute gathering, or a pantry full of fresh vegetables that need to be used up. I’ve tried everything from classic cucumber pickles to spicy kimchi, but none of them captured that crisp, almost velvet‑like texture and that layered, herb‑infused punch that I keep coming back to. That’s why this Garlic & Herb Pickled Veggie S recipe is a game‑changer: it’s simple, it’s bold, and it’s the kind of dish that will make your friends wonder why they’ve ever settled for store‑bought pickles.
The beauty of this recipe lies in its balance. The garlic doesn’t overpower; it sings in harmony with the herbs. The vinegar provides a bright, clean acidity that lifts the veggies without making them soggy. And the subtle sweetness from a touch of sugar and apple cider vinegar keeps the flavor profile from tipping into the overly sharp territory. Every bite is a crunchy, savory, slightly sweet, and herbaceous experience that will have you reaching for another bite—yes, I dare you to taste this and not go back for seconds.
And the best part? This isn’t just a one‑off recipe. The pickling process is so forgiving that you can tweak it to suit any palate, any occasion, or even a different season. Want a sweeter version? Add a splash of honey. Craving heat? Toss in some crushed red pepper flakes. The possibilities are endless, but the core of this dish—garlic, herbs, and a bright vinegar base—remains the same, delivering a flavor that is hands down the best version you’ll ever make at home.
Let me walk you through every single step—by the end, you’ll wonder how you ever made it any other way. This isn’t just a recipe; it’s a culinary experience that will elevate your snack game, impress your guests, and leave you with a pantry full of delicious, ready‑to‑serve pickled veggies that last for weeks.
What Makes This Version Stand Out
- Taste: The garlic and herb blend creates a depth of flavor that feels both familiar and adventurous. Each bite delivers a punch of savory, slightly sweet, and tangy notes that linger on the palate.
- Texture: The veggies stay crisp and crunchy, thanks to the right balance of vinegar and salt. The result is a snap that’s satisfying without being crunch‑crunch.
- Ease: No complicated steps or obscure ingredients. All you need is a handful of pantry staples and fresh veggies you already have.
- Uniqueness: The combination of garlic, dill, rosemary, and a hint of mustard seeds gives this pickled version a distinctive, aromatic profile that sets it apart from classic cucumber or carrot pickles.
- Versatility: Serve them as an appetizer, a side dish, or a topping for salads, sandwiches, or tacos. The bright, herbaceous flavor works with almost everything.
- Make‑Ahead: The pickled veggies keep wonderfully in the fridge for up to a month, making them perfect for meal prep or last‑minute entertaining.
- Ingredient Quality: Fresh, high‑quality vegetables and herbs are the secret to the bright, clean taste. Don’t skimp on the garlic; it’s the star of the show.
- Crowd Reaction: Friends will rave about the crunch and the herbaceous zing, and you’ll be the host who can brag about the homemade, artisanal touch.
Alright, let’s break down exactly what goes into this masterpiece…
Inside the Ingredient List
The Flavor Base
The heart of this pickle is the brine—a symphony of vinegar, water, sugar, and a blend of whole spices. The white vinegar provides a clean acidity, while the apple cider vinegar adds a subtle fruitiness that cuts through the garlic’s boldness. The sugar isn’t there to make it sweet; it balances the acidity and helps the veggies retain their crispness.
If you skip the brine, the veggies will either be bland or overly sour. The right mix ensures that the pickles have that bright, refreshing snap that makes them so addictive. For a lower‑sugar version, simply reduce the sugar to a tablespoon; the result will be slightly sharper but still delicious.
The Texture Crew
Carrots, cucumbers, bell peppers, and celery form the crunchy foundation. Each vegetable brings its own unique bite: carrots add sweetness, cucumbers bring coolness, bell peppers add a slight sweetness and color, while celery offers a subtle peppery note. Together, they create a medley that’s both visually appealing and texturally diverse.
If you’re worried about one vegetable overpowering the others, keep the ratios balanced. For example, using equal parts of each veggie ensures that no single flavor dominates. If you prefer a more pronounced carrot flavor, double the amount of carrots and keep the others at a single portion.
The Unexpected Star
Fresh garlic is the star that makes this recipe unforgettable. Roasted garlic brings a mellow, caramelized flavor that complements the sharpness of the vinegar. When you add it to the brine, the garlic’s aroma fills the kitchen, creating a sensory experience that’s both comforting and exciting.
If you’re not a garlic fan, you can reduce the amount to a single clove or use garlic powder. However, the fresh garlic’s depth is hard to replicate, so I recommend keeping at least one clove to maintain that signature flavor.
The Final Flourish
The herbs—dill, thyme, rosemary, and parsley—provide a fragrant, green finish that ties everything together. Each herb brings its own nuance: dill offers a bright, almost citrusy note, thyme adds earthiness, rosemary contributes a piney aroma, and parsley rounds it out with a fresh, clean finish. Together, they create a bouquet that’s both aromatic and complex.
If you’re in a pinch or simply want to experiment, feel free to swap rosemary for oregano or add a sprig of basil for a sweeter herb profile. The key is to keep the herb mix fresh; dried herbs won’t deliver the same vibrant flavor.
Everything's prepped? Good. Let's get into the real action…
The Method — Step by Step
- Prepare the Veggies: Wash and dry all the vegetables thoroughly. Slice carrots, cucumbers, bell peppers, and celery into uniform sticks, about 2 inches long. The uniformity ensures even pickling and a consistent bite. While the veggies sit, you can start prepping the brine.
- Make the Brine: In a medium saucepan, combine 1 cup white vinegar, 1 cup apple cider vinegar, 1 cup water, and 1 tablespoon sugar. Add 1 teaspoon salt, 1 teaspoon black pepper, 1 teaspoon mustard seeds, 1 teaspoon coriander seeds, 1 teaspoon dill seeds, and 1 teaspoon peppercorns. Bring the mixture to a gentle boil, stirring until the sugar dissolves. The aroma should be sharp and inviting.
- Roast the Garlic: While the brine simmers, take 4 cloves of fresh garlic, peel, and lightly roast them in a dry skillet over medium heat for 2-3 minutes, or until they develop a golden brown. The roasting process mellows the raw sharpness and brings out a sweet, caramelized flavor that will permeate the pickles.
- Combine Veggies and Brine: Place the sliced veggies in a large heat‑proof jar or bowl. Pour the hot brine over them, ensuring that all the sticks are submerged. Add the roasted garlic cloves, a handful of fresh dill, 1 tablespoon thyme, 1 tablespoon rosemary, and 1 tablespoon parsley. The herbs should be scattered evenly over the veggies.
- Let It Cool: Allow the mixture to cool to room temperature, about 30 minutes. During this time, the veggies will start to absorb the brine, and the flavors will begin to meld. The smell during this cooling phase is intoxicating—think of a garden after rain.
- Refrigerate: Cover the jar or bowl with a lid or plastic wrap and place it in the refrigerator. Let the pickles sit for at least 2 hours, but the best flavor develops after 24 hours. The longer they sit, the deeper the garlic and herb notes become.
- Check the Texture: After 24 hours, check one stick. It should be firm yet slightly tender. If it feels too hard, let it sit for another hour. If it’s too soft, the brine might be too weak—add a pinch of salt and let it sit another 30 minutes.
- Serve: Once the desired texture is achieved, the pickles are ready to serve. They’re perfect straight from the jar, or you can transfer them to a serving dish. Pair them with a tangy yogurt dip or a simple vinaigrette for an extra layer of flavor.
- Enjoy: The first bite will hit you with a bright, garlicky punch, followed by the herbaceous finish and a satisfying crunch. If you’re not already craving more, remember this line: “I dare you to taste this and not go back for seconds.”
That’s it — you did it. But hold on, I’ve got a few more tricks that will take this to another level…
Insider Tricks for Flawless Results
The Temperature Rule Nobody Follows
Many people assume that a hot brine is the best way to pickle, but the temperature actually matters. The key is to bring the brine to a gentle boil, then let it cool to room temperature before pouring it over the veggies. This ensures the sugar dissolves fully and the veggies don’t steam, which could soften them. I once tried a “quick pickling” method that left the veggies soggy—lesson learned, and the rule stands.
Why Your Nose Knows Best
Before you seal the jar, give it a quick sniff. If the aroma feels off—too sharp or too sweet—adjust the brine. A balanced pickling solution should smell bright, slightly sweet, and herbaceous. This sensory check is a quick way to catch a mistake before it’s too late.
The 5-Minute Rest That Changes Everything
After you pour the brine over the veggies, let the mixture sit for 5 minutes before refrigerating. This short rest allows the veggies to start absorbing the brine immediately, improving the overall flavor distribution. I’ve found that skipping this step can lead to uneven pickling.
Keep It Cool, Keep It Crunchy
Storing the pickles in a cool, dark place like the refrigerator preserves the crunch. If you notice the veggies softening after a week, add a pinch of salt to the jar and let them sit for another 30 minutes. The salt helps re‑crisp the fibers.
The Sweetness Secret
The amount of sugar you use can be adjusted to taste. I like a subtle sweetness that doesn’t overpower the garlic, so I use just 1 tablespoon. If you’re on a low‑sugar diet, you can reduce it to a teaspoon, but be prepared for a slightly more acidic flavor profile.
Creative Twists and Variations
This recipe is a playground. Here are some of my favorite ways to switch things up:
Spicy Jalapeño Kick
Add sliced jalapeños to the veggie mix for a fiery twist. The heat pairs wonderfully with the garlic, creating a balanced, spicy, yet herbaceous pickle that’s perfect for those who love a bit of heat.
Honey‑Glazed Sweetness
Replace the tablespoon of sugar with an equal amount of honey. The result is a sweet, glossy glaze that enhances the natural sweetness of carrots and bell peppers.
Herbal Mix‑Up
Swap rosemary for oregano or add a splash of fresh basil. Each herb brings its own flavor profile, turning the pickles into a new culinary experience every time.
Miso Twist
Stir in a teaspoon of white miso into the brine. The miso adds umami depth, making the pickles more complex and savory—perfect for an Asian-inspired snack.
Citrus Burst
Add a sliced orange or lemon peel to the brine. The citrus zest brightens the flavor and gives the pickles a refreshing, zesty finish.
Smoky Char
Char the veggies briefly on a grill before adding them to the brine. The smoky char adds depth and pairs beautifully with the fresh herbs.
Storing and Bringing It Back to Life
Fridge Storage
Store the pickles in an airtight container or jar in the refrigerator. They’ll keep up to a month, but for the best flavor, aim for 2-3 weeks. The brine will continue to infuse the veggies, intensifying the taste over time.
Freezer Friendly
If you want to freeze them, transfer the pickles to a freezer‑safe container. They’ll stay good for up to 3 months. Thaw in the refrigerator before serving. Note that the texture may soften slightly after freezing, but the flavor remains intact.
Best Reheating Method
To revive the crunch, steam the pickles for 1-2 minutes in a steamer basket. Add a tiny splash of water before reheating to keep them from drying out. This gentle heat restores the crispness without compromising the flavor.