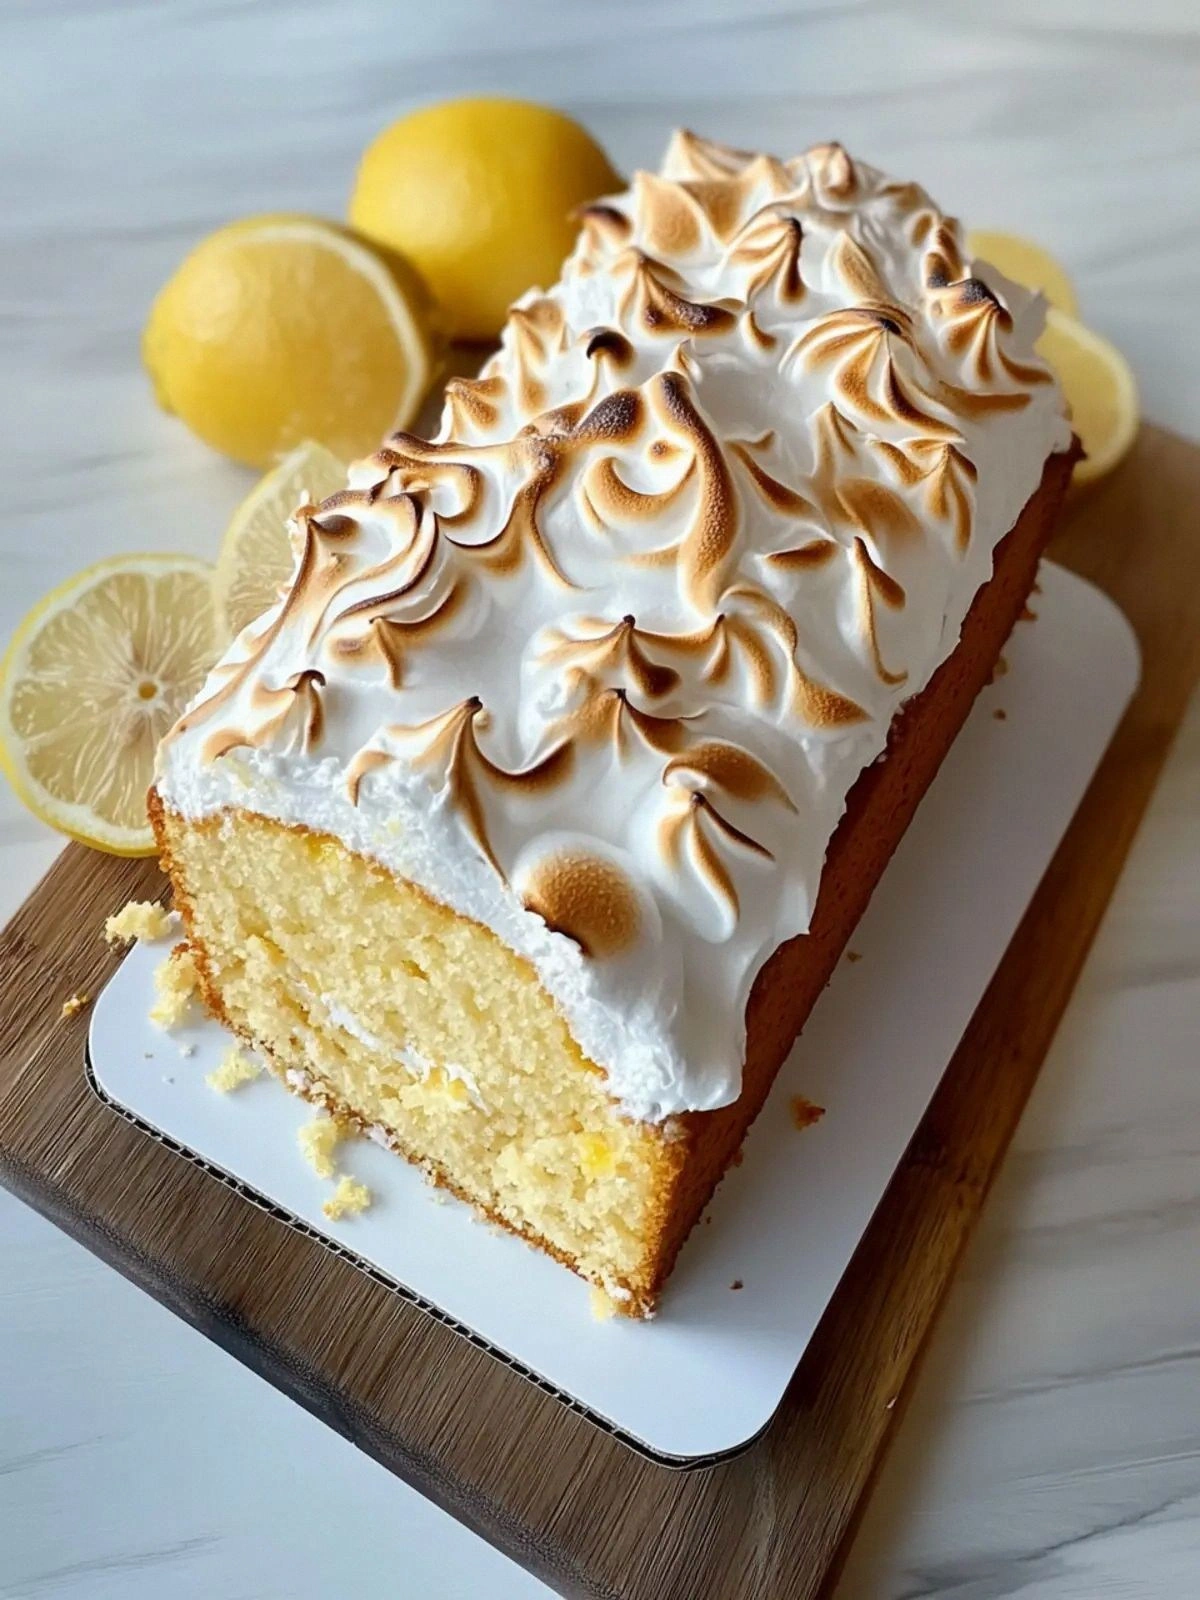
The first time I tried to make lemon bars, I was so excited that I forgot to preheat the oven. I threw a batch of batter into a pan, set the timer, and then spent the next fifteen minutes scrolling through Pinterest for a recipe that actually tasted good. When the timer finally beeped, the edges were a burnt brown, the center was a gooey, syrupy mess, and I was left with a kitchen that smelled like a lemon orchard gone wrong. That disaster sparked a mission: to create a lemon bar cookie cup that would make anyone—myself included—pause, inhale, and say, “This is the best thing I’ve ever tasted.”
Picture this: a golden, buttery crust that crackles like fresh toast when you bite into it, a bright, tart lemon filling that explodes on the palate, and a dusting of powdered sugar that glistens like morning frost. The aroma alone is a promise of sunshine and citrus, and the sound of the first bite is a satisfying crunch that echoes through the room. I can almost hear the faint clink of a spoon against a glass of sparkling water, the soft sigh of someone who has just tasted pure, unadulterated bliss. And that’s not just a fancy description; it’s the reality of every bite from this recipe.
What makes this version stand out isn’t just the flavor profile—it’s the technique, the ingredient quality, and the sheer confidence with which you can trust the process. I’ve spent months tweaking ratios, testing different brands of butter, and experimenting with the exact moment to fold in the lemon zest. The result is a cookie cup that holds its shape perfectly, offers a crisp exterior with a melt-in-your-mouth center, and delivers a lemon punch that’s neither too sharp nor too sweet. This isn’t a run-of-the-mill lemon bar; it’s a game-changer that will have your friends asking for your secret recipe long after the last crumb has disappeared.
There’s one trick I’ll reveal that most recipes overlook: the use of melted butter instead of softened butter. That small change gives the batter a silky texture, reduces the risk of a greasy finish, and lets the lemon flavor shine through without being masked. I dare you to taste this and not go back for seconds, because once you try it, you’ll be convinced that this is hands down the best version you’ll ever make at home. So, let’s walk through every single step—by the end, you’ll wonder how you ever made it any other way.
What Makes This Version Stand Out
- Flavor: The balance of tart and sweet is achieved through fresh lemon juice, zest, and a touch of vanilla, creating a bright, citrusy taste that lingers without overwhelming.
- Texture: The melted butter and precise baking time give a buttery, slightly crisp crust that yields to a tender, moist interior—like a perfect sandwich between two soft clouds.
- Ease: The recipe uses pantry staples and a straightforward method, so even a novice can produce professional results without fuss.
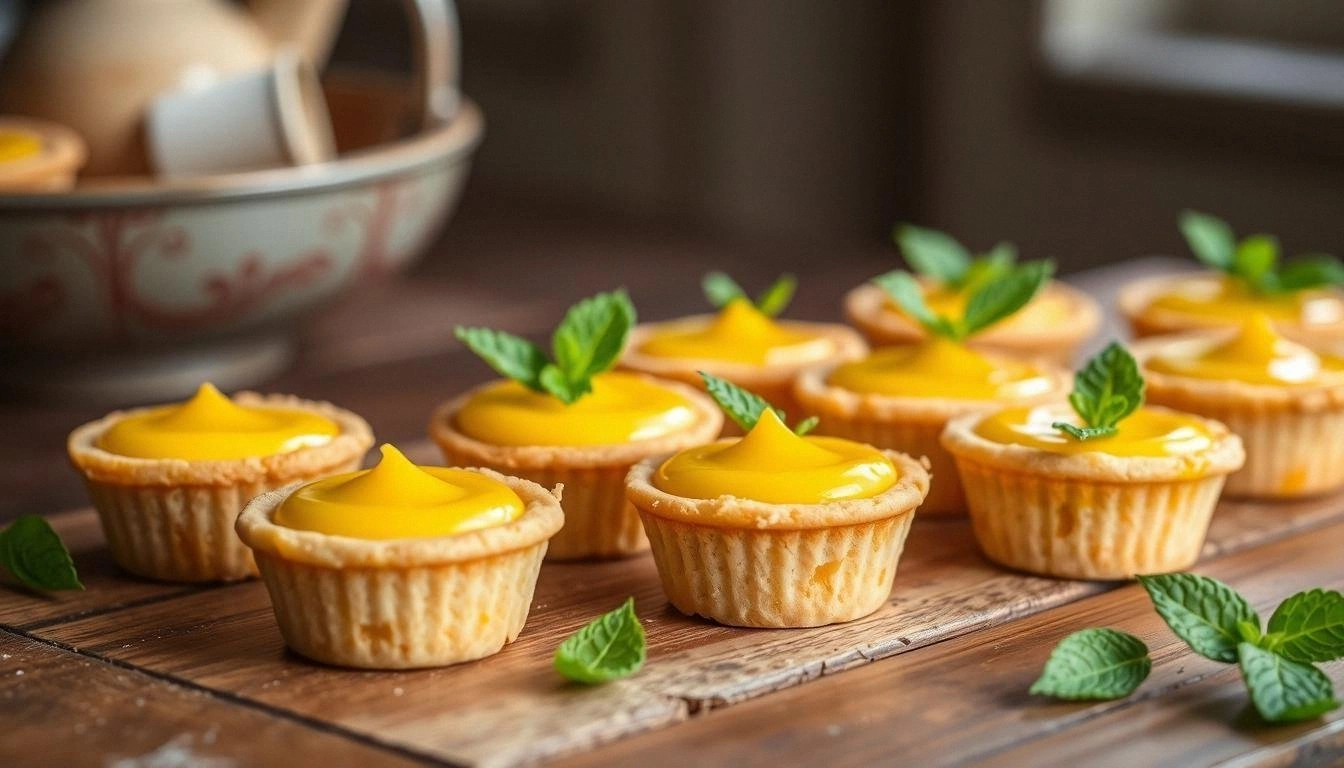
- Visual Appeal: The bright yellow hue of the lemon filling, combined with a dusting of powdered sugar, turns each cup into a mini masterpiece that looks as good as it tastes.
- Crowd-pleaser: At parties, these cups become the center of attention, with guests lining up for the first bite and then asking for the recipe.
- Ingredient Quality: Using unsalted butter and fresh lemons ensures maximum flavor and control over saltiness, setting this recipe apart from store-bought or generic versions.
- Methodology: The step-by-step process, from mixing the dry to folding in the wet, is designed to avoid common pitfalls like overmixing or uneven baking.
- Make-Ahead: Once baked, the cups can be stored at room temperature for up to three days, making them perfect for busy days or last-minute gatherings.
Alright, let's break down exactly what goes into this masterpiece...
Inside the Ingredient List
The Flavor Base
At the heart of every great dessert is a solid foundation, and that foundation for these lemon bars is a combination of all-purpose flour, baking powder, and a pinch of salt. The flour provides structure, allowing the cookies to rise just enough to create a light, airy interior. Baking powder is the secret to a gentle lift, ensuring the cups don’t collapse under the weight of the lemon filling. Salt, while seemingly insignificant, brings out the natural sweetness of the lemons and balances the overall flavor profile. If you skip any of these, the texture will suffer—expect dense, flat cups that don’t hold their shape.
The Sweetness Crew
Granulated sugar is the sweetener that pairs beautifully with lemon’s acidity. It dissolves quickly, preventing a gritty texture and allowing the lemon zest to shine. Powdered sugar is reserved for the finishing dusting; it melts into a thin glaze that adds a subtle sweetness and an elegant visual touch. Some bakers opt for brown sugar for a hint of molasses, but this recipe keeps it clean and bright. If you prefer a lower-sugar option, substitute half the granulated sugar with a natural sweetener like stevia, but be mindful that the texture may change.
The Butter & Egg Union
Unsalted butter is the cornerstone of flavor and texture. Melted butter creates a silky batter that spreads evenly, giving the crust a glossy finish. The fat content of the butter also helps to tenderize the dough, preventing a dry bite. Eggs bind the batter together, add richness, and help the cookies set properly. Two large eggs strike the perfect balance—too many and the cookies become rubbery, too few and they lack structure. If you’re vegan, a flaxseed meal and water mixture can replace eggs, but the result will differ in taste and texture.
The Citrus Star
Fresh lemon juice is the star of this recipe. It delivers a bright, tangy flavor that cuts through the butter’s richness. Lemon zest adds aromatic oils that intensify the citrus profile without adding extra liquid. Together, they create a harmonious balance that feels like a sunny day in every bite. If you can’t find fresh lemons, bottled lemon juice works, but it’s less vibrant. For an extra zing, add a splash of lime juice—just be sure to adjust the sugar accordingly.
The Final Flourish
Vanilla extract rounds out the flavor, providing a warm undertone that complements the sharpness of the lemon. It also enhances the overall aroma, making the baking process more inviting. A dash of almond extract can replace vanilla for a nutty twist, but this recipe sticks to the classic pairing. Remember, the final sprinkle of powdered sugar isn’t just decorative; it adds a delicate sweetness that balances the tartness and gives the cups a polished finish.
Everything's prepped? Good. Let's get into the real action...
The Method — Step by Step
- Preheat your oven to 350°F (175°C). Line a 12-cup muffin tin with paper liners, ensuring each cup is fully covered. This step is crucial; without liners, the batter will stick, and you’ll have to clean a mess. I always set the liners a few minutes before baking so they’re warm and pliable, which makes them easier to remove later.
- In a medium bowl, whisk together 2 cups of all-purpose flour, 1 tsp baking powder, and 1/2 tsp salt. This dry mix forms the structural backbone of the cookies. Sifting the flour helps eliminate lumps and ensures a smooth batter. If you’re a purist, you can add a tablespoon of cornstarch for an extra tender crumb.
- In a separate bowl, combine 1 cup of melted unsalted butter, 1 cup of granulated sugar, 2 large eggs, and 1 tsp vanilla extract. Beat the mixture with a hand mixer on medium speed until it’s light and frothy—about 2 minutes. The goal is to incorporate air without overmixing, which would make the cookies tough.
- Add the dry ingredients to the wet mixture in two portions, folding gently with a spatula each time. The batter should be thick but pourable; if it’s too thick, add a tablespoon of milk or water. This folding process is where the magic happens—too much agitation and the cookies will lose their delicate crumb.
- Fill each muffin cup about 3/4 full with the batter. The batter should sit just below the rim, creating a small well for the lemon filling. I use a small offset spatula to level the tops, which helps the cookies bake evenly.
- Bake for 18-20 minutes, or until the tops are a light golden brown and a toothpick inserted into the center comes out clean. The scent of butter and lemon will fill your kitchen—an aroma that can’t be replicated with any other dessert.
- While the cookies cool, whisk together 1/2 cup fresh lemon juice, 1 tbsp lemon zest, and 1/4 cup powdered sugar until smooth. This filling is silky and bright, ready to be poured into the cooled cups. The powdered sugar helps thicken the mixture without adding extra liquid, maintaining the desired consistency.
- Using a small ladle, carefully spoon the lemon filling into each cookie cup, filling to the top. The filling should cascade into the center, creating a layered effect. If the filling is too runny, let it chill for 10 minutes before adding; this will thicken it slightly.
- Dust the tops with powdered sugar using a fine mesh sifter for an even finish. This final touch adds a subtle sweetness and gives the cups a professional, bakery-like appearance. The powdered sugar also helps keep the tops from drying out.
- Let the cups cool completely on a wire rack before serving. This step allows the filling to set and the cookies to firm up, ensuring a clean bite. If you’re in a hurry, you can place them in the fridge for 20 minutes to speed up the setting process.
That's it — you did it. But hold on, I've got a few more tricks that'll take this to another level...
Insider Tricks for Flawless Results
The Temperature Rule Nobody Follows
Many bakers bake at the lowest temperature that their oven allows, hoping it will keep the cookies from browning too quickly. The truth is, a steady 350°F gives the batter enough time to rise without scorching the edges. If your oven runs hot, preheat it for an extra 10 minutes and use an oven thermometer to confirm the temperature. This small adjustment can mean the difference between a golden, crisp edge and a soggy, undercooked center.
Why Your Nose Knows Best
The aroma of fresh lemon and butter is a natural indicator that the batter has reached the right consistency. If you smell a faint, sweet scent before the batter starts to sizzle, it’s time to fold in the dry ingredients. This sensory cue helps you avoid overmixing, which can lead to dense, chewy cookies.
The 5-Minute Rest That Changes Everything
After baking, let the cups rest on the pan for 5 minutes before transferring them to a wire rack. This short pause allows the cookies to set, preventing them from cracking or sliding off the paper liners. It also gives the lemon filling a chance to thicken slightly, making each bite smoother.
The Secret to a Perfect Dusting
Sift powdered sugar directly over the cups, then tap the tin gently to remove any clumps. The fine texture of the dusting not only looks elegant but also adds a subtle sweetness that balances the lemon’s sharpness. For an extra touch of elegance, sprinkle a pinch of edible gold leaf on a few cups—this is perfect for special occasions.
The Quick Cooling Trick
If you’re short on time, place the baking tin on a metal tray and run cold water around the edges. This rapid cooling method helps the cookies firm up faster and reduces the chance of the filling leaking out. Just be sure the water doesn’t seep into the cups—use a towel to keep the surface dry.
Creative Twists and Variations
This recipe is a playground. Here are some of my favorite ways to switch things up:
Lemon‑Lavender Bliss
Add 1 tsp dried culinary lavender to the batter for a floral note that pairs beautifully with lemon. Use a small amount—just enough to scent the batter without overpowering the citrus. The result is a sophisticated, aromatic cup that’s perfect for spring gatherings.
Chocolate‑Lemon Surprise
Swirl in 2 tbsp dark chocolate chips into the lemon filling before pouring it in. The chocolate adds depth and a hint of bitterness that contrasts with the tartness. This variation is a crowd-pleaser for chocolate lovers who still crave a citrus kick.
Coconut‑Lemon Escape
Replace half the butter with shredded coconut oil and sprinkle toasted coconut on top after dusting. The coconut’s natural sweetness complements the lemon, creating a tropical vibe that’s ideal for summer parties.
Balsamic‑Lemon Fusion
Drizzle a splash of high-quality balsamic vinegar into the lemon filling for a complex, umami-rich flavor. The vinegar’s acidity enhances the lemon while adding a subtle sweetness. This daring twist is great for adventurous palates.
Ginger‑Lemon Zing
Grate 1 tsp fresh ginger into the lemon filling for a spicy kick. The ginger’s warmth balances the sharpness of the lemon, resulting in a balanced, invigorating taste. It’s a perfect addition for winter celebrations.
Storing and Bringing It Back to Life
Fridge Storage
Store the cups in an airtight container at room temperature for up to three days. Keep them away from direct sunlight to preserve the lemon flavor. If you notice the tops drying out, lightly dust them with powdered sugar again before serving.
Freezer Friendly
For longer storage, place the cups in a freezer-safe container and freeze for up to one month. When you’re ready to enjoy, thaw them at room temperature for 30 minutes, then warm in a 300°F oven for 5 minutes to restore freshness.
Best Reheating Method
If the cups feel a little stale, add a tiny splash of water to the filling, cover the tin with foil, and warm in a 300°F oven for 10 minutes. The water steams the filling, bringing back the silky texture and bright lemon aroma.