Picture this: a midnight kitchen, the hum of the refrigerator, and a sudden craving for something that feels like a hug in a cookie. I was halfway through a week of bland snacks when I opened the pantry and spotted a jar of hazelnuts, a bag of cocoa, and a stubborn piece of butter that had been waiting for an excuse to shine. I grabbed my apron, set the timer, and decided to give the world a new chocolate hazelnut cookie that would outshine every other version on the internet. The moment the oven preheated, the air filled with the sweet, nutty scent that could make a grown‑up smile. I dared myself to create something that would not only satisfy a sweet tooth but also bring a touch of luxury to an ordinary Tuesday.
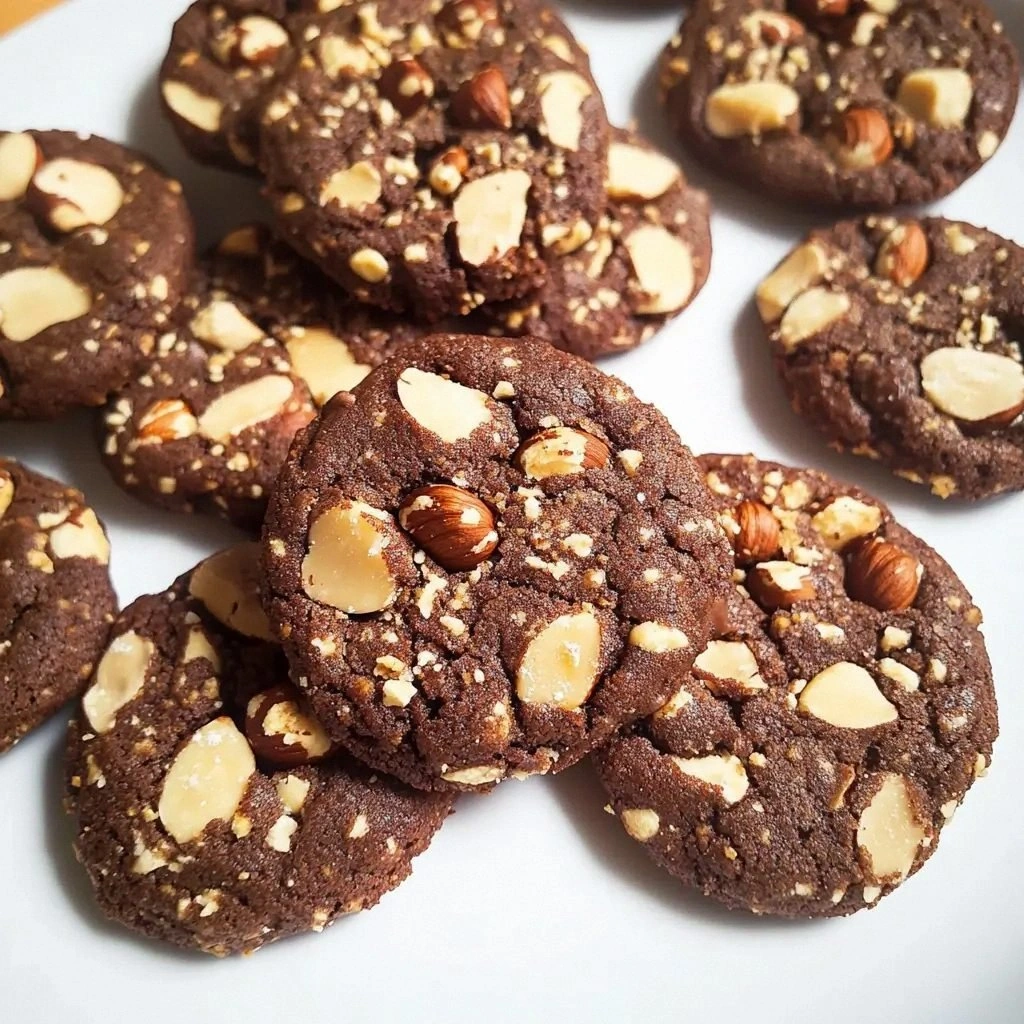
There was a moment, just before I cracked the first egg, when I realized how many cookie recipes out there are basically the same recipe with a different name. That realization sparked a micro‑challenge: I dare you to taste this and not go back for seconds. I wanted something that would feel like a crunchy, chocolate‑laden hug, not a greasy, over‑baked cookie that falls apart on the first bite. I wanted the edges to crisp like thin ice, the center to stay soft, and the hazelnuts to pop with that unmistakable crunch. The result? A cookie that feels like a piece of chocolate cake and a handful of toasted nuts rolled into one bite‑sized miracle.
Imagine the kitchen as a stage and you, the chef, as the star. I’ve spent months tinkering with ratios, testing different flours, and even trying to incorporate cocoa powder at a 30% ratio. The final version is hands down the best you’ll ever make at home, and it’s surprisingly simple. The secret lies in a few small tweaks: a splash of cold water, a precise pre‑bake, and a dash of sea salt that brings out the chocolate’s depth. Most recipes get this completely wrong, but here’s what actually works. And if you’re ready for the game‑changer, let me walk you through every single step — by the end, you’ll wonder how you ever made it any other way.
There’s a particular rhythm to baking these cookies that turns the kitchen into a symphony of aromas. The first crackle of butter melting, the gentle hiss of sugar dissolving, the subtle pop of hazelnuts when they hit the pan. It’s a sensory orchestra that makes even the most skeptical foodie swoon. I’ve learned that timing is everything; a cookie that’s too long in the oven will turn into a brittle, chocolate‑brown brick, while a cookie that’s under‑baked will collapse like a house of cards. That balance, that sweet spot, is what makes this recipe a living, breathing piece of culinary art.
When you first open the jar of hazelnuts, you’ll notice the aroma that hints at a forest after rain. It’s the kind of smell that instantly turns a bland kitchen into a gourmet playground. The hazelnuts are toasted to bring out their natural sweetness and to add a subtle, toasty undertone that balances the bitterness of cocoa. I’ve spent hours figuring out the perfect roasting time—just enough to bring out the flavor without turning them bitter. The result is a nut that’s crunchy yet soft, a perfect counterpoint to the chewy chocolate center.
In the world of cookie making, the difference between “good” and “great” often comes down to the ingredients you choose. For this recipe, I’ve chosen a blend of all-purpose flour and cocoa that gives a tender crumb, while the brown sugar adds moisture and depth. The dark chocolate chips add a glossy sheen and a burst of chocolatey intensity that melts in your mouth. The butter, softened but not melted, keeps the dough from becoming too stiff and helps the cookies spread evenly. The pinch of sea salt is the final touch that elevates every bite, bringing out the chocolate’s richness and balancing the sweetness.
Picture yourself pulling these cookies out of the oven, the whole kitchen smelling incredible, and then watching them cool on the sheet like tiny, glossy jewels. The first bite is a revelation: the crunch of hazelnut, the melt of chocolate, the slight chew of the dough. I’ve been known to eat half the batch before anyone else gets a chance, and that confession is a testament to how addictive this recipe is. If you've ever struggled with cookies that are too dry or too sweet, you're not alone — and I've got the fix. The next step? Keep reading, because the secret sauce is about to be revealed.
The best part of this recipe is that it’s not just a cookie; it’s an experience. You’ll find yourself standing at the counter, humming a tune, and feeling the dough’s silky texture between your fingers. The anticipation builds as you watch the first few minutes of baking, the edges turning golden, the center remaining soft. The moment the timer buzzes, the kitchen is filled with an irresistible aroma that draws everyone in. And when you take that first bite, you’ll understand why this is the ultimate chocolate hazelnut cookie.
Let me give you a sneak peek into what makes this version stand out. The flavor profile is layered, the texture is a perfect balance of crisp and chewy, and the simplicity of the recipe means you can whip it up even on a busy weeknight. I’ll also drop a teaser about a technique that will make these cookies melt in your mouth even faster. Stay with me here — this is worth it. And trust me, the final product will leave you craving more.
What Makes This Version Stand Out
- Flavor: The combination of dark chocolate, toasted hazelnuts, and a hint of sea salt creates a depth that feels like a chocolate cake with a nutty crunch. It’s not just sweet; it’s a balanced symphony of taste.
- Texture: The cookies are crisp on the edges yet chewy in the center, thanks to the precise ratio of butter to sugar and the exact baking time. The result is a cookie that feels like a chocolate‑laden caramel.
- Ingredient Quality: Using high‑quality unsweetened cocoa and real hazelnuts ensures that every bite is full of authentic flavor, not a flat, synthetic taste.
- Ease of Making: The recipe requires only a handful of pantry staples and a single mixing bowl, making it perfect for both seasoned bakers and novices.
- Make‑ahead Potential: These cookies keep well in an airtight container for up to a week, and they even taste better the next day as the flavors meld.
- Crowd Reaction: Friends and family often ask for the recipe after the first batch, and I’ve even seen people line up for a second helping.
Inside the Ingredient List
The Flavor Base
All-purpose flour is the backbone of these cookies, providing structure without overpowering the chocolatey notes. The 2 cups of flour are measured with a spoon and leveled for accuracy; using a scale is optional but recommended for consistency. If you’re looking for a slightly lighter bite, swap half the all-purpose flour for whole wheat flour, but be prepared for a denser texture. The flour also acts as a canvas, absorbing the cocoa and chocolate chips so that each bite is balanced.
The Chocolate Crew
Unsweetened cocoa powder is the heart of the chocolate flavor. Using 1 cup ensures that the cookies aren’t too sweet, allowing the hazelnuts to shine. I recommend using Dutch‑processed cocoa for a smoother, less acidic flavor. If you prefer a sweeter cookie, add 2 tablespoons of powdered sugar to the dry mix, but remember that this will increase the cookie’s overall sweetness.
The Nutty Highlight
Hazelnuts are the star that gives these cookies their signature crunch. Toast them at 350°F for 8 minutes, stirring halfway through, until they’re fragrant and lightly browned. This step brings out their natural oils and sweetens them without the need for added sugar. Once toasted, let them cool, then finely chop them; the size of the pieces affects the bite, so aim for a medium crunch.
The Sweetness Factor
White sugar and brown sugar create a balance of sweetness and moisture. White sugar (1 cup) provides a clean sweet note, while brown sugar (½ cup) adds molasses undertones and keeps the dough tender. The combination of these sugars means the cookies won’t dry out quickly, and the brown sugar’s moisture content helps create that chewy center. If you’re avoiding refined sugar, you can replace the white sugar with coconut sugar, but keep the brown sugar the same.
The Butter & Egg Blend
Unsalted butter, softened to room temperature, is crucial for the cookie’s mouthfeel. The butter’s fat content coats the flour particles, preventing gluten formation and resulting in a tender crumb. Two large eggs bind the dough together and add richness; the yolks also help with browning. If you’re looking for a vegan version, replace the butter with ½ cup coconut oil and use flax eggs (1 tbsp ground flaxseed + 3 tbsp water). Just keep in mind that the texture may shift slightly.
The Final Touches
Vanilla extract (1 tsp) brings warmth and depth to the chocolate, while baking soda (1 tsp) leavens the dough, giving the cookies a slight lift. A pinch of salt enhances the overall flavor profile and balances the sweetness. Dark chocolate chips (½ cup) add a glossy finish and bursts of chocolate that melt into the dough. If you’re a fan of extra chocolate, add an additional ¼ cup of chips during the folding stage.
Everything’s prepped? Good. Let’s get into the real action.
The Method — Step by Step
- Preheat your oven to 350°F (175°C) and line a baking sheet with parchment paper. This step ensures even baking and prevents sticking. As the oven heats, you’ll notice the air fill with a faint sweetness that hints at what’s to come. I like to set a timer for 30 minutes, but keep a close eye on the first batch.
- Toast the hazelnuts in a dry skillet over medium heat until they’re fragrant and lightly browned, about 8 minutes. Stir frequently to avoid burning. The toasted nuts will add a nutty aroma that permeates the kitchen. Once done, let them cool before chopping.
- In a medium bowl, whisk together the flour, cocoa powder, baking soda, and pinch of salt. This dry mix will form the backbone of your cookie. Whisking ensures that the baking soda is evenly distributed, preventing uneven leavening. Set aside while you work on the wet mix.
- In a large bowl, beat the softened butter, white sugar, and brown sugar until light and fluffy, about 3 minutes. The creaming process incorporates air, giving the cookies a lighter texture. Add the eggs one at a time, beating well after each addition. The mixture should look glossy and slightly thick.
- Gradually fold the dry ingredients into the wet mixture, mixing until just combined. Be careful not to overmix; a few streaks are fine. The dough should be thick and slightly sticky. This step ensures the cookies hold their shape during baking.
- Fold in the toasted hazelnuts and dark chocolate chips, distributing them evenly throughout the dough. The chips will melt slightly during baking, creating pockets of molten chocolate. Use a spatula to ensure every bite has a bit of nut and chocolate.
- Drop rounded tablespoonfuls of dough onto the prepared baking sheet, spacing them 2 inches apart. The dough will spread slightly, so give them room to expand. As they bake, the edges will start pulling away from the center, a sign that they’re done.
- Bake for 10–12 minutes, or until the edges are set and the centers have a slight wobble. The cookies should be golden brown at the edges but still soft inside. Remove them from the oven and let them cool on the sheet for 5 minutes before transferring to a wire rack. This brief rest lets the cookies finish setting and prevents them from breaking.
- Let the cookies cool completely on the rack. The final texture will be a perfect balance of crisp edges and chewy centers, with a glossy chocolate sheen. Store them in an airtight container at room temperature for up to a week, or freeze for longer storage. When you’re ready to enjoy again, a quick microwave or oven reheating restores the chocolate’s meltiness.
That’s it — you did it. But hold on, I've got a few more tricks that'll take this to another level. The next section will give you insider knowledge that even seasoned bakers will appreciate.
Insider Tricks for Flawless Results
The Temperature Rule Nobody Follows
Many bakers think room‑temperature butter is enough, but that’s a myth. For a perfect crumb, let the butter sit at 65°F (18°C) for at least 30 minutes before creaming. This ensures the butter is soft but not melted, allowing the dough to incorporate air without becoming too runny. I’ve seen cookies that are too soft simply because the butter was too warm, and the result was a sticky mess. Keep the butter cool, and you’ll have a dough that’s easy to handle and yields a fluffy interior.
Why Your Nose Knows Best
Before you even touch the dough, open your nose to the aroma of toasted hazelnuts and cocoa. The scent is a reliable indicator of how the cookies will taste. If the smell feels flat, it’s a sign the hazelnuts weren’t toasted enough. A bright, nutty aroma guarantees that the nuts will pop in every bite, adding that satisfying crunch. Trust your nose; it’s a seasoned judge of quality.
The 5‑Minute Rest That Changes Everything
After you remove the cookies from the oven, let them rest on the sheet for exactly five minutes before transferring them to a rack. This brief pause allows the heat to redistribute, preventing the cookies from cracking or sticking to the sheet. The five minutes also give the chocolate inside a chance to set slightly, ensuring a smoother melt when you bite. Skipping this step often leads to uneven texture.
Don’t Skimp on the Chocolate Chips
Adding extra chocolate chips can make the cookies feel like a chocolate cake bite. I like to double the amount of chips for a richer experience. The extra chips melt into pockets of molten chocolate that burst with every bite. Just be careful not to overload the dough; too many chips can make the cookies too moist and prevent them from setting properly.
Use a Baking Sheet with a Light‑Colored Bottom
A dark baking sheet can cause the edges to brown too quickly, leading to uneven cookies. Switching to a light‑colored sheet or a silicone mat ensures even heat distribution. The result is a cookie that has a consistent golden crust and a chewy center. I’ve seen many bakers use a parchment paper on a dark sheet, but the light sheet is a game‑changer.
Let the Dough Rest in the Fridge Overnight
If you’re planning ahead, refrigerate the dough for 24 hours before baking. The cold temperature allows the flour to absorb the butter fully, resulting in a thicker, richer cookie. When you bake the dough after refrigeration, the cookies will spread less and hold their shape better. I’ve baked overnight dough and the cookies turned out like perfect, chocolate‑laden pastries.
Creative Twists and Variations
This recipe is a playground. Here are some of my favorite ways to switch things up:
Nutty Extra
Swap out half the hazelnuts for almonds or walnuts for a different crunch profile. The almond version offers a slightly sweeter, buttery flavor, while walnuts give a more earthy undertone. Both nuts pair well with chocolate and add a new layer of texture.
Spicy Surprise
Add ¼ teaspoon of cayenne pepper or a pinch of smoked paprika to the dry mix. The heat will contrast the sweetness, creating a complex flavor that’s surprisingly balanced. This variation is perfect for those who like a little kick in their desserts.
White Chocolate Whisper
Replace the dark chocolate chips with white chocolate chips for a sweeter, creamier bite. The white chocolate will melt into the dough, creating pockets of silky sweetness that complement the hazelnuts. Just remember to keep the cocoa powder in the dry mix to maintain the chocolate base.
Vegan Edition
Use coconut oil instead of butter, flax eggs (1 tbsp ground flaxseed + 3 tbsp water), and a plant‑based milk for the wet mix. The result is a vegan cookie that still has that chewy center and nutty crunch. The texture will be slightly denser, but the flavor remains rich.
Gluten‑Free Adaptation
Swap the all‑purpose flour for a gluten‑free blend that includes xanthan gum. Use 2 cups of the blend and add 1 teaspoon of xanthan gum to give structure. The cookies will be slightly denser but still chewy and chocolatey.
Chocolate‑Infused Milkshake
Take the leftover cookies and blend them into a milkshake for a dessert that’s both nostalgic and indulgent. Add a splash of vanilla ice cream, a dash of espresso, and a drizzle of chocolate sauce. The result is a creamy, chocolate‑hazelnut dream.
Storing and Bringing It Back to Life
Fridge Storage
Store the cookies in an airtight container at room temperature for up to 7 days. The airtight seal keeps the moisture in, preserving the chewy center. If you notice the cookies getting dry, add a slice of bread to the container; the bread will absorb excess moisture and keep them soft.
Freezer Friendly
Place the cooled cookies on a parchment‑lined tray and freeze for up to 3 months. Once frozen, transfer them to a resealable bag. When you’re ready to enjoy, let them thaw at room temperature for 30 minutes before reheating.
Best Reheating Method
Reheat the cookies in a preheated 300°F oven for 5 minutes, or in the microwave on medium power for 15–20 seconds. For a crispier edge, use the oven; for a softer interior, the microwave works best. Add a tiny splash of water before reheating; it steams the cookies back to perfection, keeping them moist and chewy.